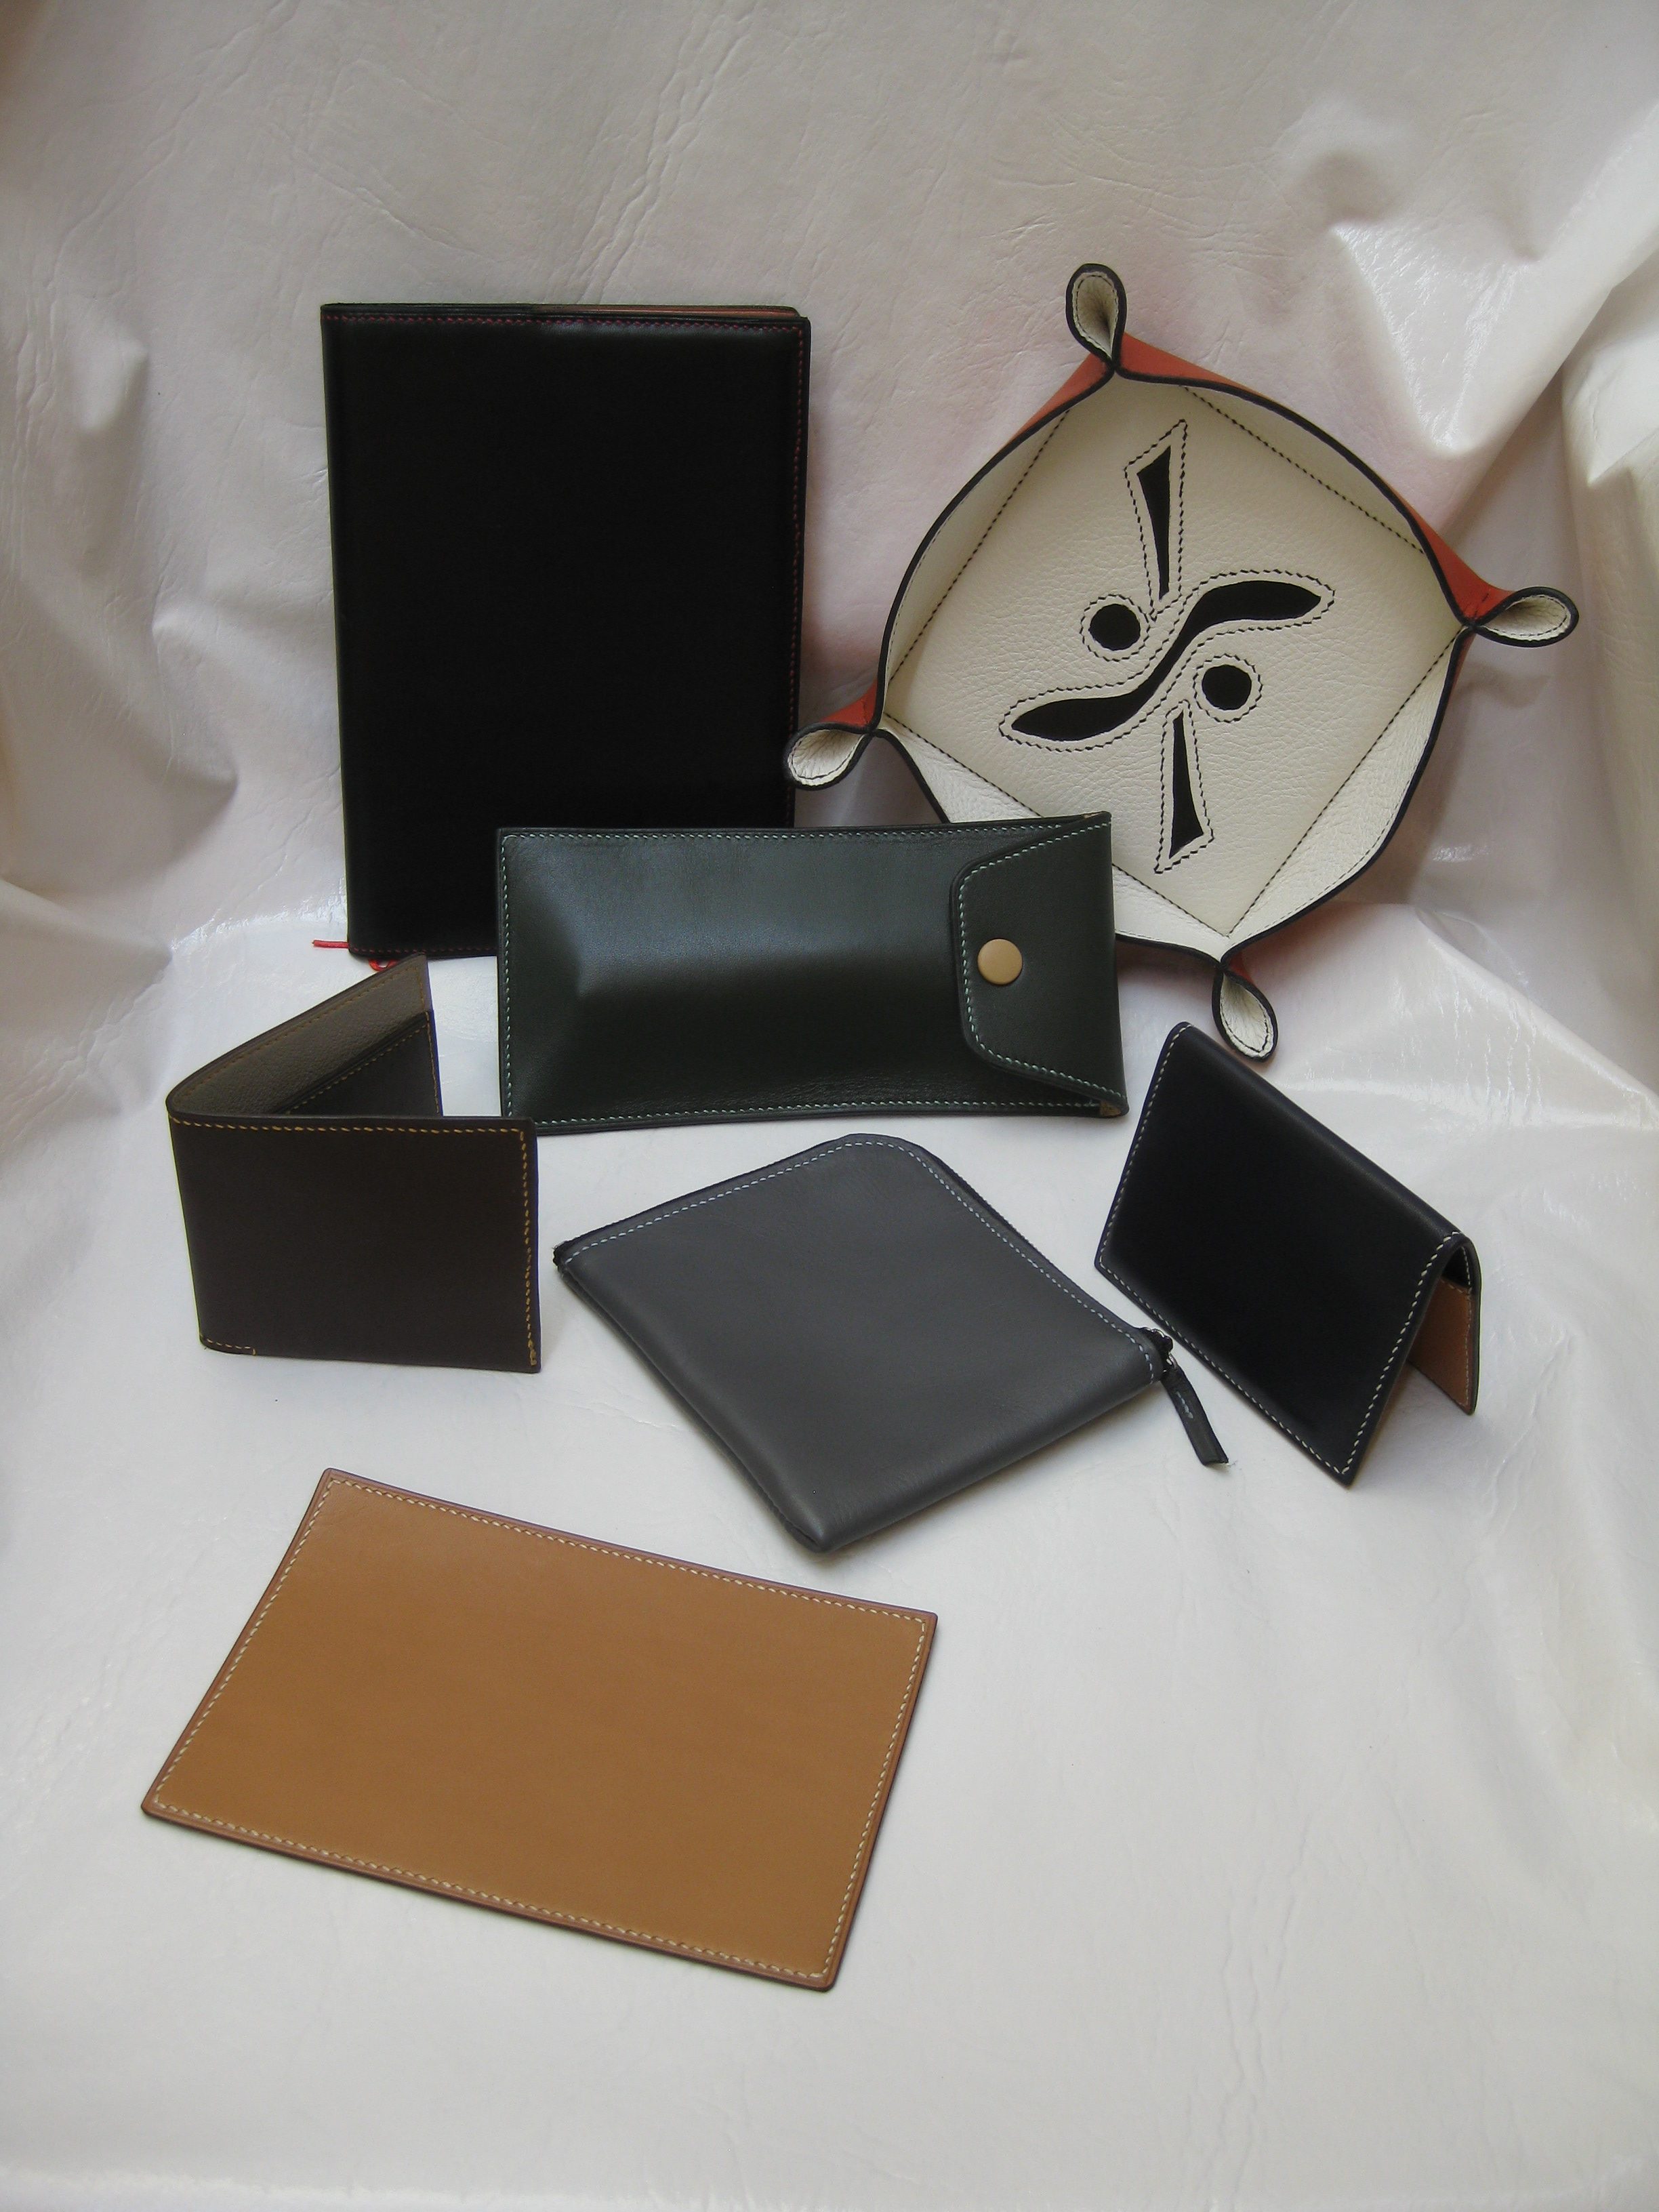
I considered taking courses at a local college or tech school, but found a one-year program offered by an individual; I took the beginner course and successfully completed the first six projects.
Yes, there are seven items here…the first is a sample to learn basics like cutting, gluing, stitching (each piece is hand stitched) and edge finishing.
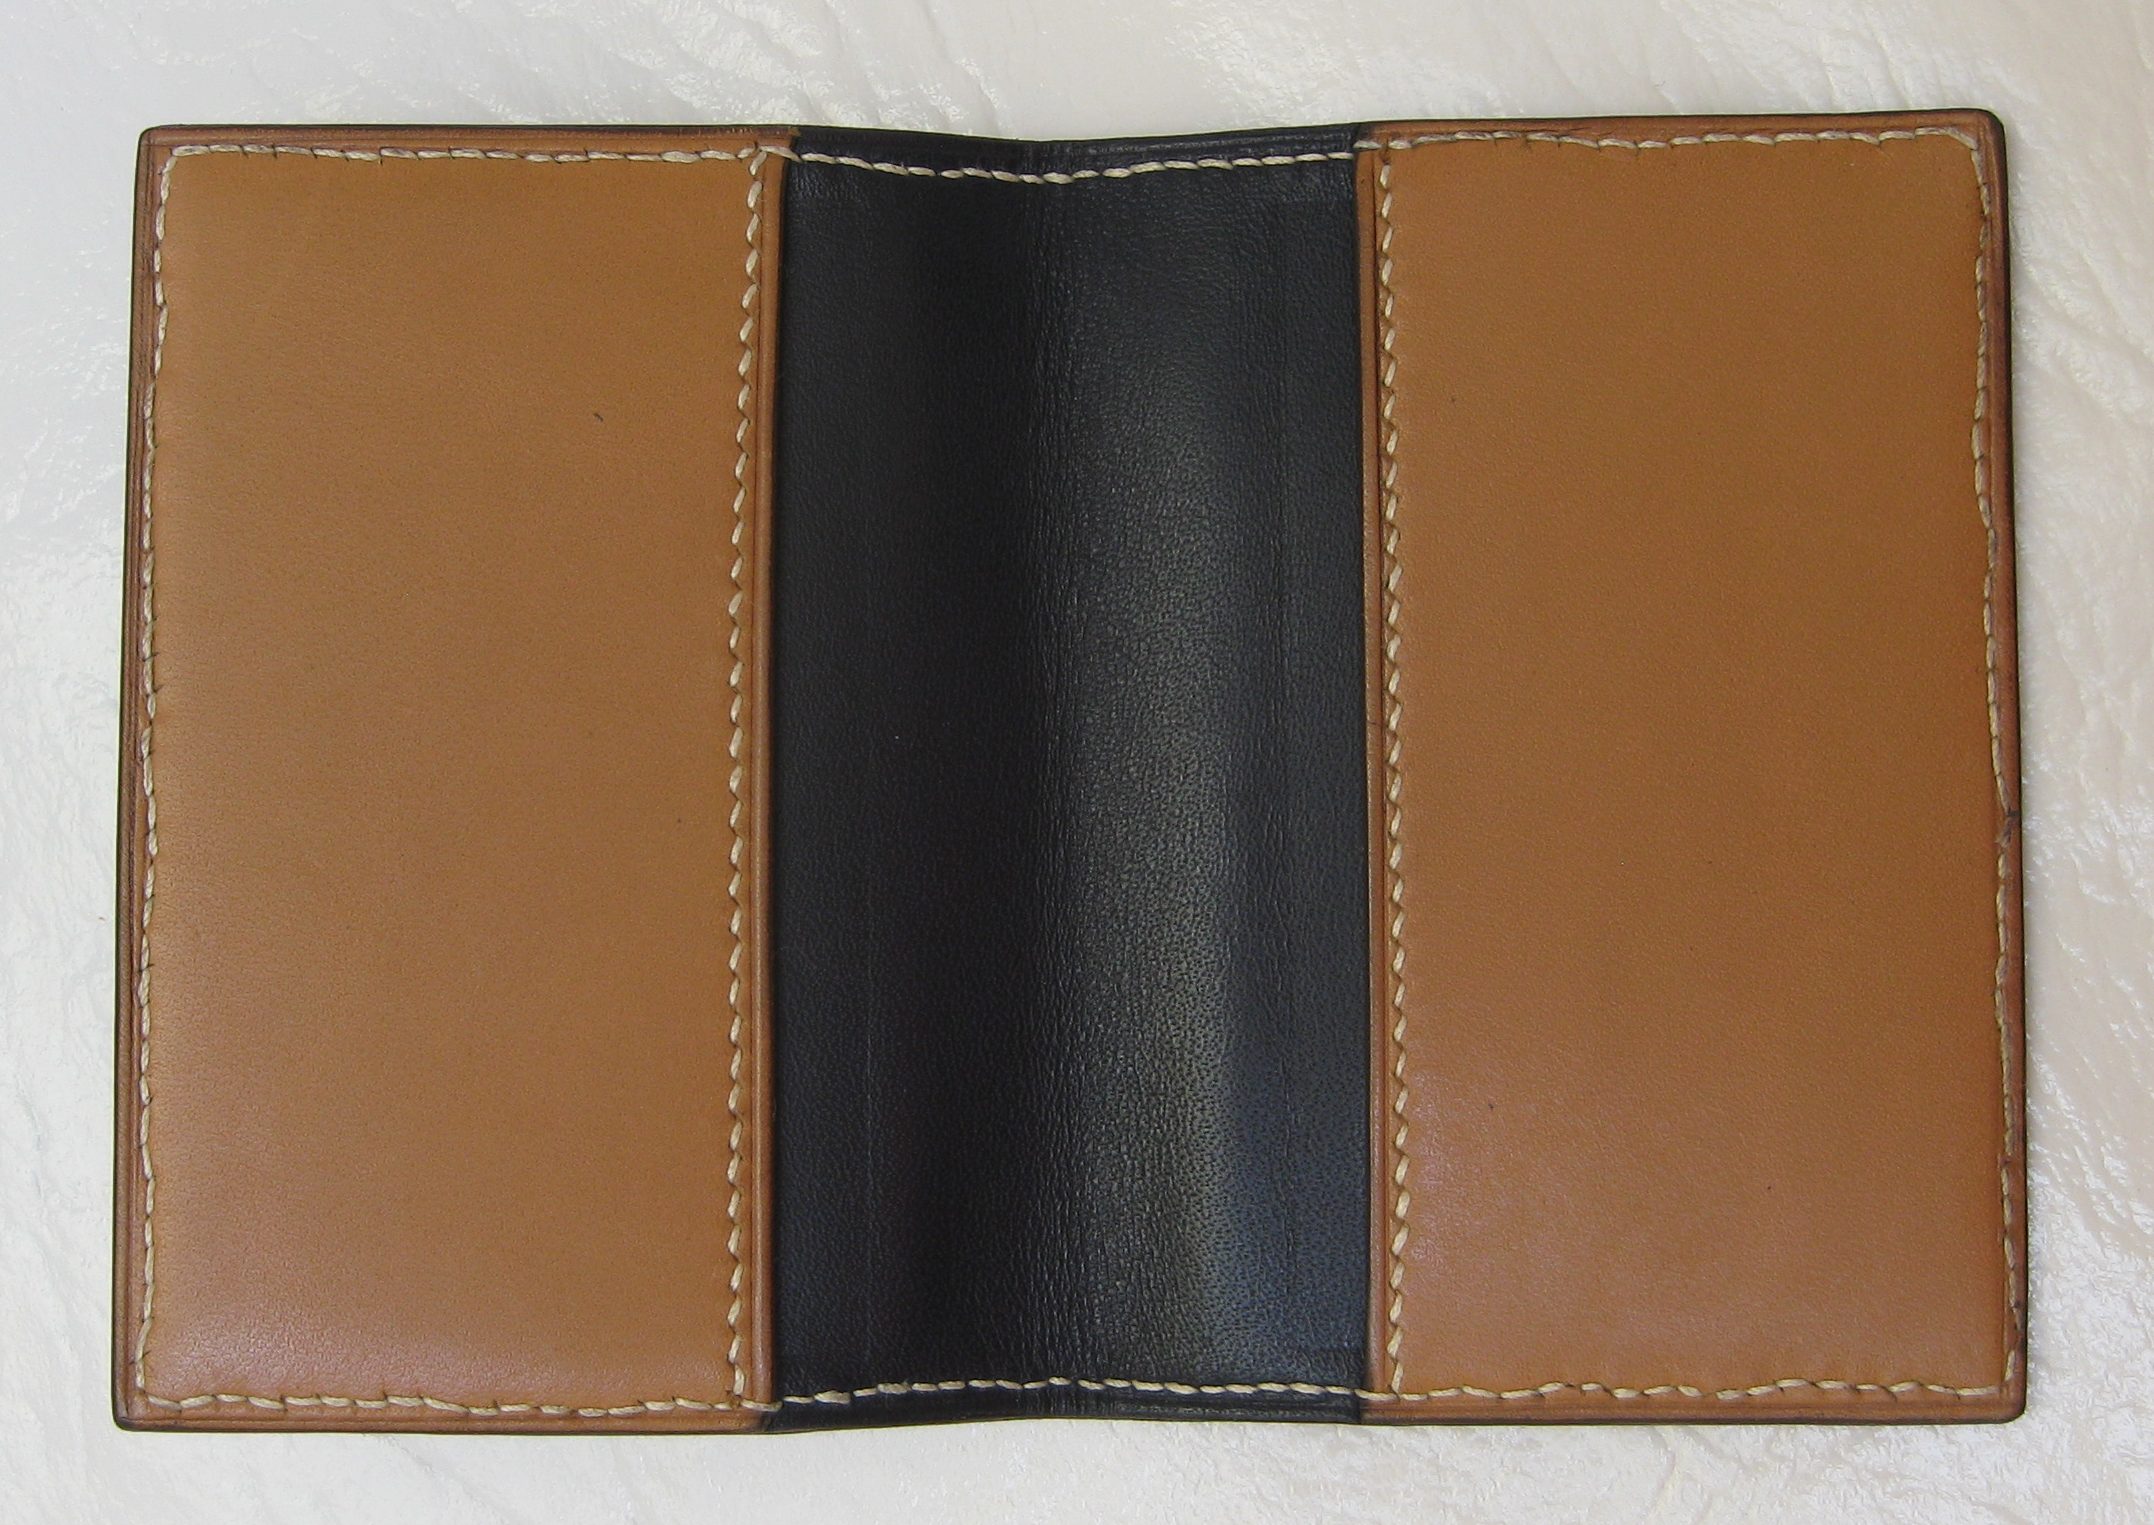
This is the back side of the first project, a slim card wallet (of buttery soft leather). Look closely and you can see the stitching lines around the outer edge are not quite straight. An even closer look and you may be able to see the creasing iron marking. My plan is to incorporate creasing and the edge finishing techniques I learned into wallets and leather handbags.
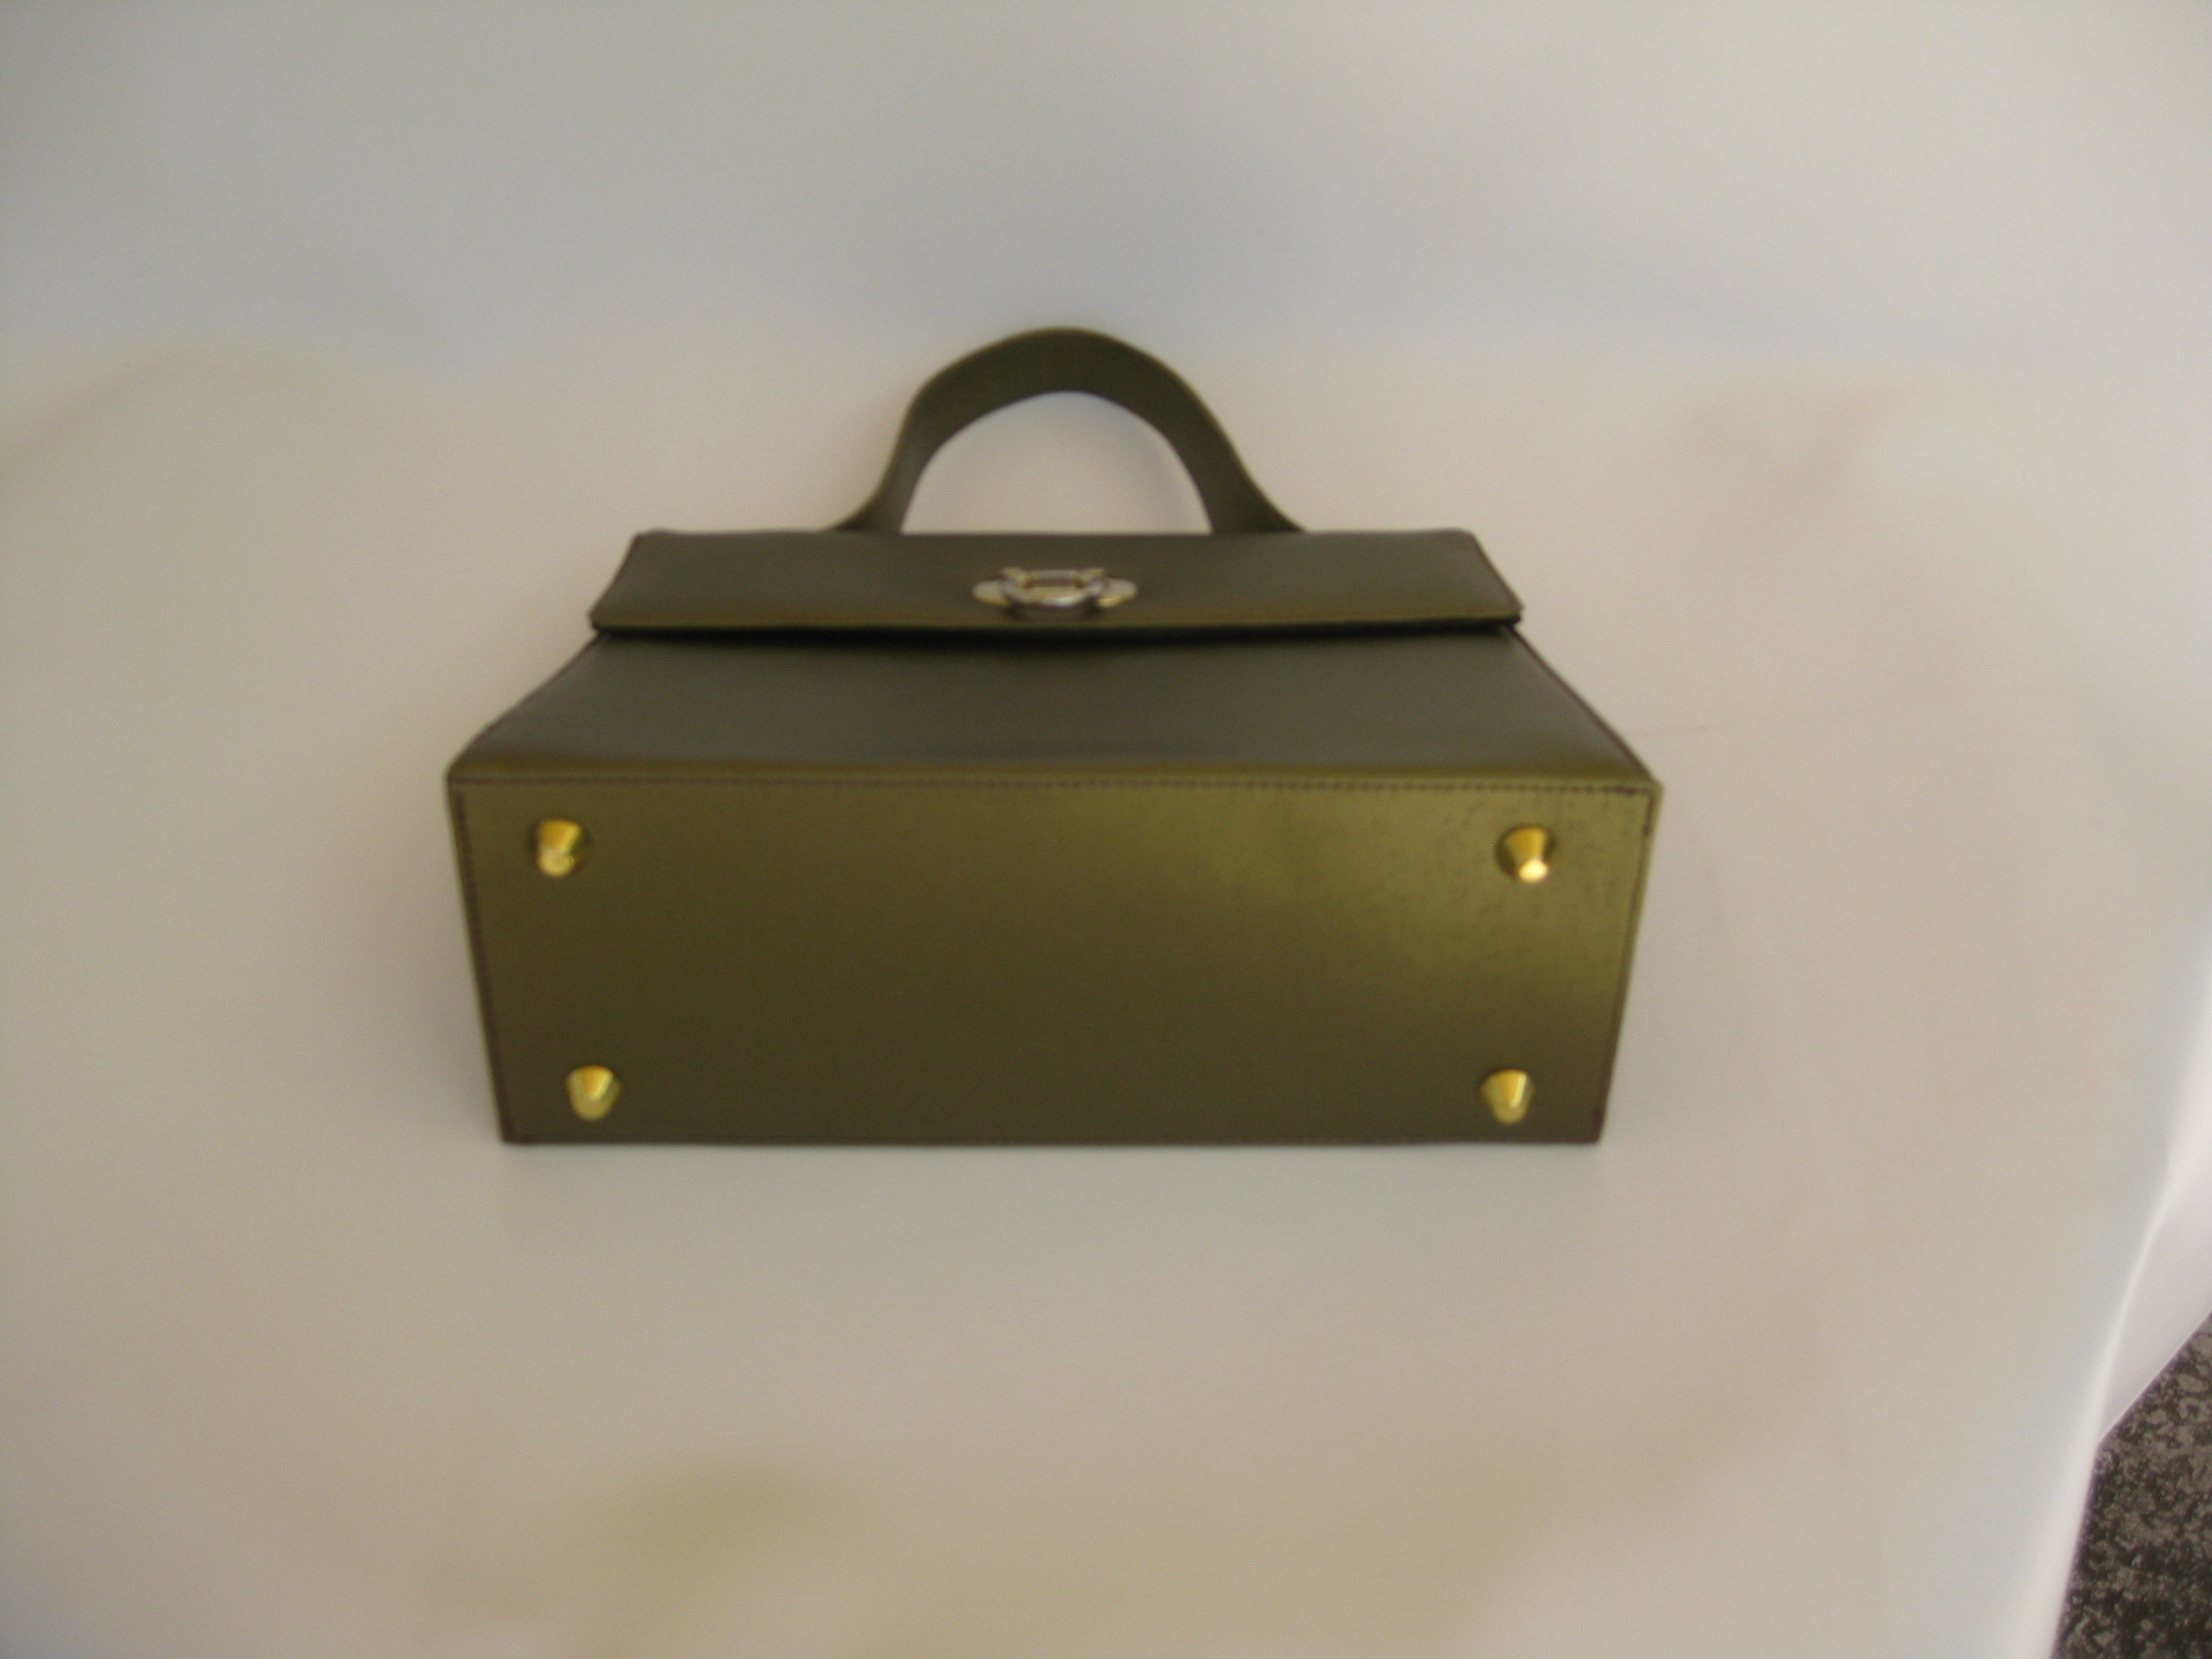
I need to take more pictures of this bag – I only have the one right now, but I reworked the reverse engineered structured handbag. I finished it a while ago, but am just now getting around to posting.
This time around it went faster except with my post sewing machine, I could not stitch it properly…I ended up hand stitching the final parts during construction.
The first time I carried it a woman stopped me and complimented me on how much she liked it. That was an inspiration of sorts and made me want to “up my game”.
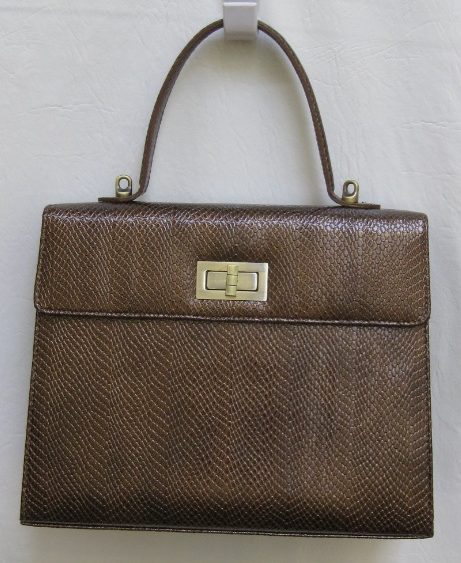
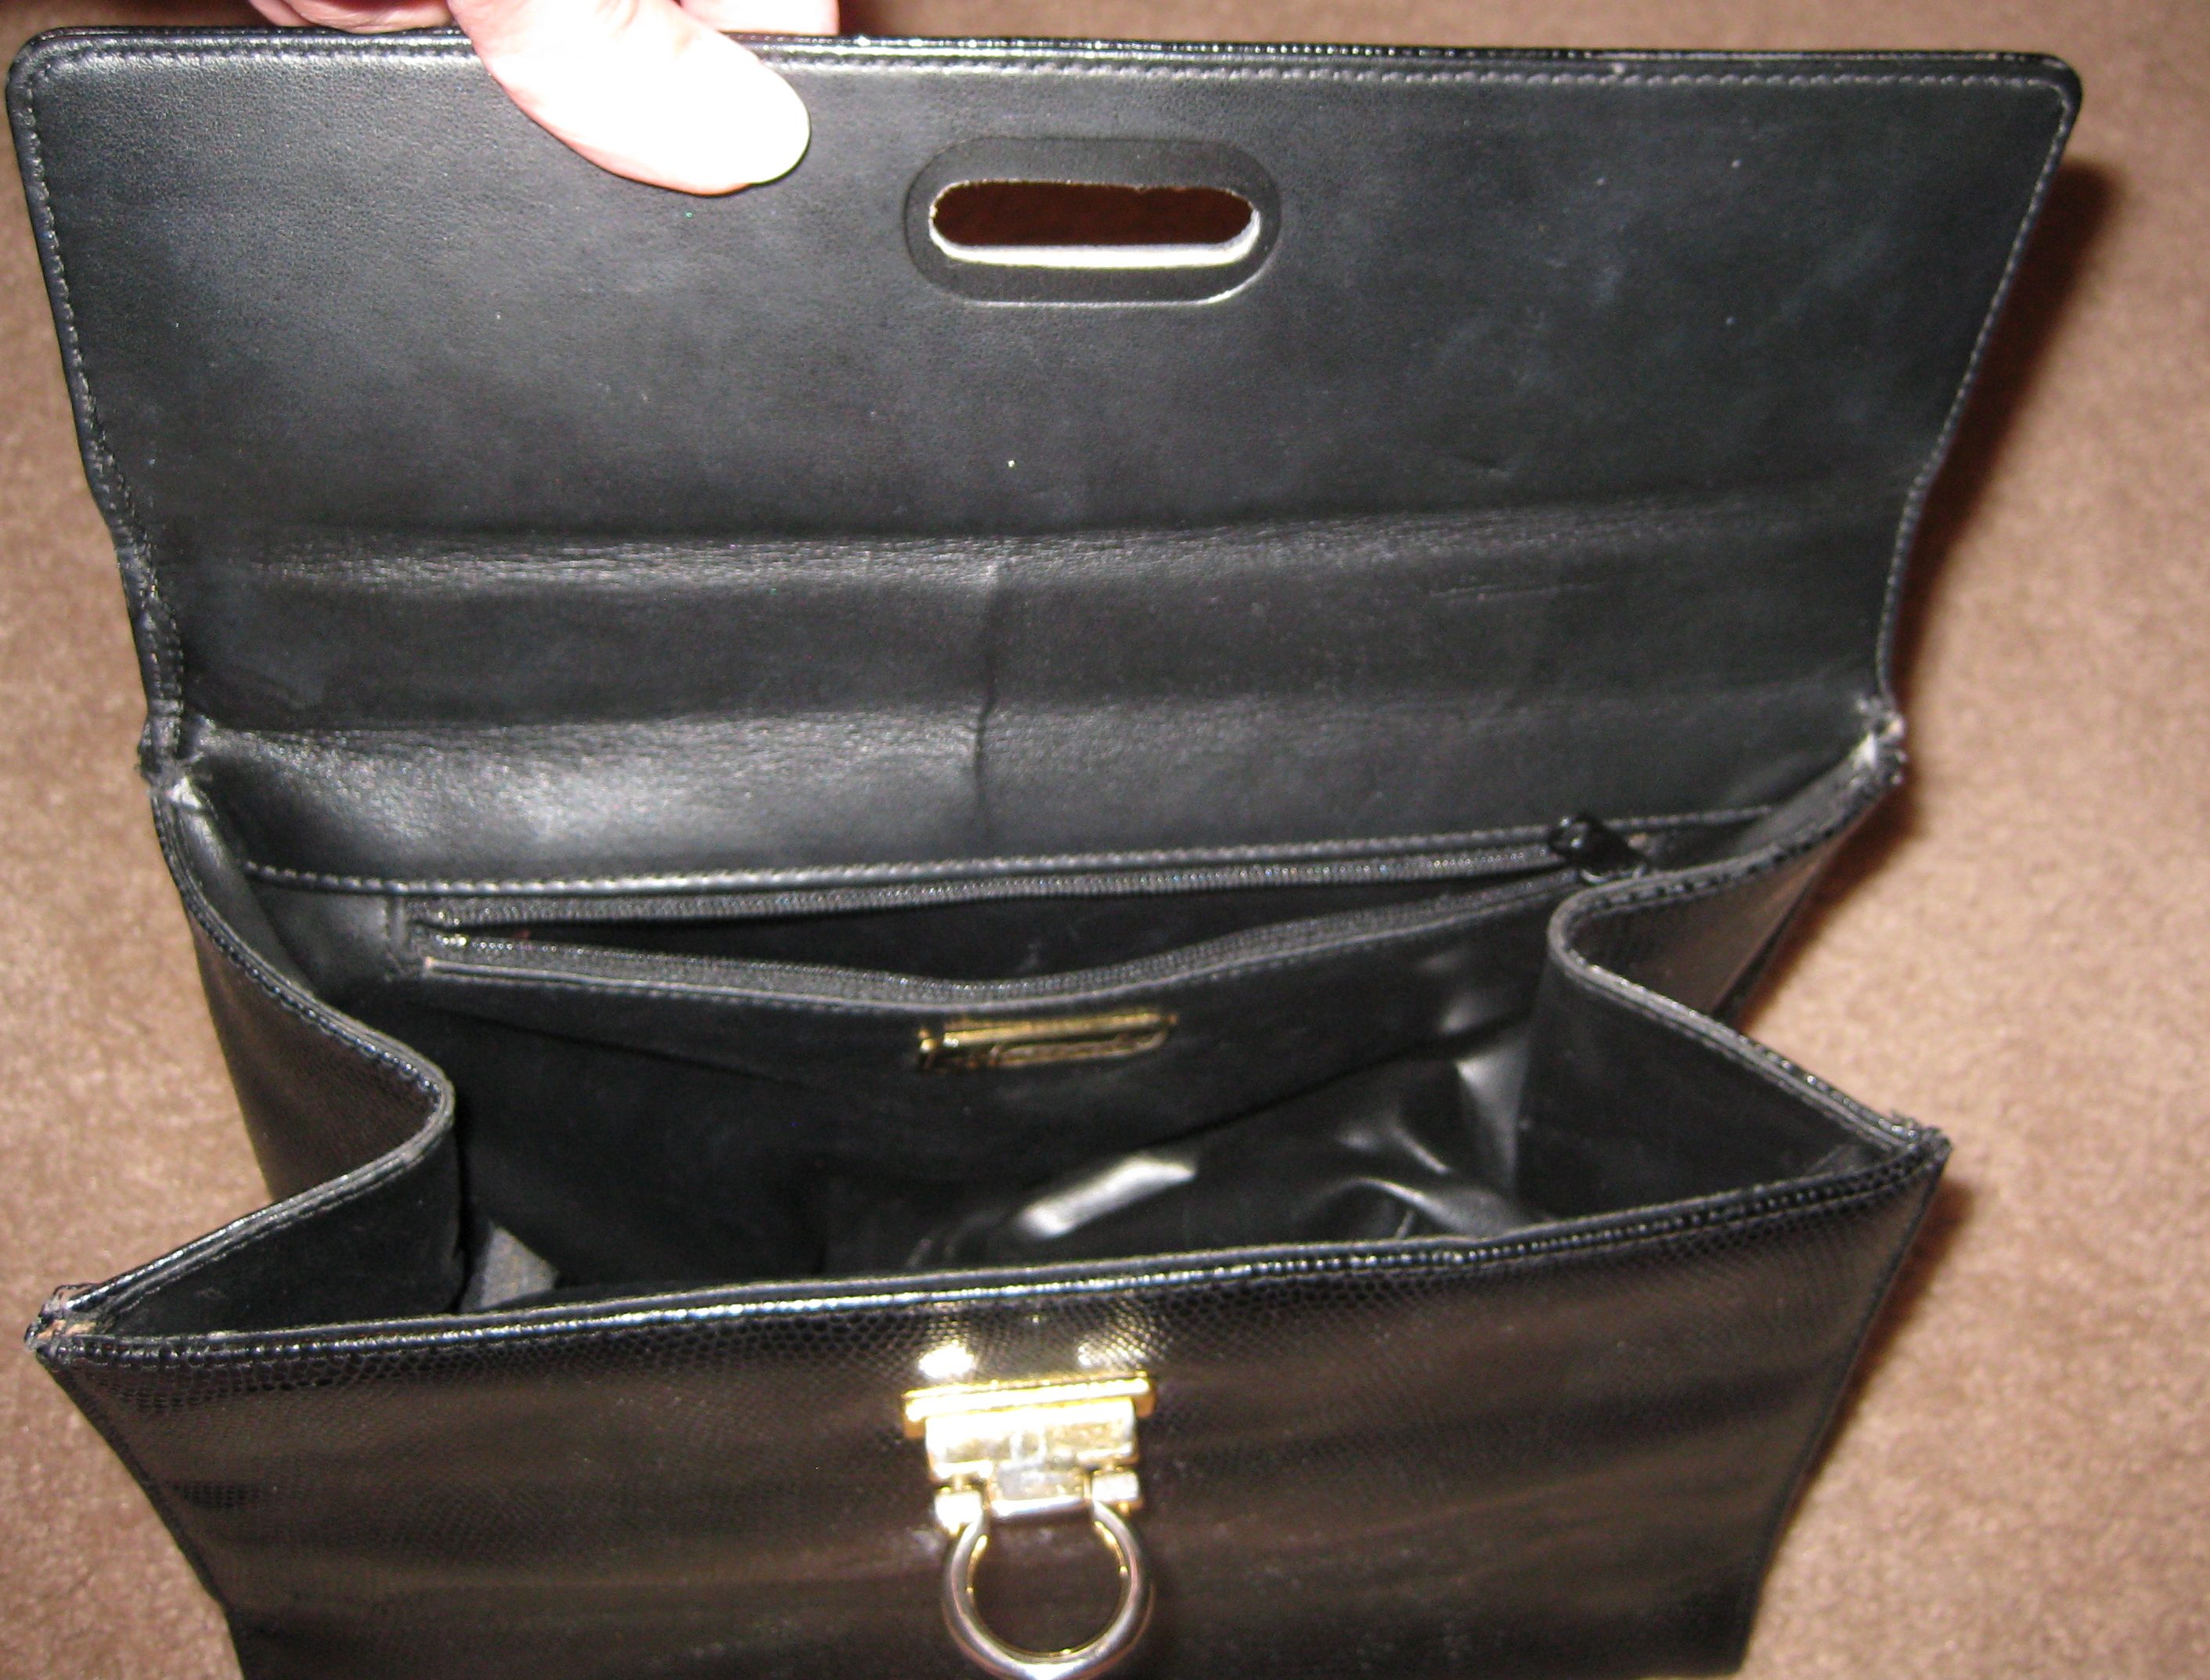
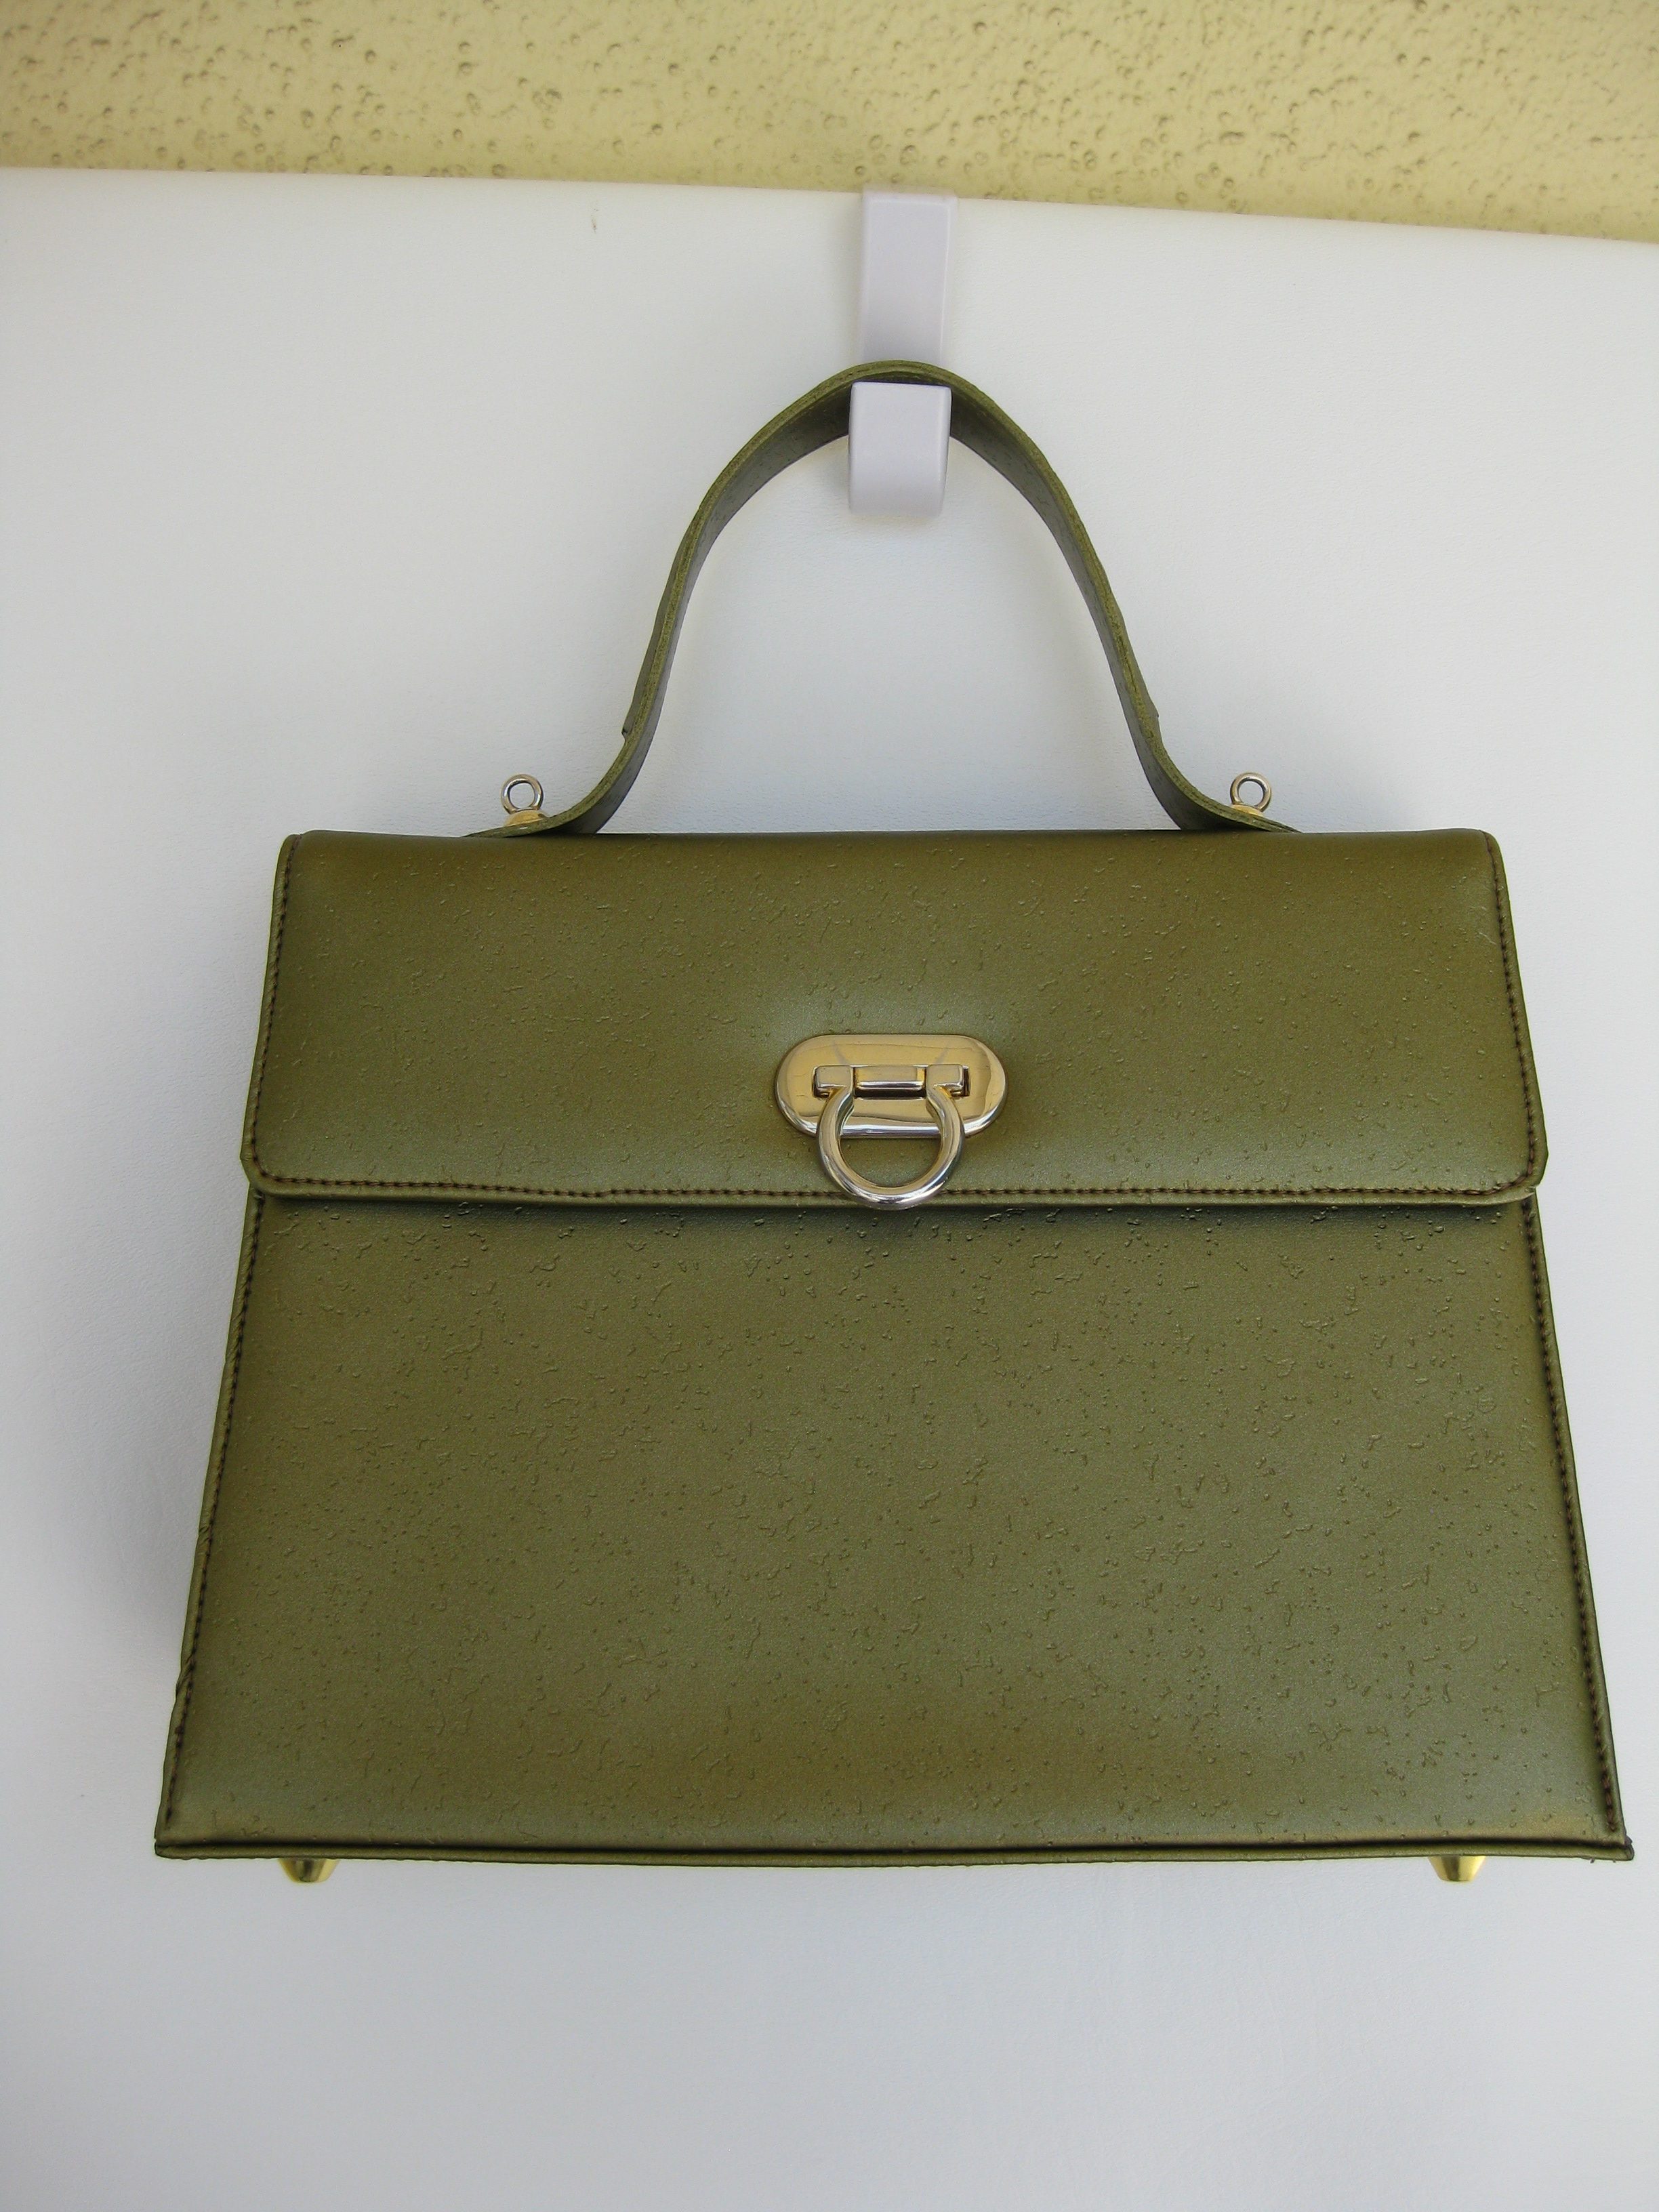
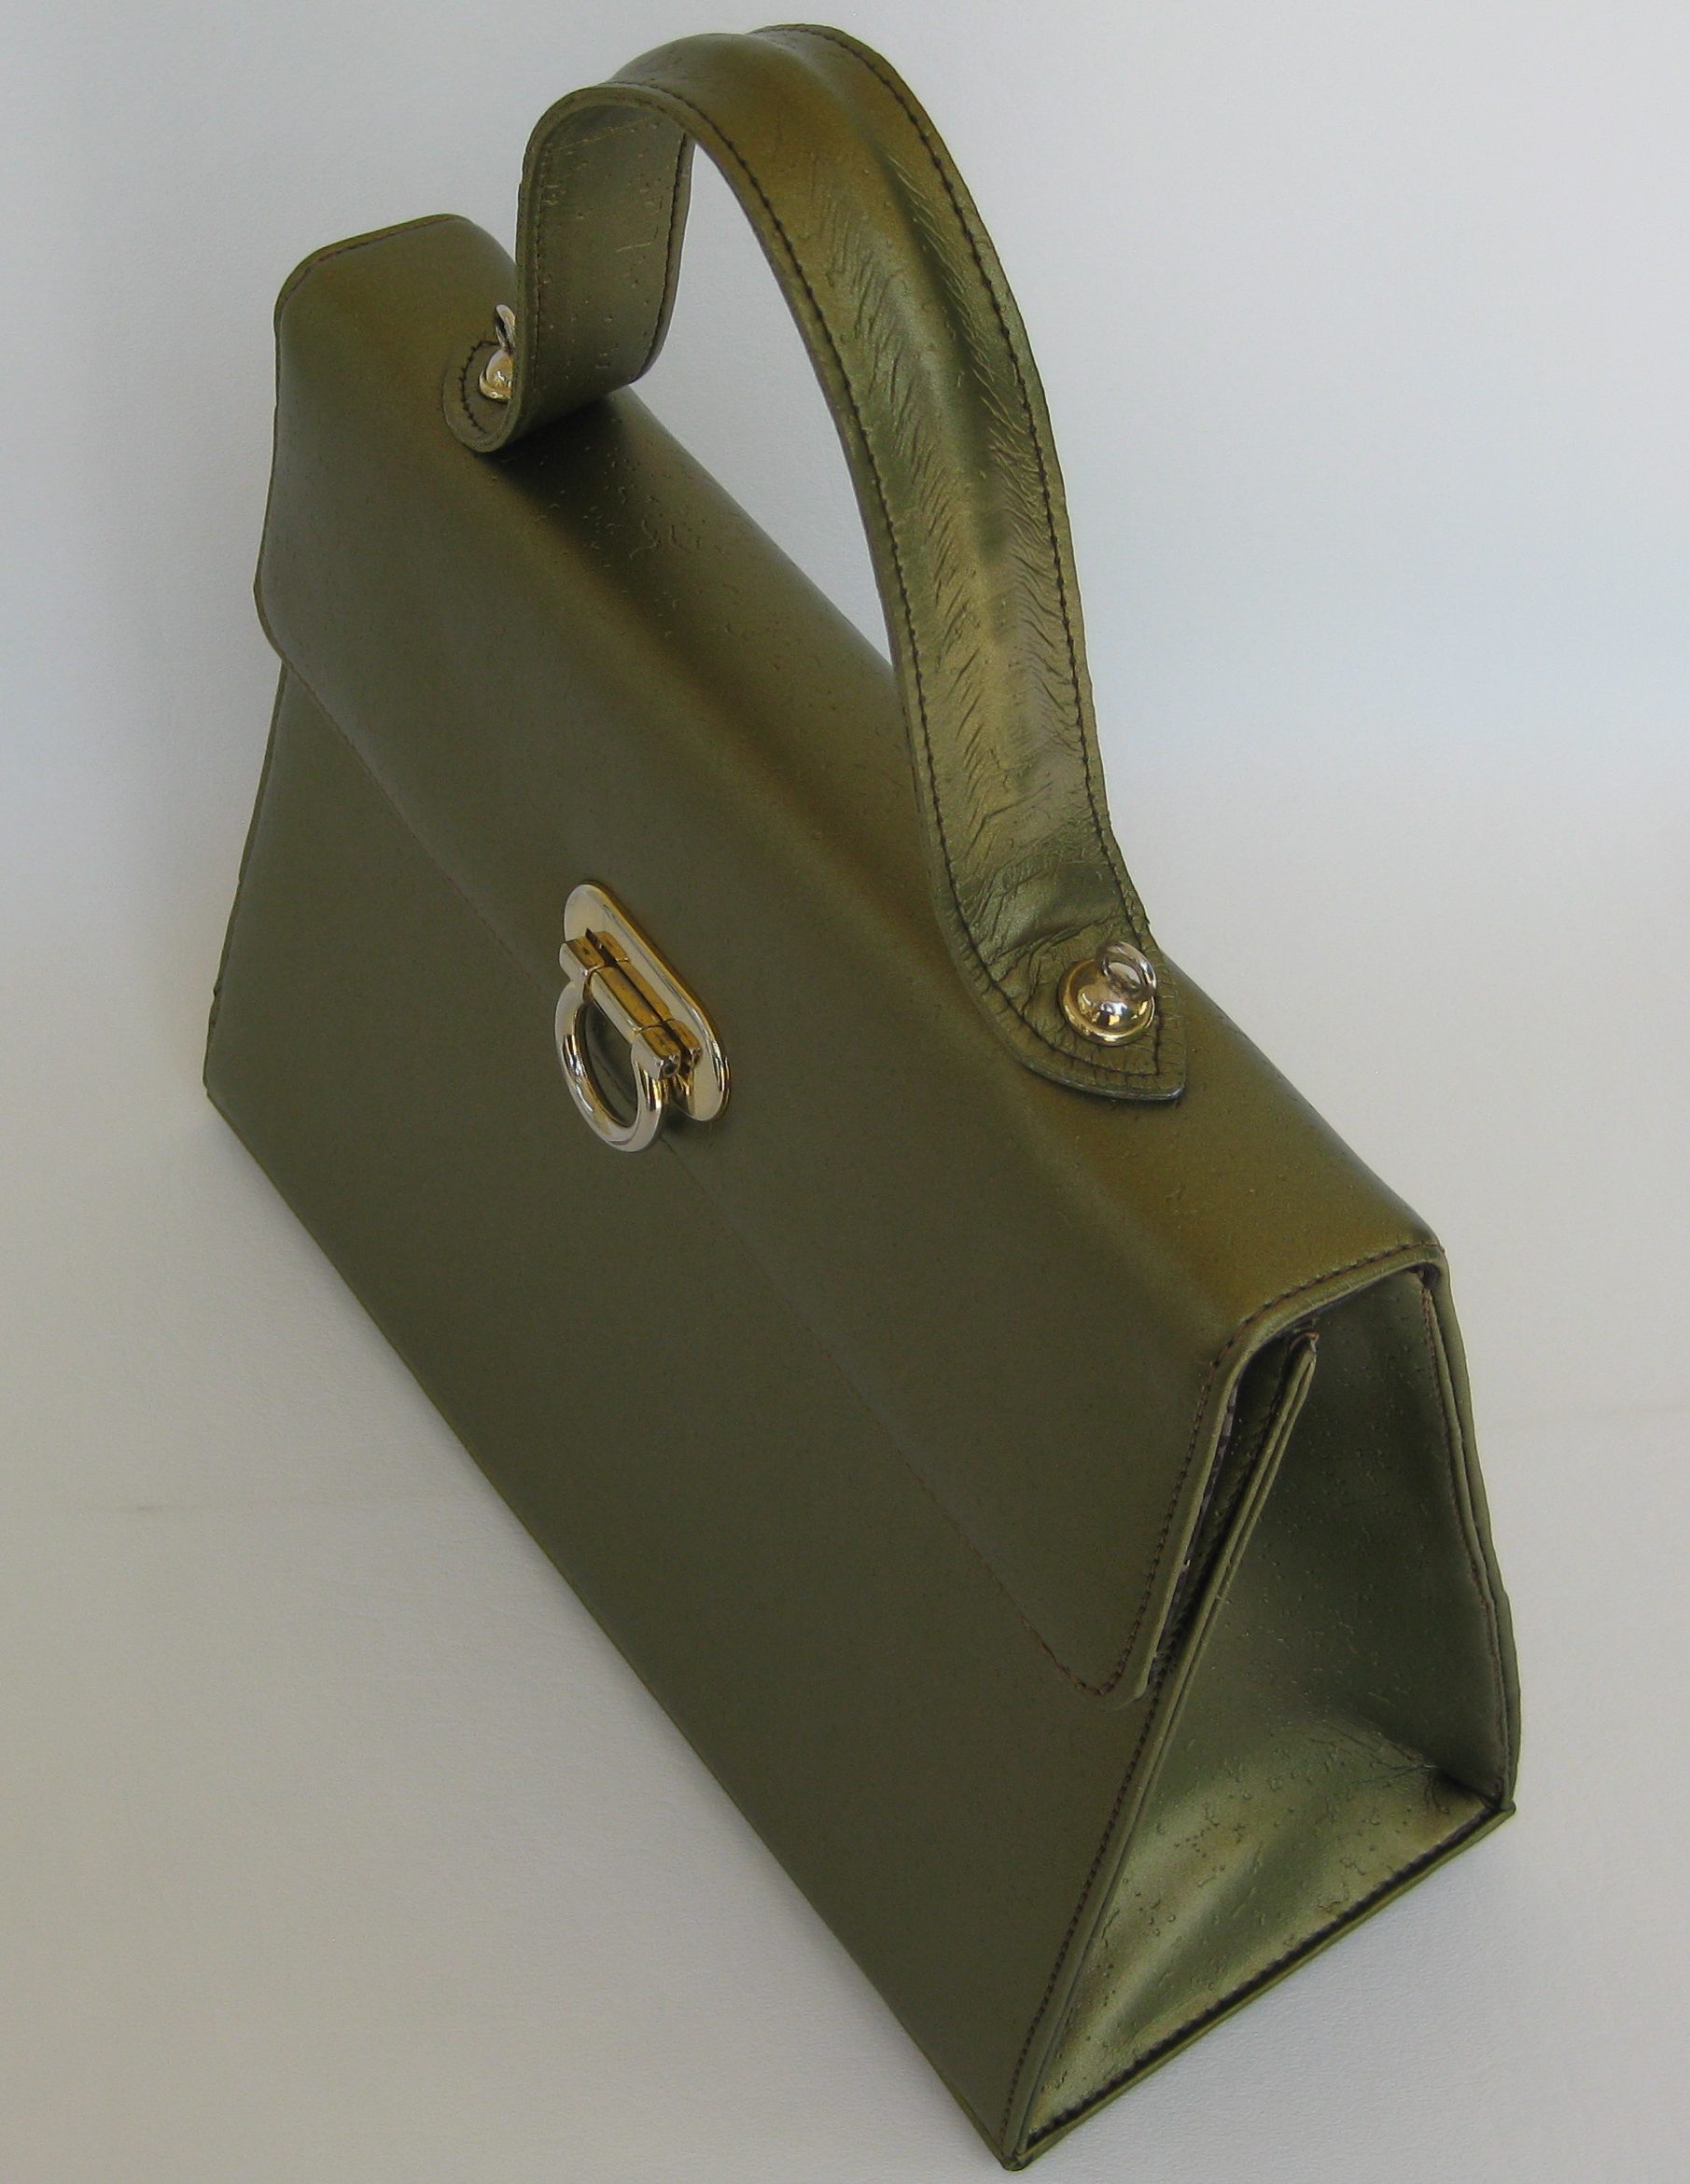
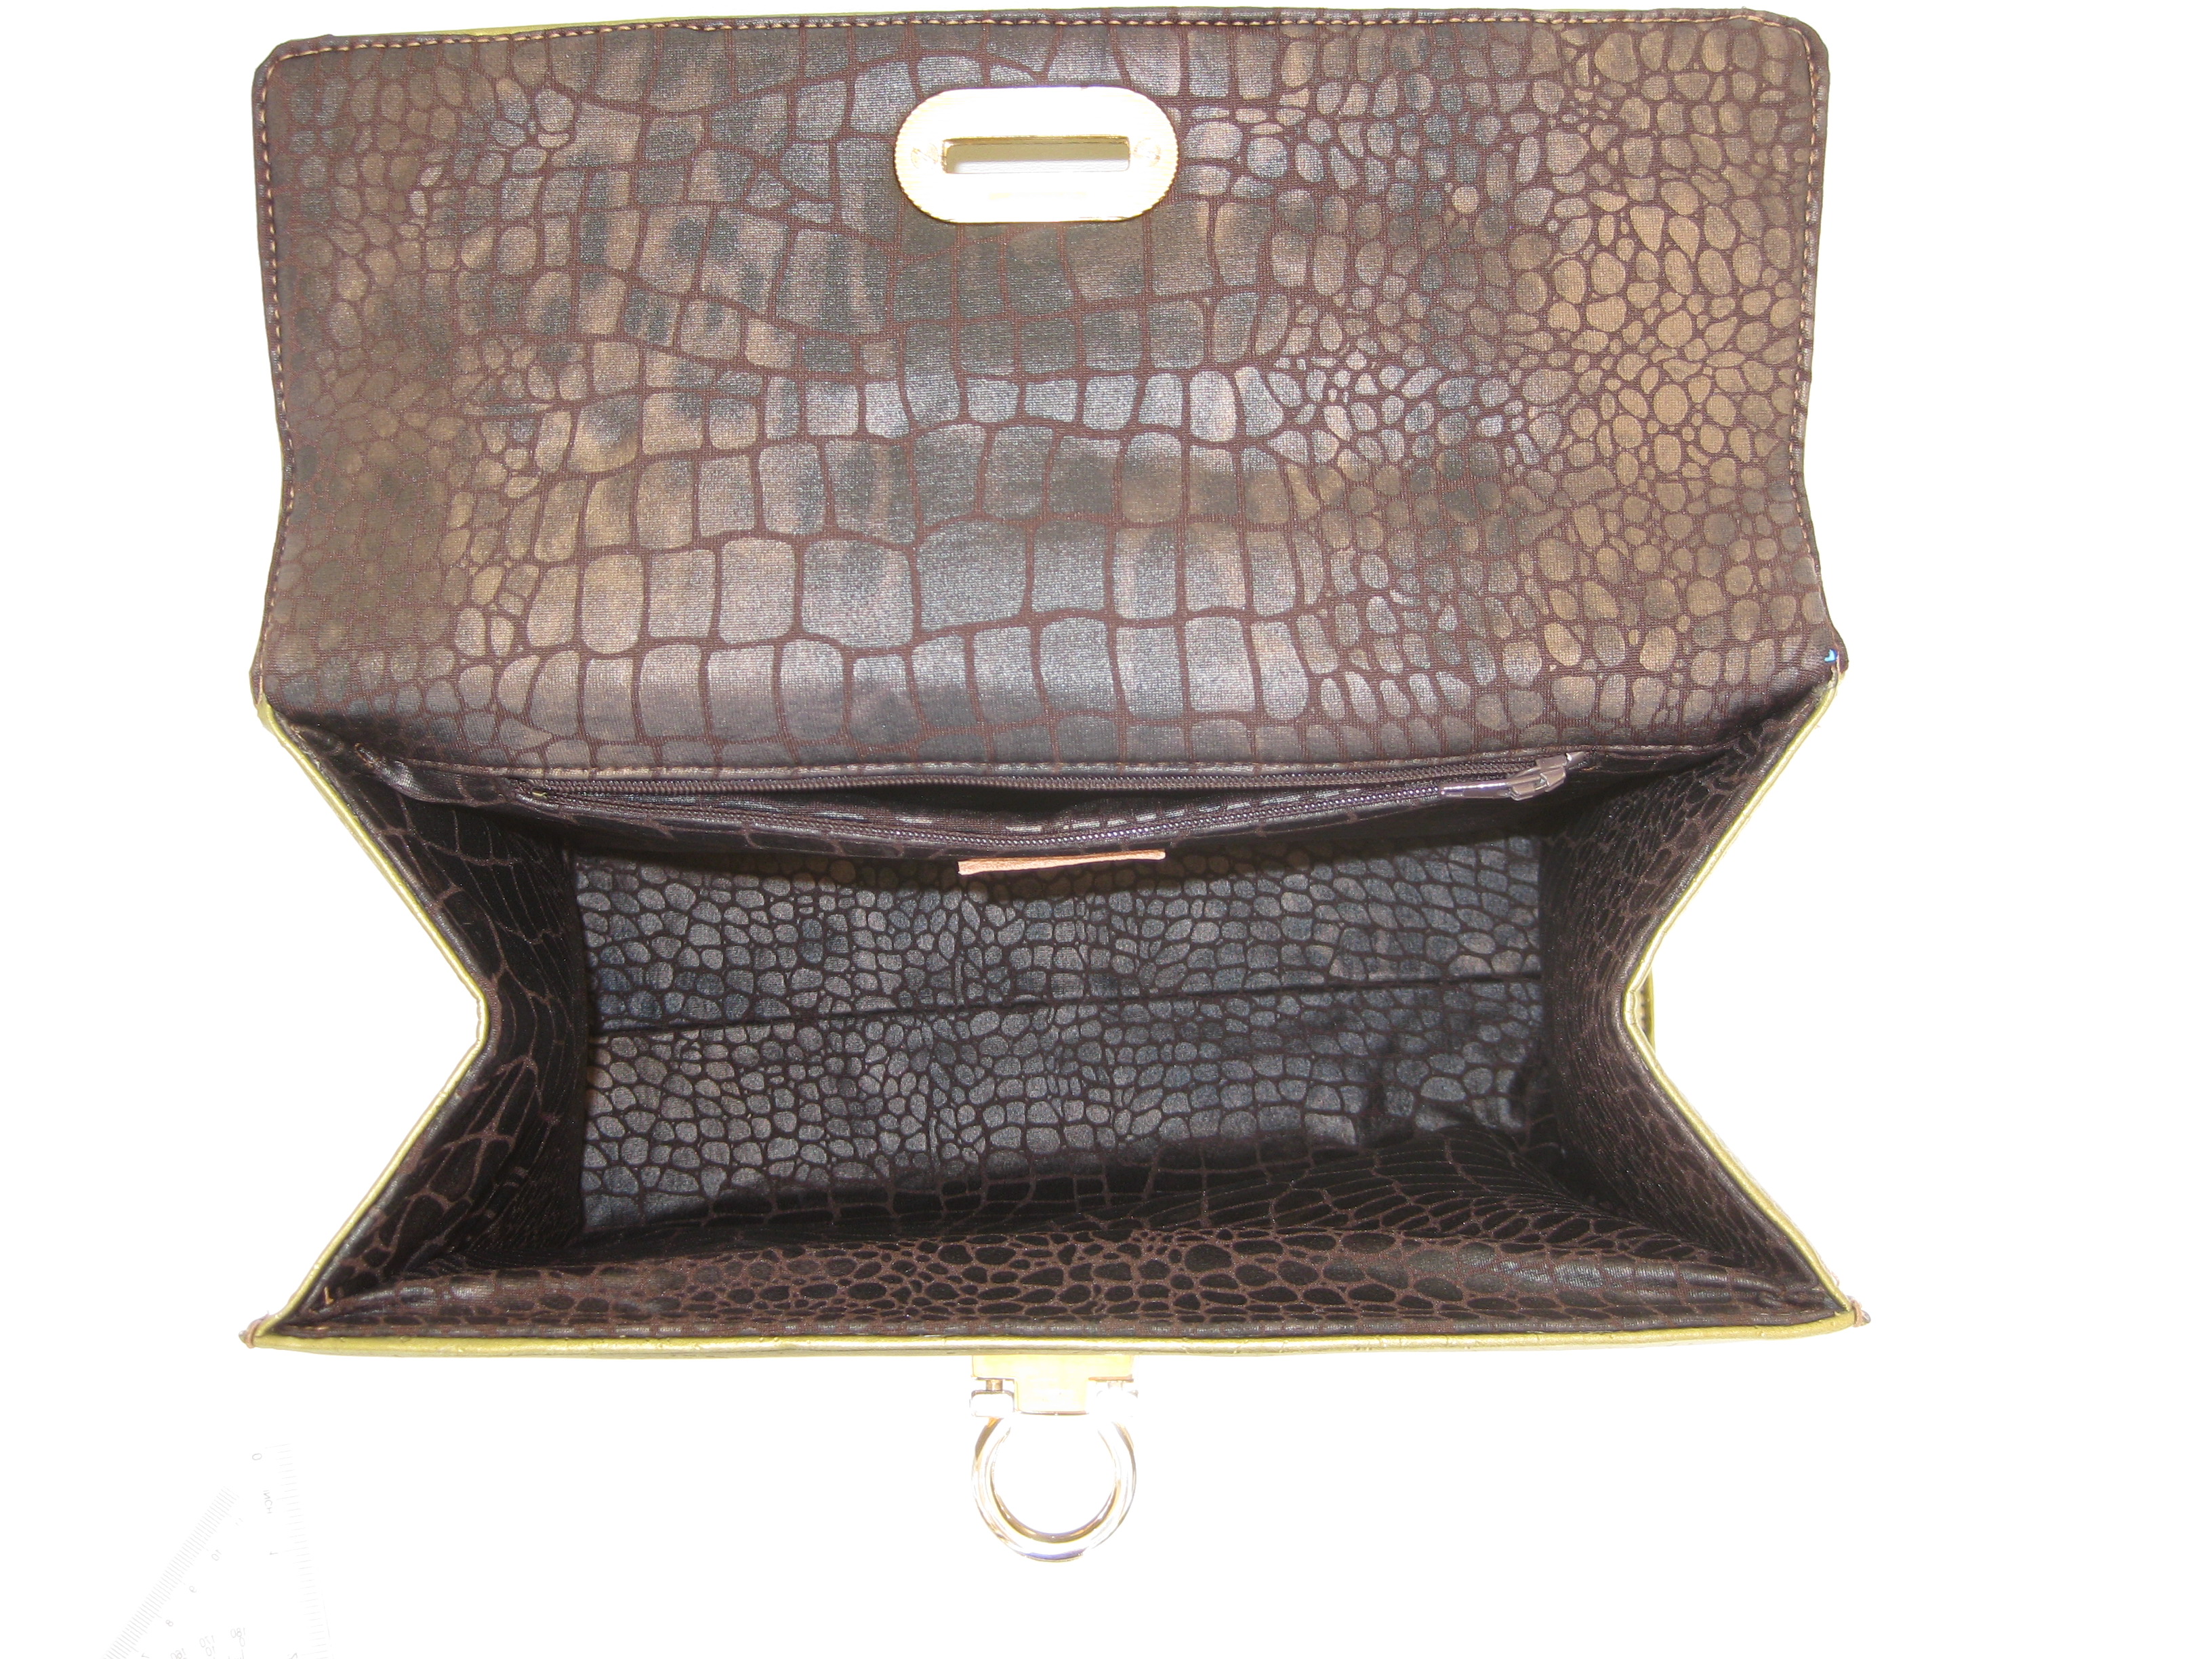
I bought this handbag in the late 1990s at a London department store; I carried it often and it barely survived my 2007 truck fire (too worn and smelled of fire/smoke to carry).It took me a while to take it apart, inventory and create the pattern pieces and then work up the courage (and skills!) to make this bag.I used the original hardware along with a remnant piece of funky textured, almost metallic flannel-backed vinyl for the shell.I think the handle can be a little thinner and shaped more so it will lay flat on the top edge of the bag. The rigidity is from Texon (thanks to Kayla at Lyn-Fle this is the thickness I needed!)Another remnant for the inside/lining this was some knit material that worked rather well. I placed my logo under the back zipped pocket.
Metal feet similar to the original. Now that I did this first one, I know more can be done and possibly even with some really nice leather…first I must call Anne or Sandy at Ohio Travel Bag for supplies, I see they have just what I need to make this bag again only with new hardware.
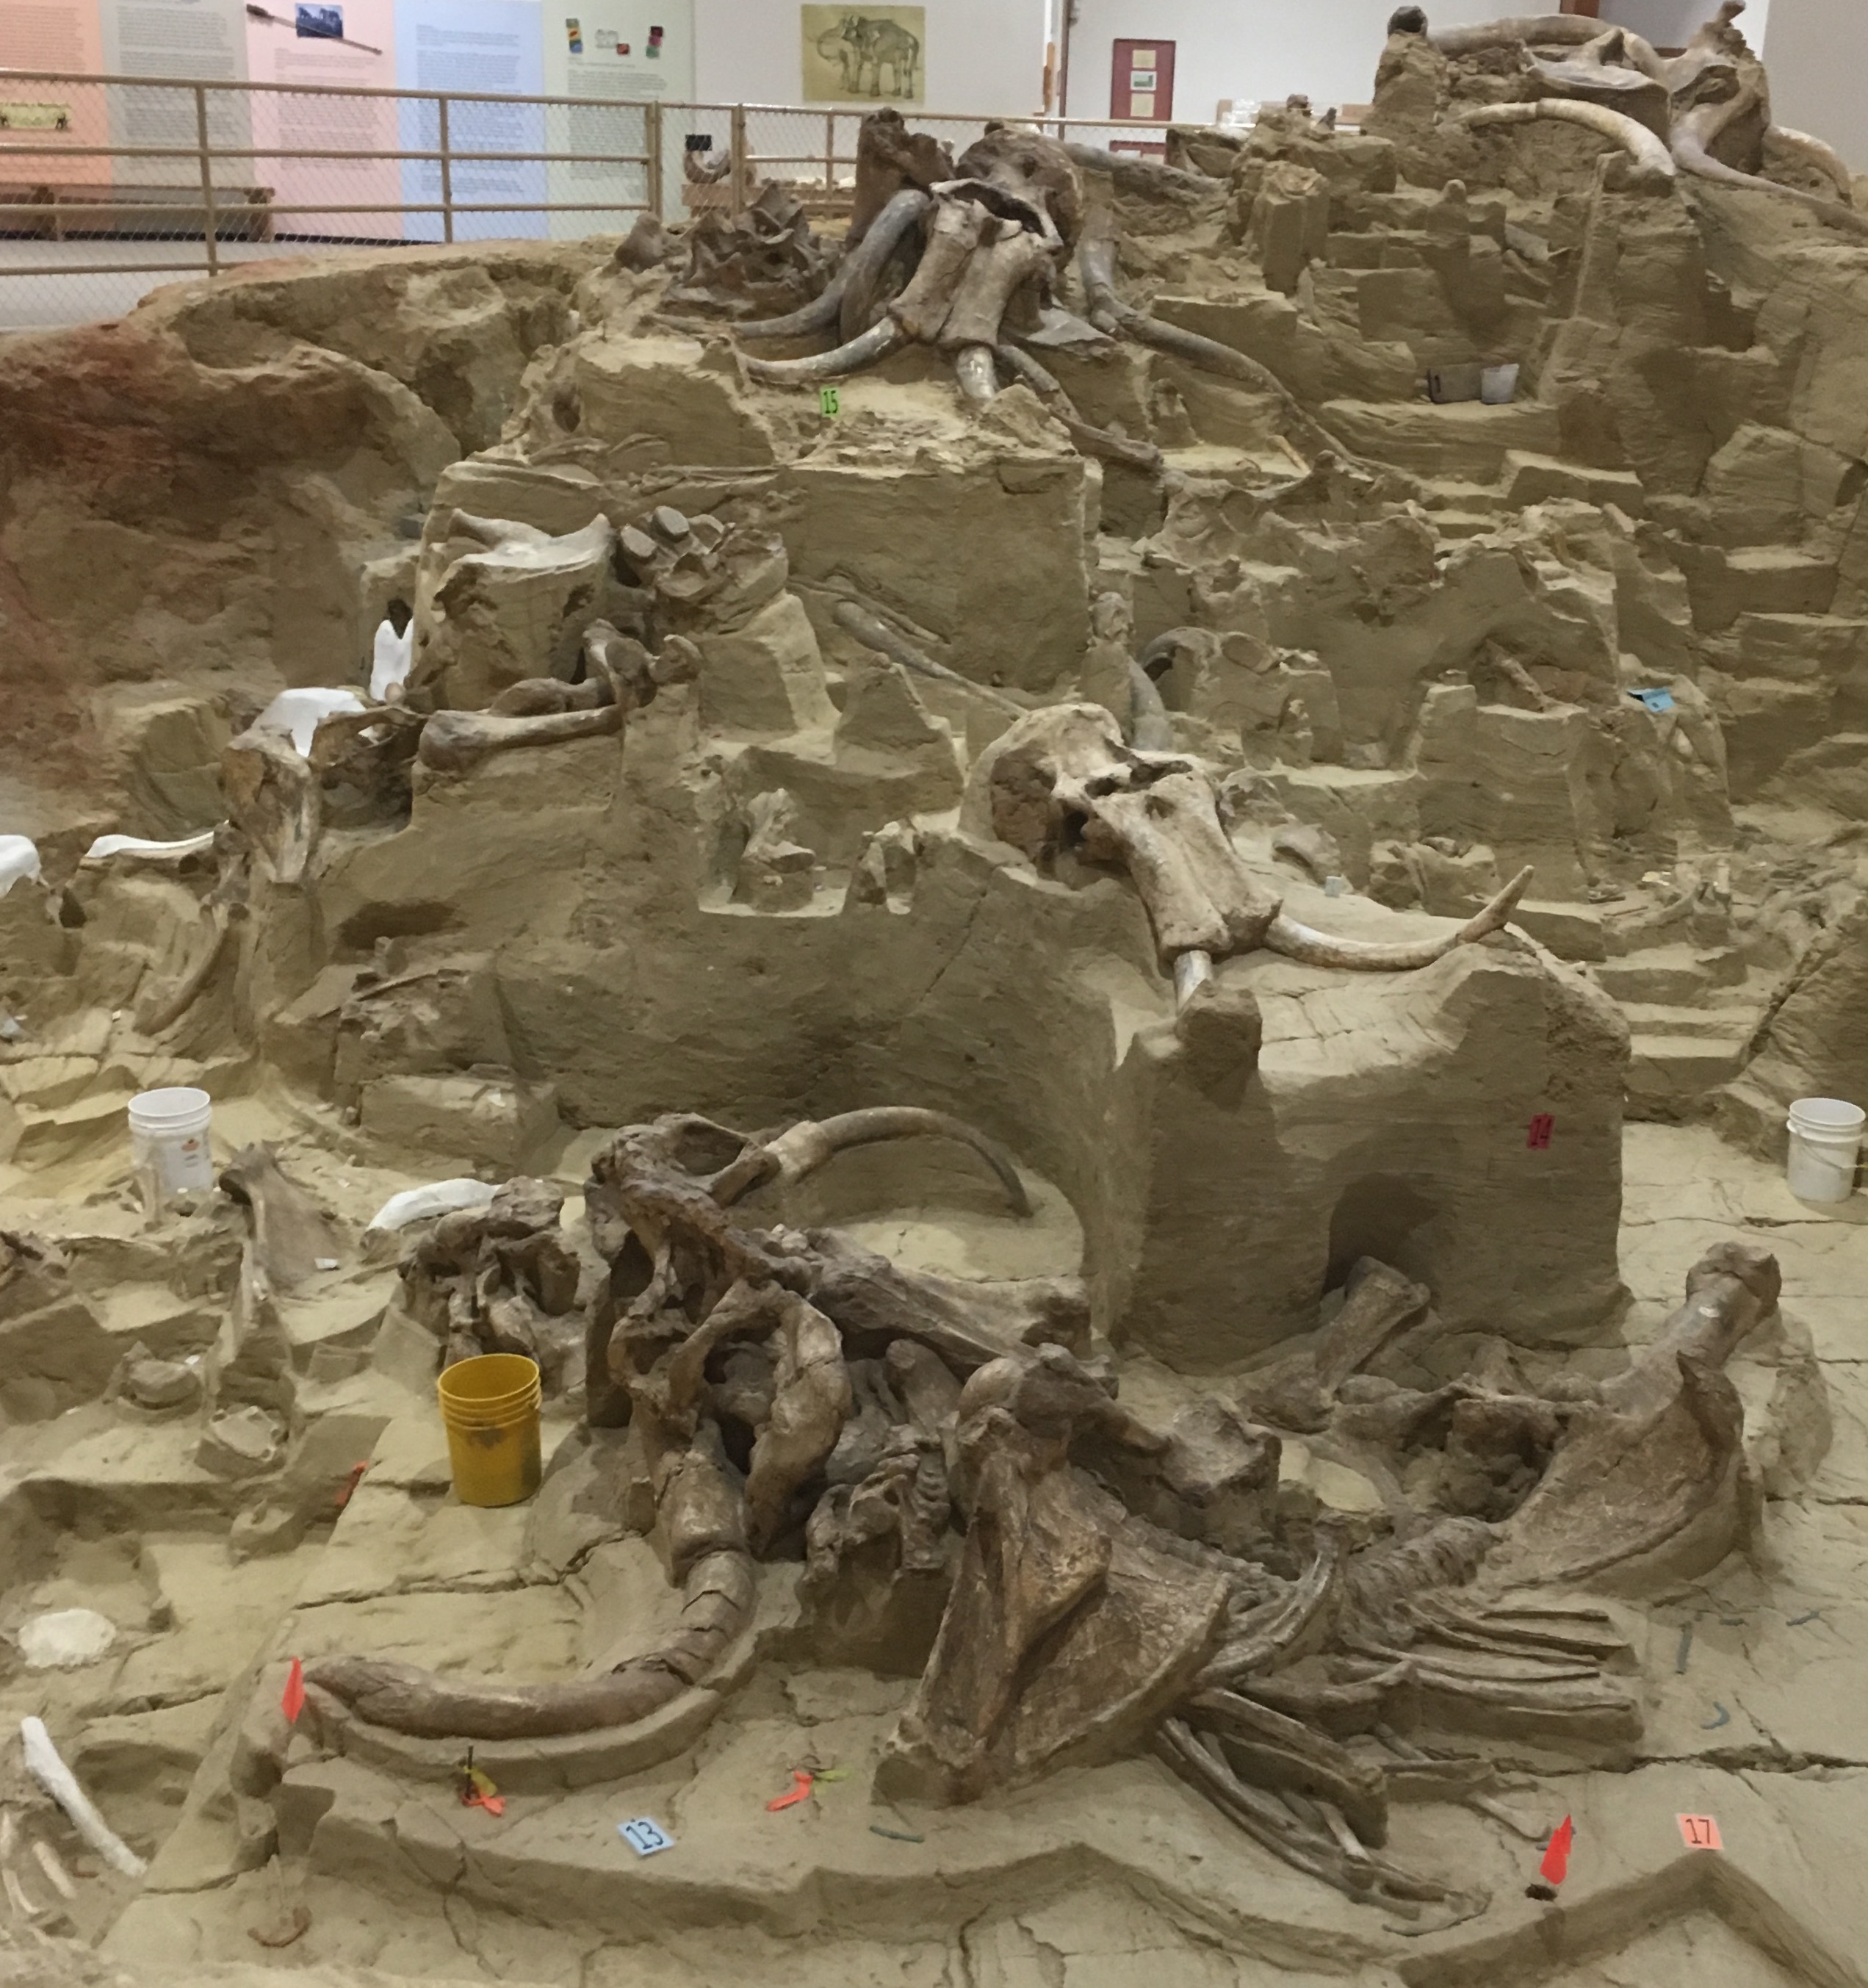
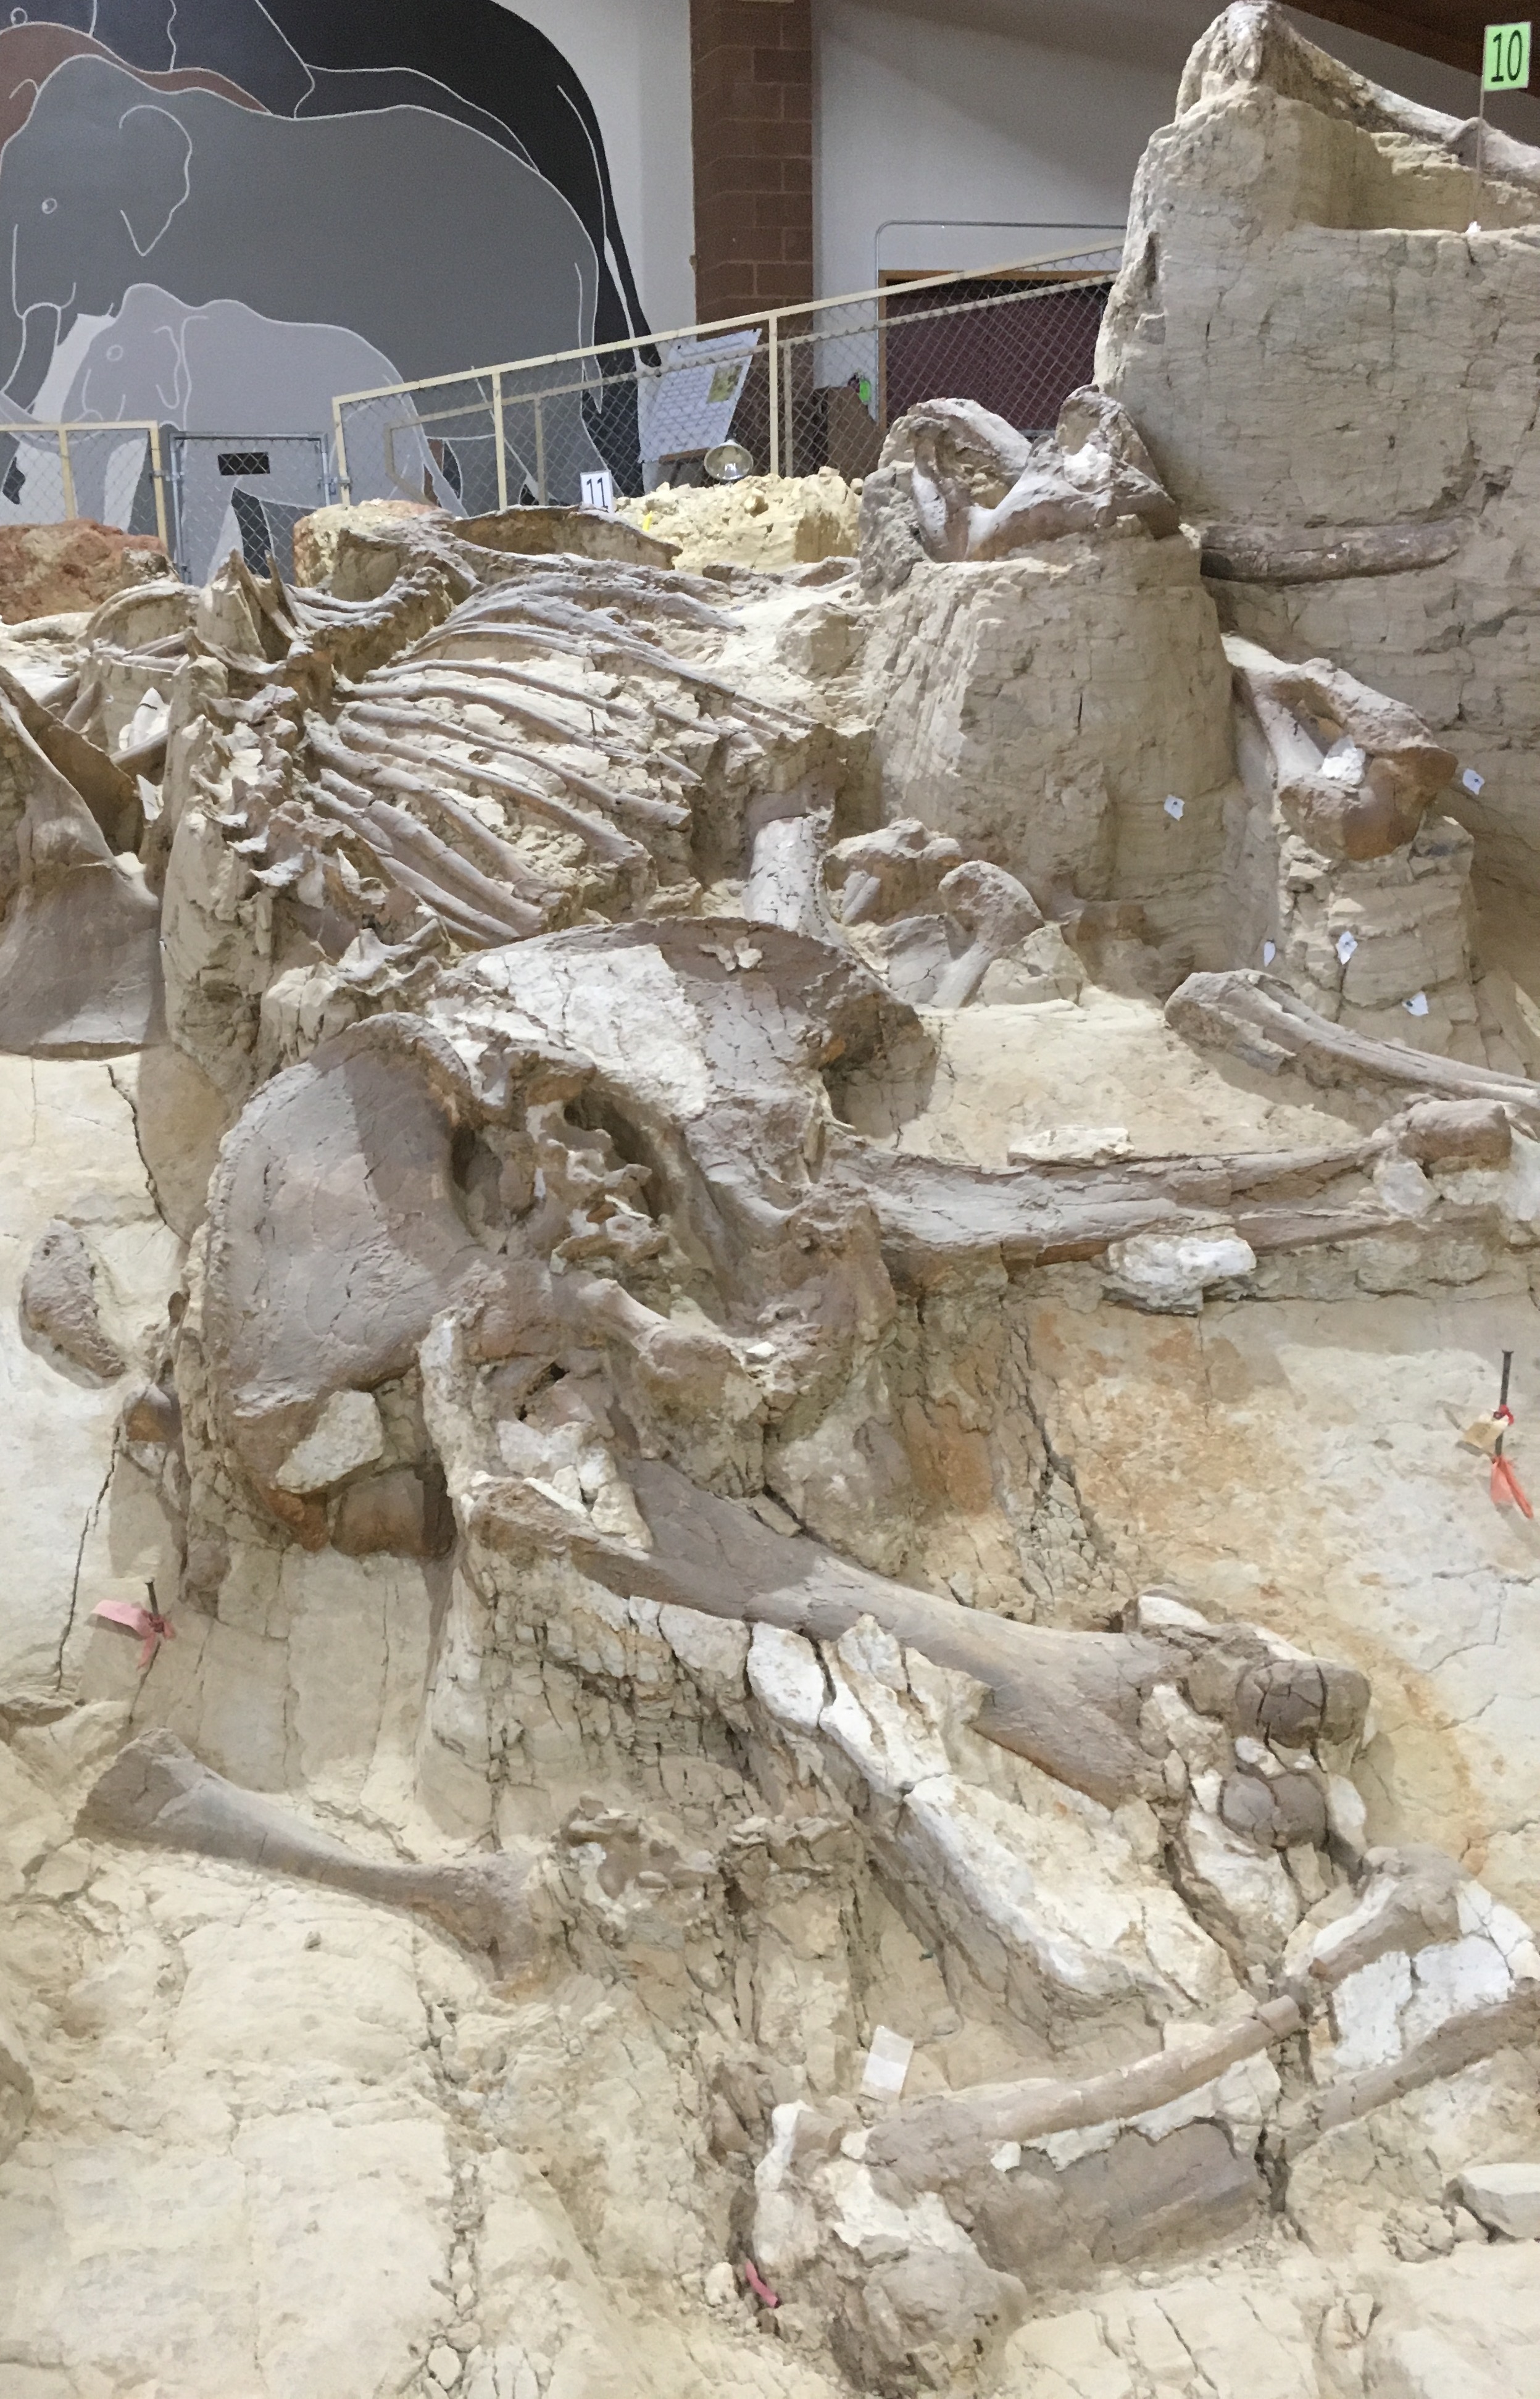
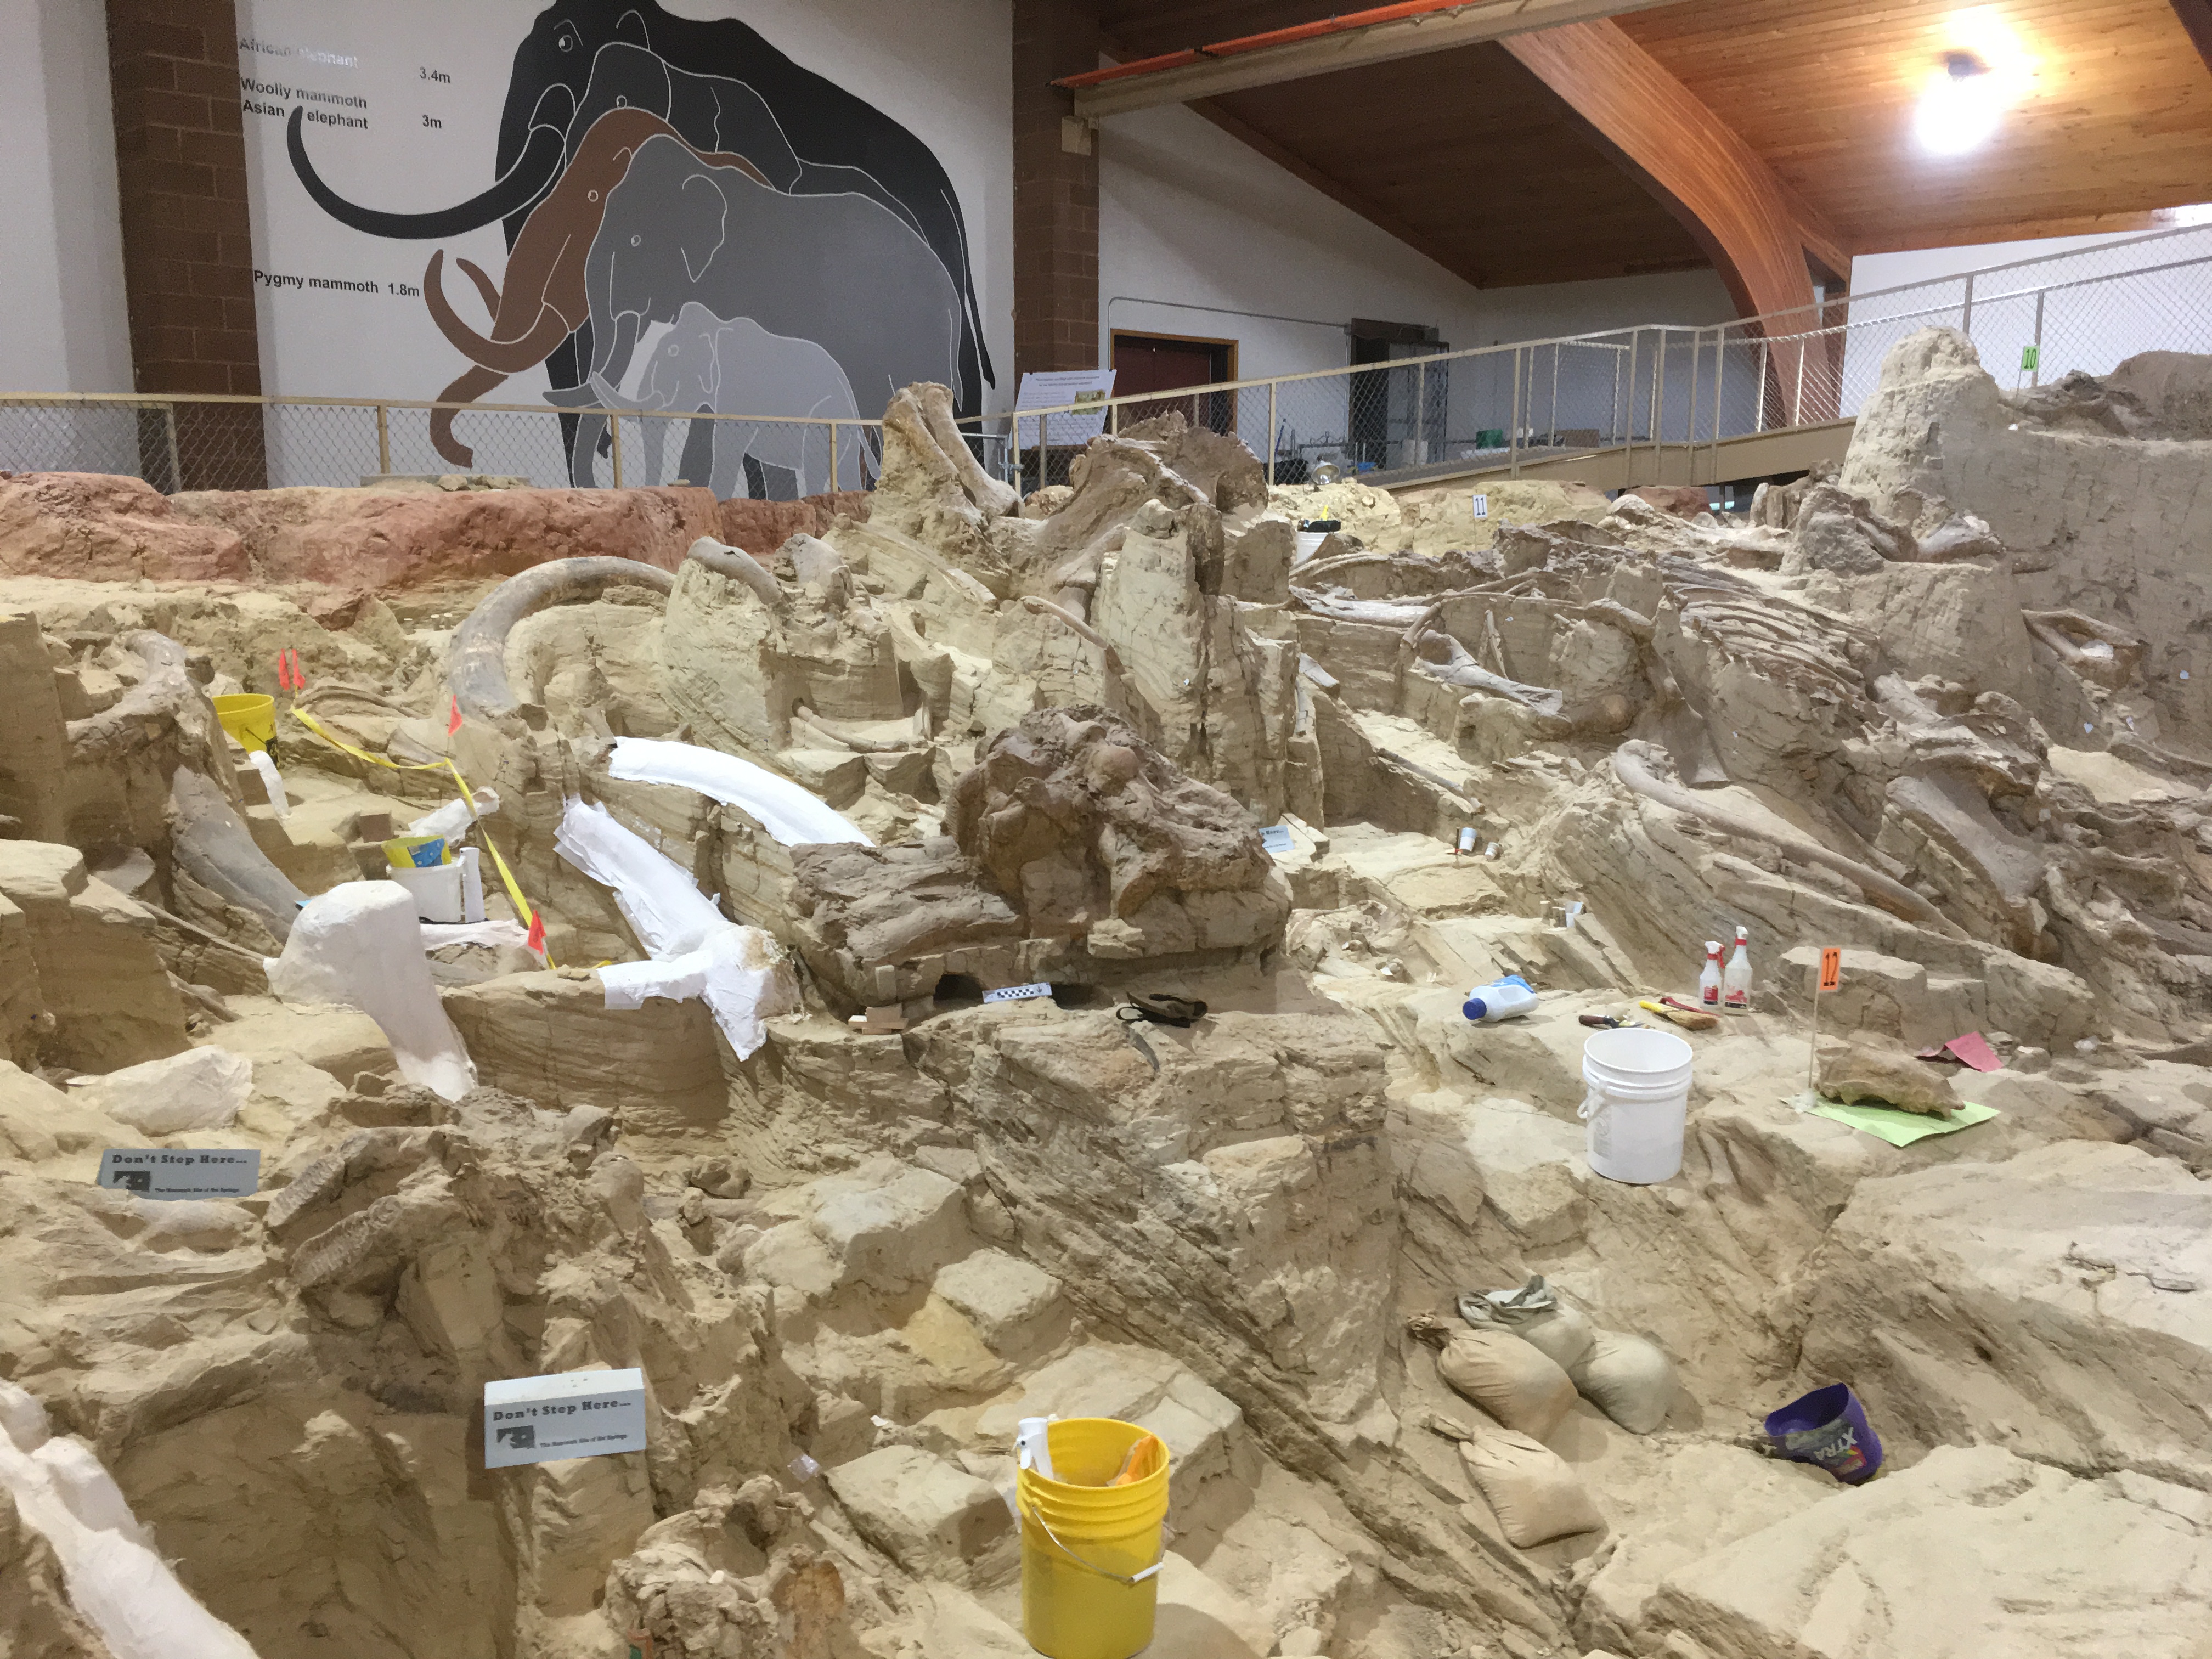
So a friend mentioned something he saw on television about an enclosed bone bed that was a museum and working dig site…It was an amazing adventure; our team was small – just four of us and the site staff. Yes, that is a mammoth skeleton and there are plenty more to be excavated and preserved.I would recommend this to someone looking for a completely different vacation and would consider doing it again.
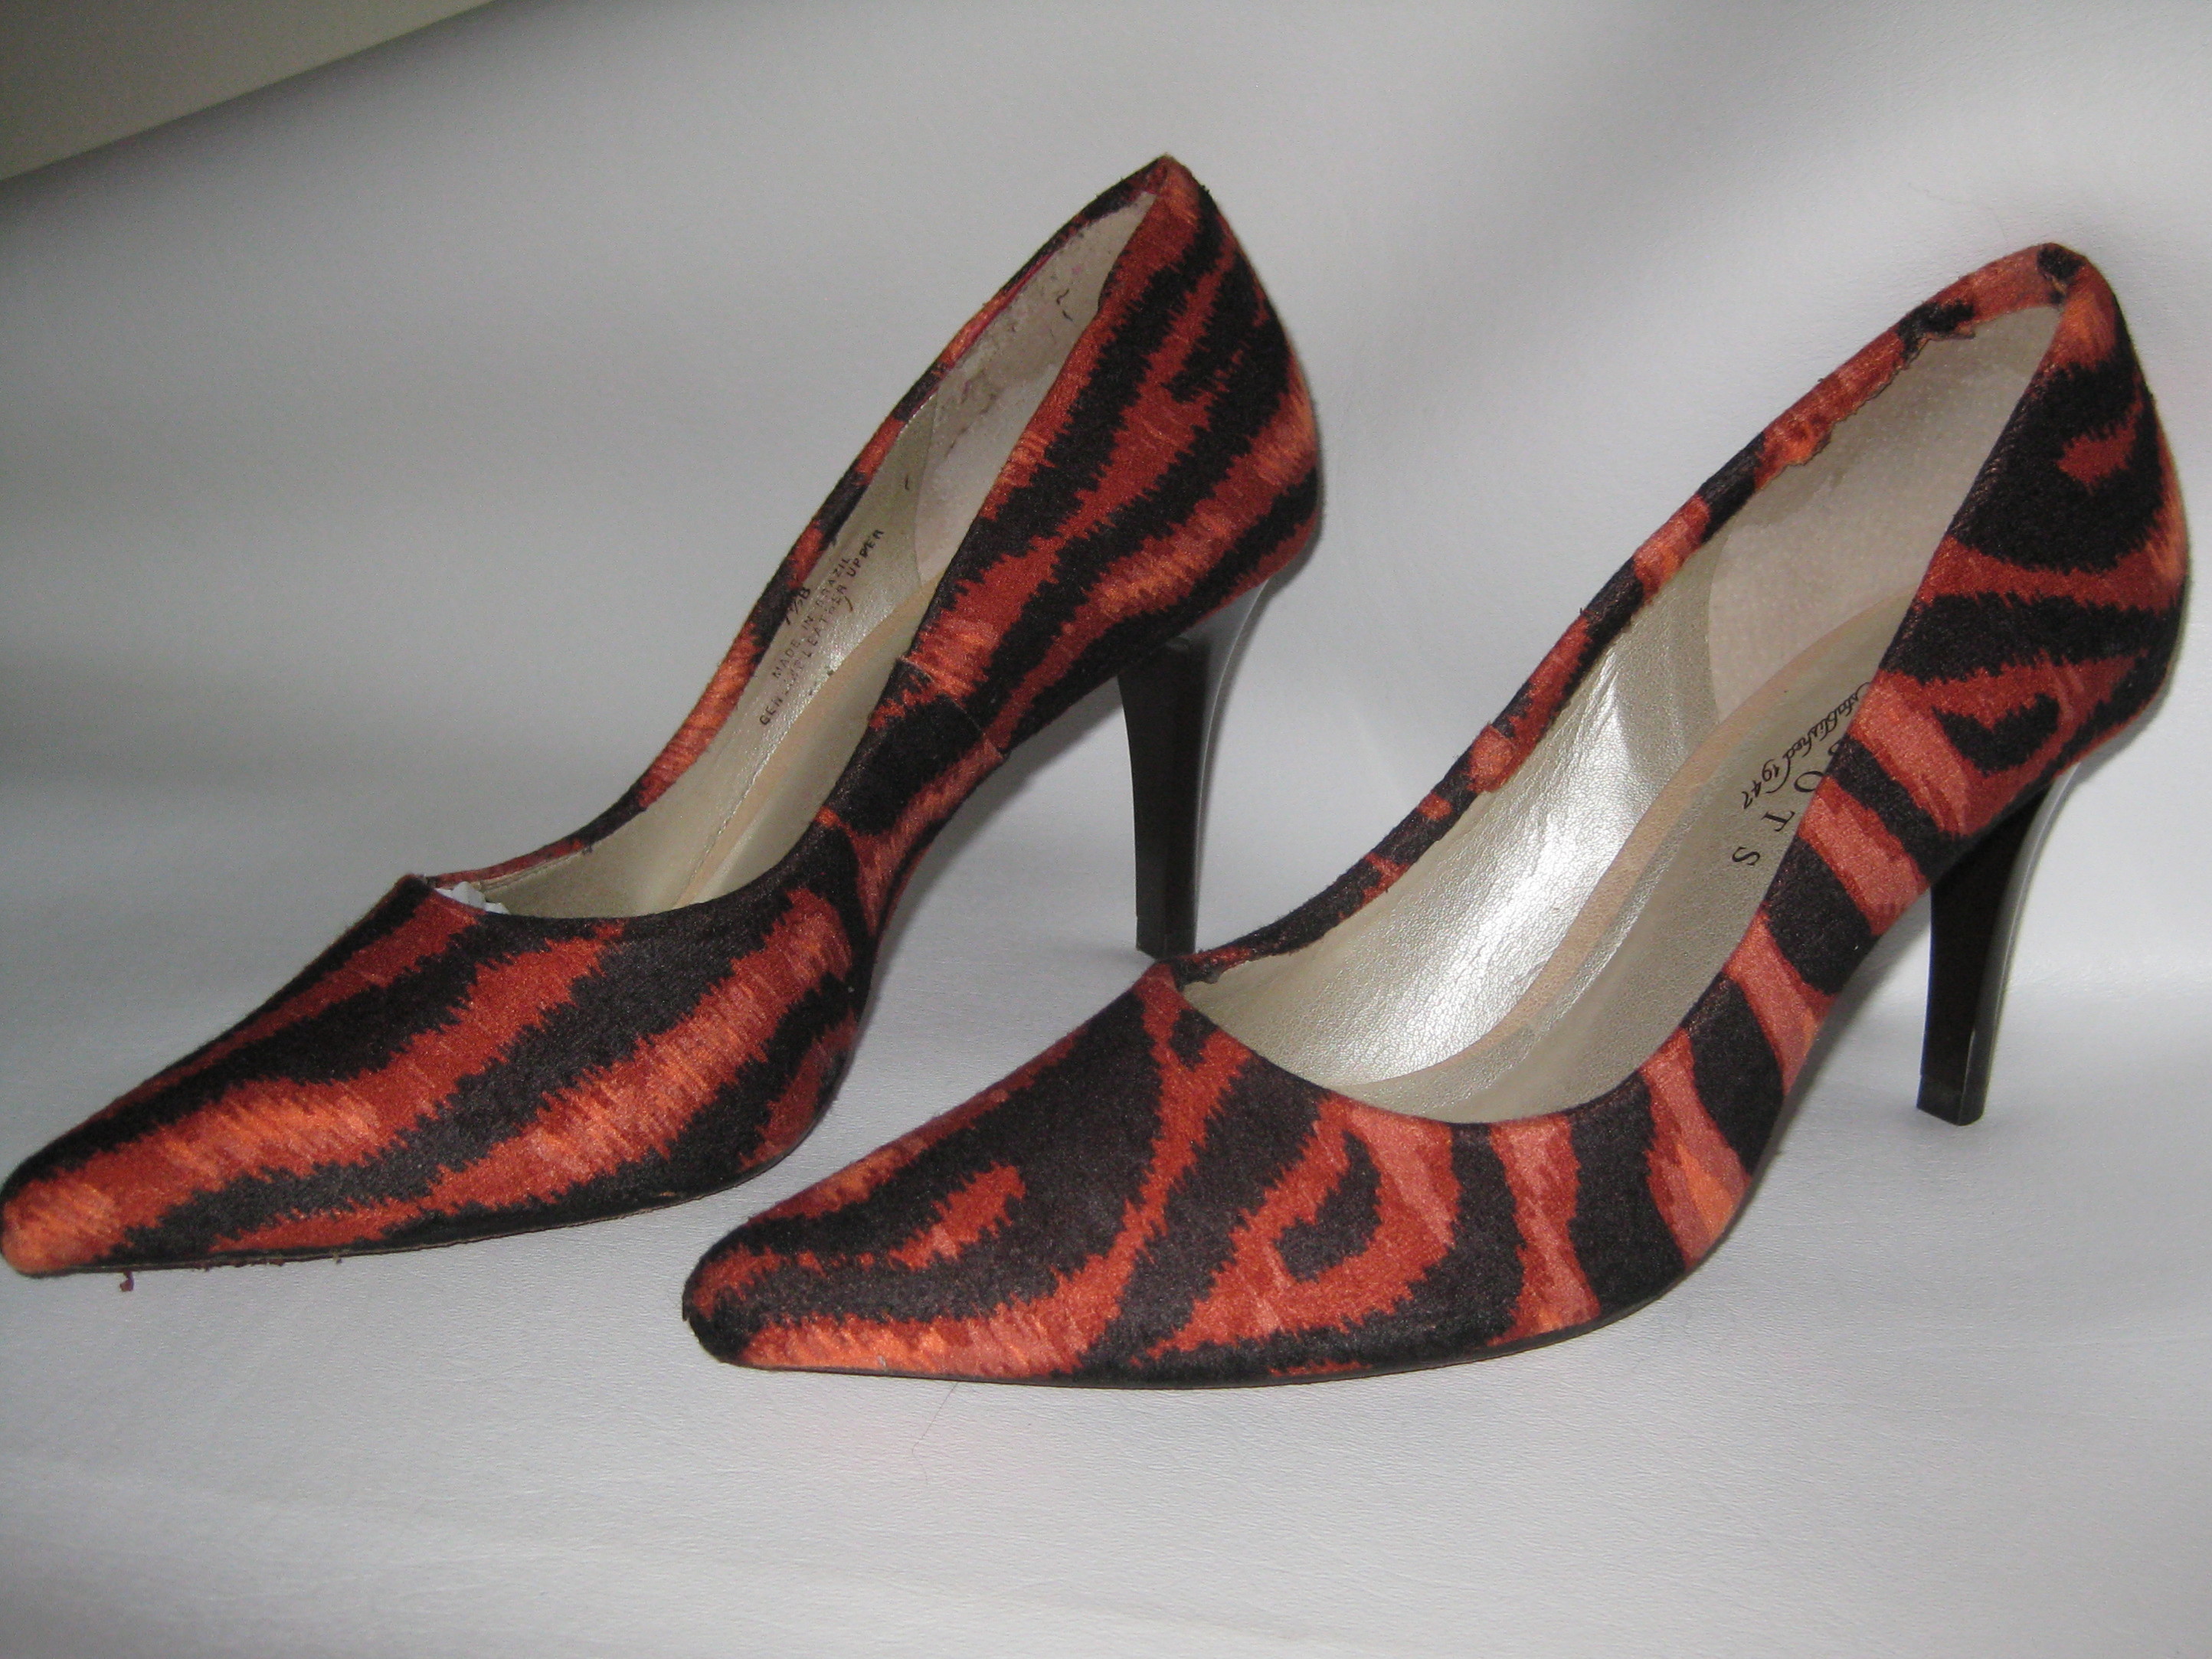
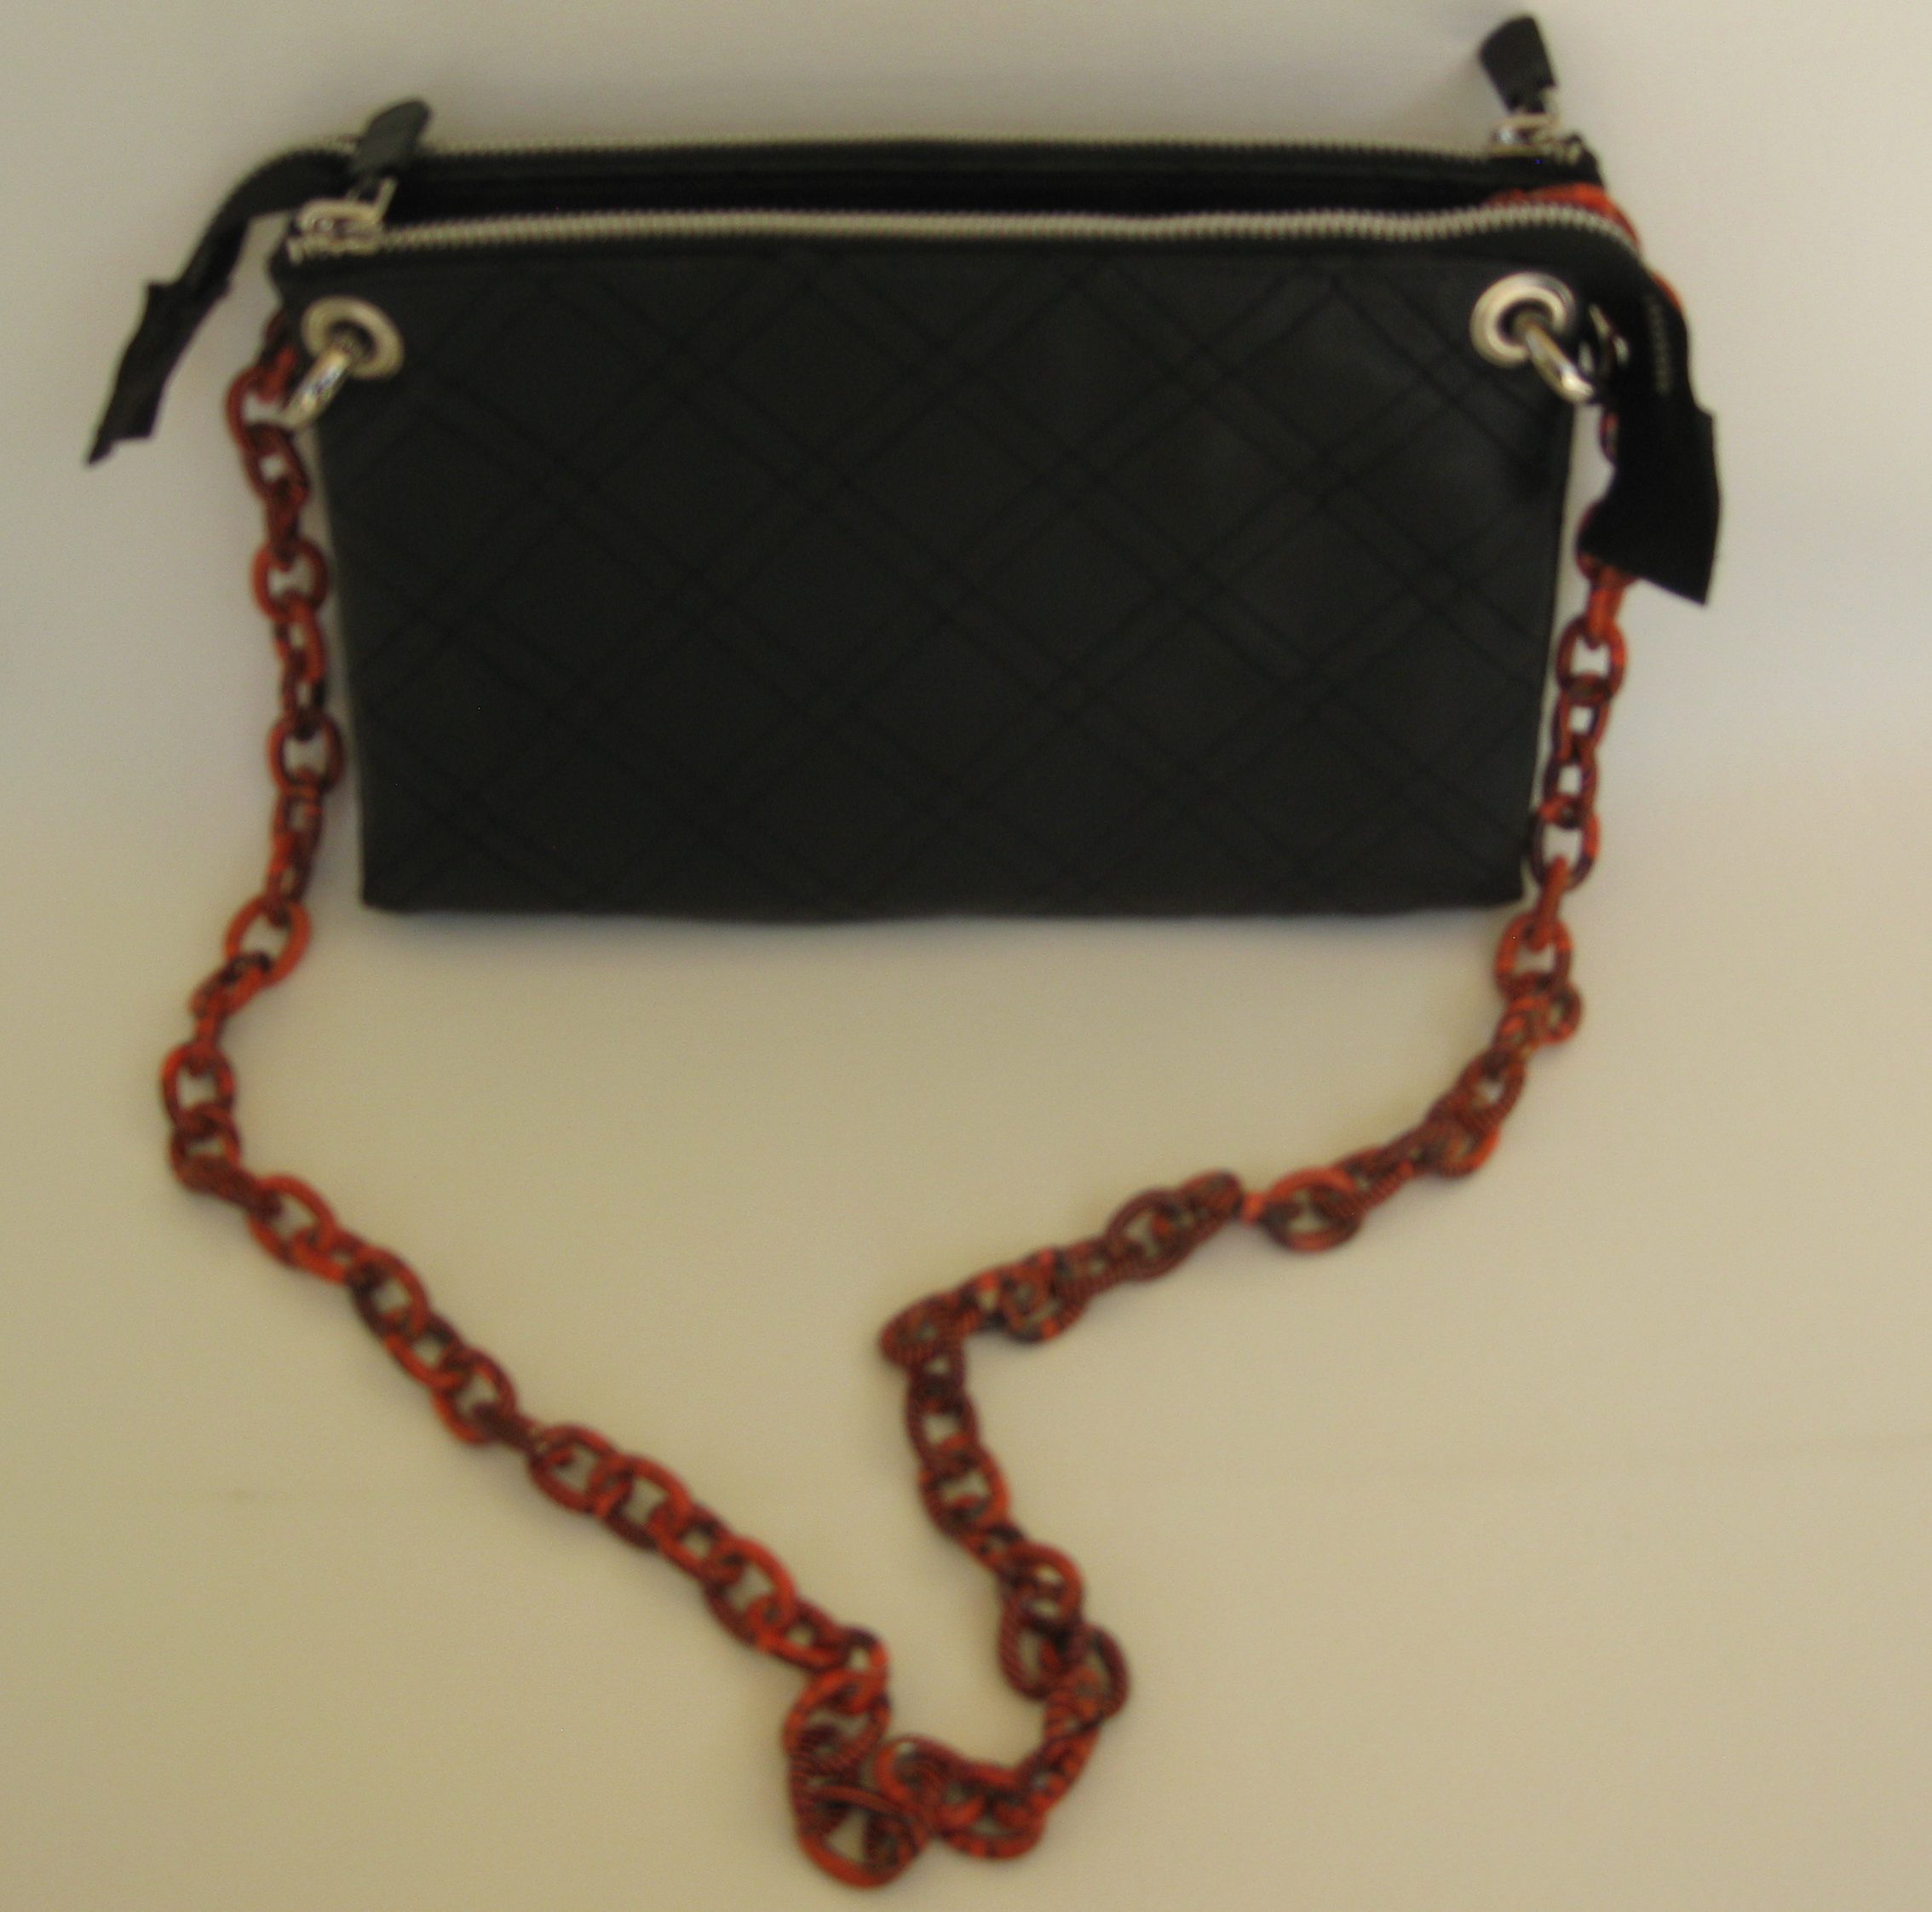
A little black dress with tiger print insets to celebrate an East Coast University graduation.Rather than a black patent pump, I used the same fabric to cover these shoes.To tie it all together, I put together this little bag of black quilted vinyl double zip openings and a tiger printed chain. Spring rings on either end of the bag allow me to change the chain to silver colored metal.
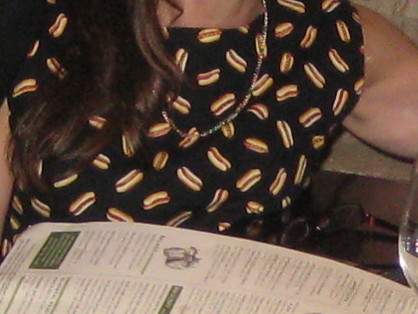
Look close – the pattern on this is hotdogs! We have an inside family joke of sorts with the Graduate sooo I made this little dress to wear to dinner.
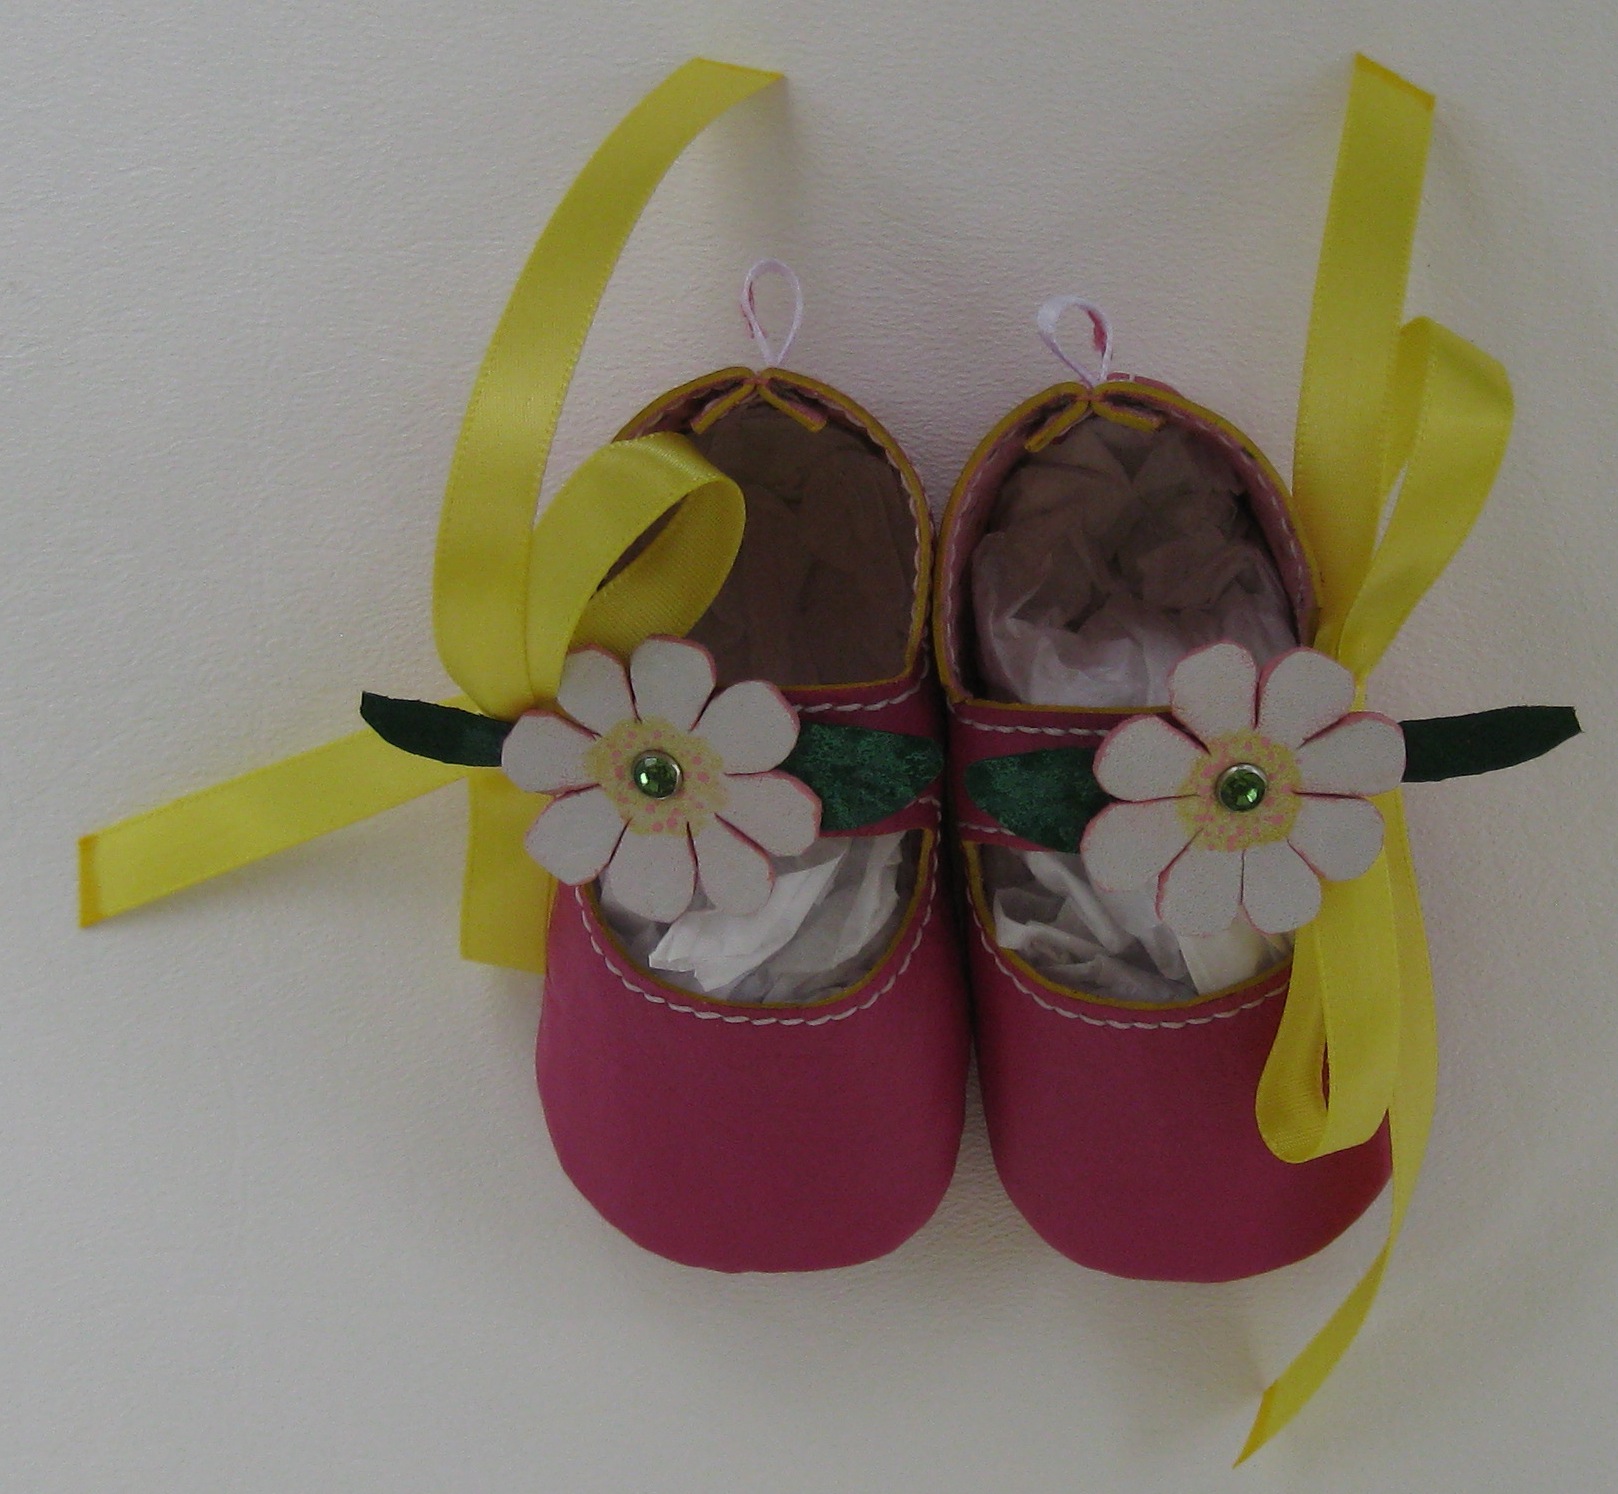
Congratulations to a friend of mine and his wife on the birth of their daughter this fall. I wanted to do something special since Jayme has been so supportive of me and my quest with this little hobby of mine…
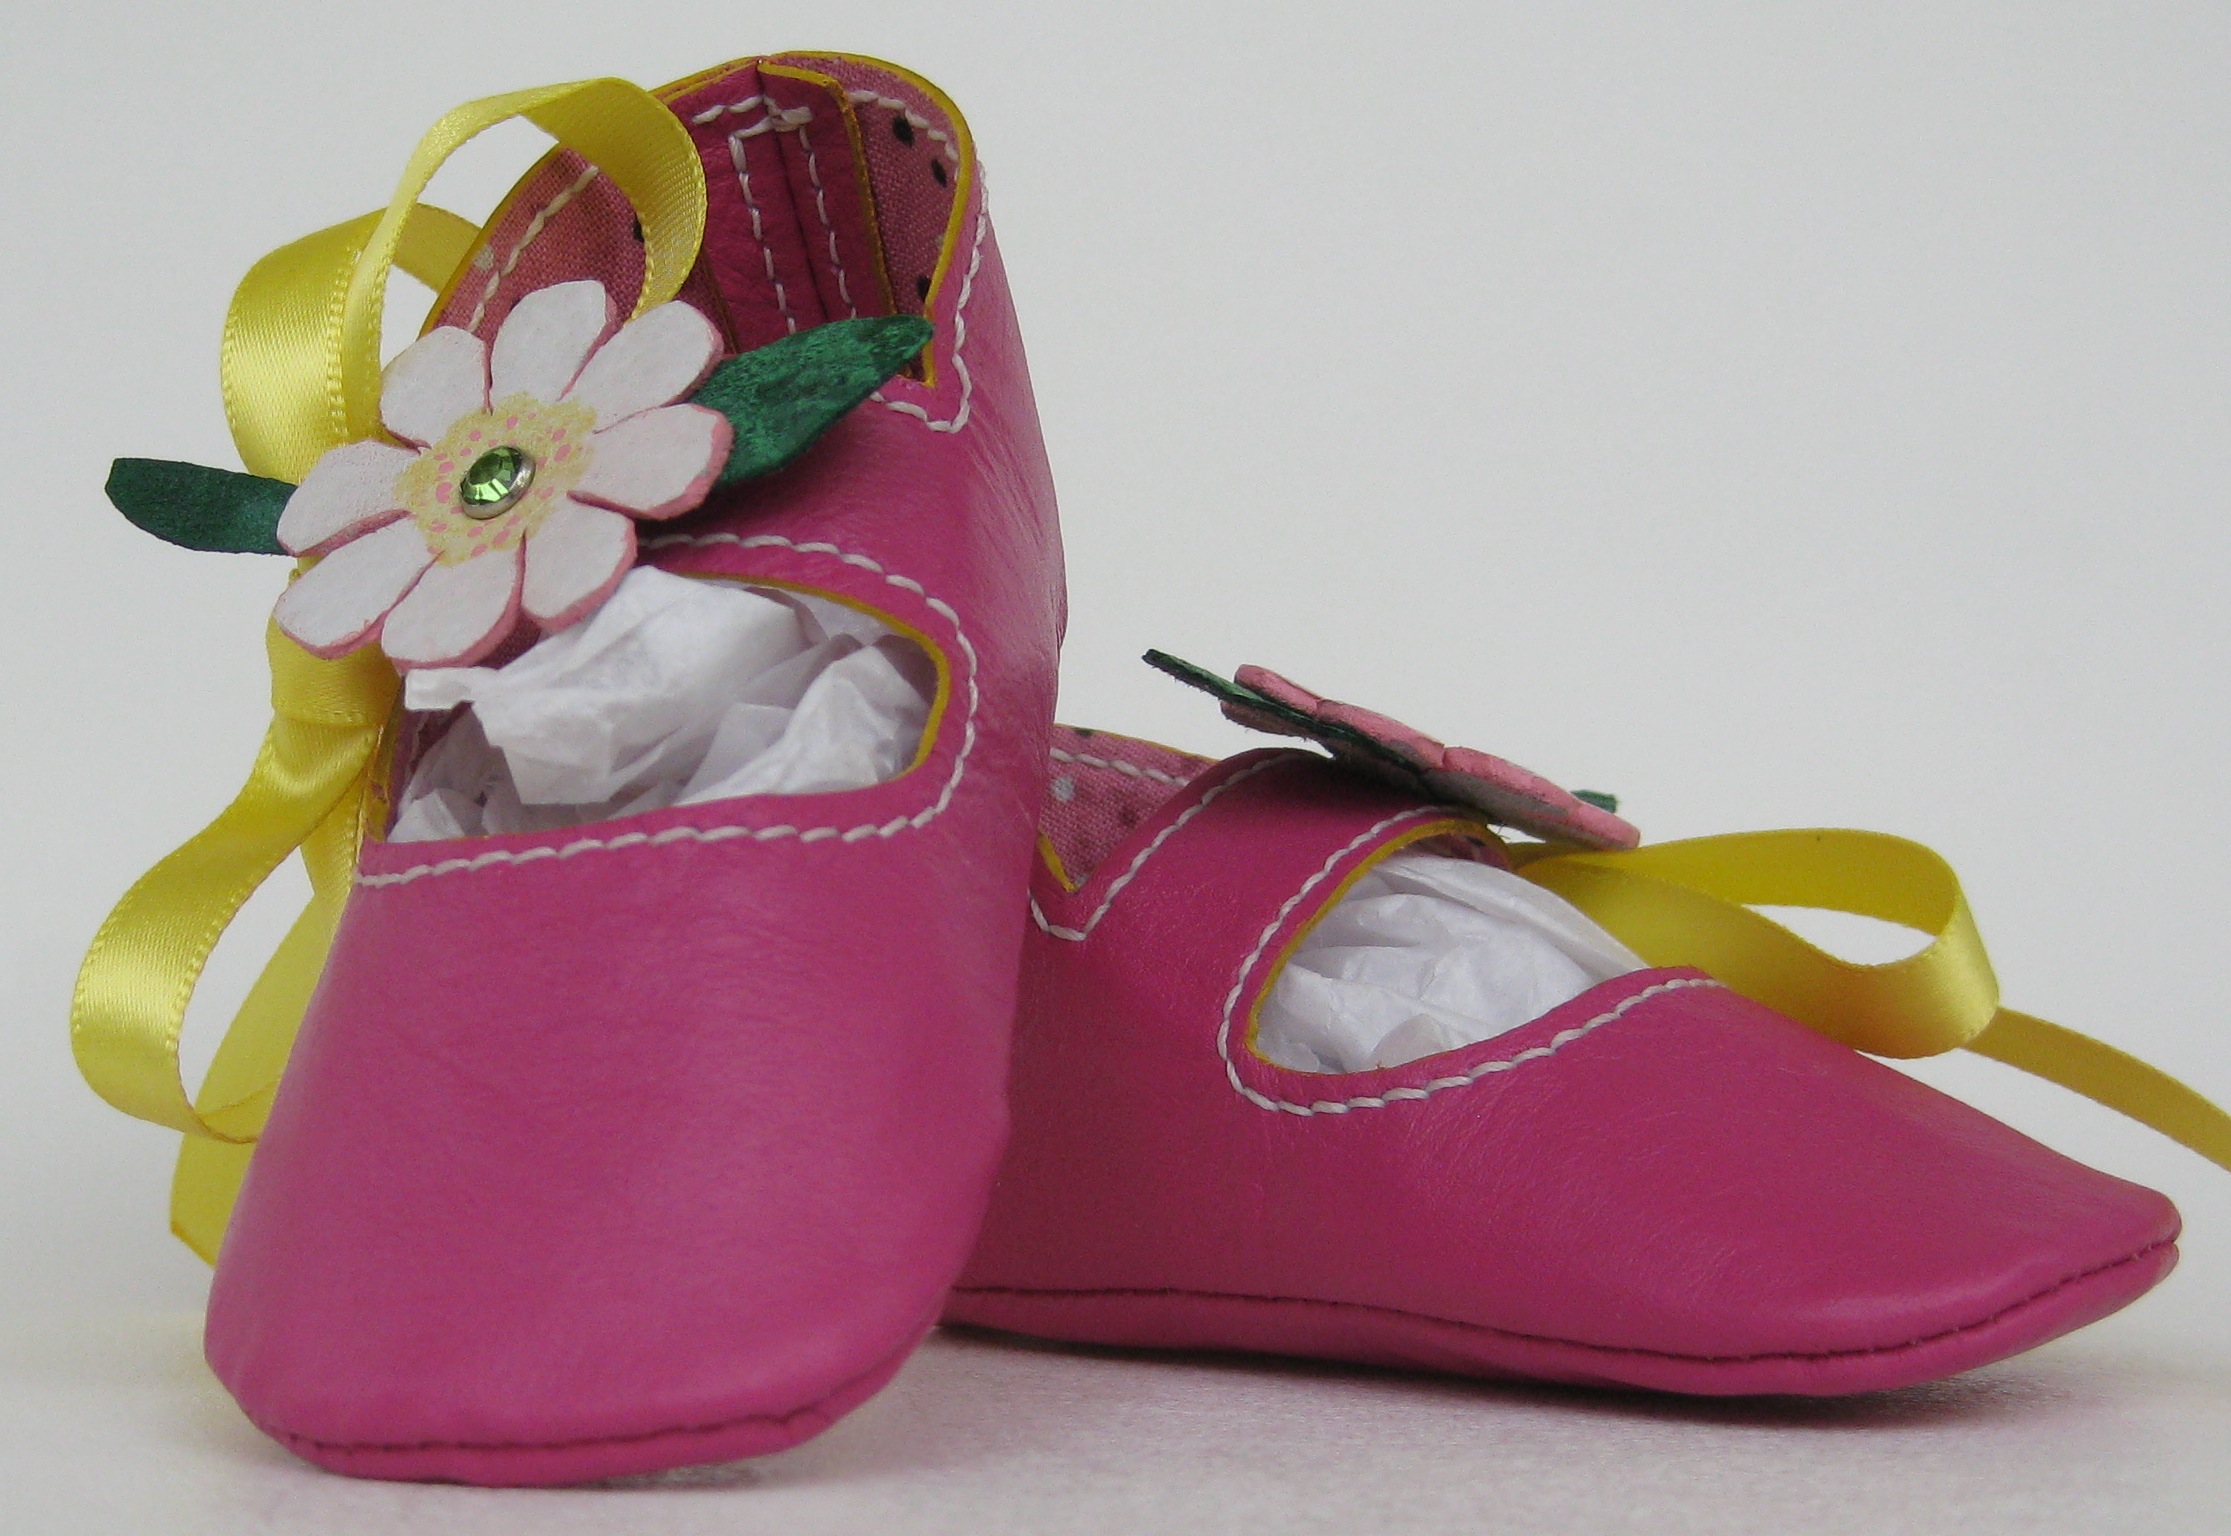
Top view. Each shoe is hand stitched and alledges finished with leather edge paint. In the center of the little hand-cut flowers I used a peridot (green) colored stone rivet.These Mary Jane styled shoes have tie closures and are lined with a cotton blend polka dot fabric.For add a more finished look, I top stitched along either side of the back stitches. Each of the little tags has a hand stitched “S” for Spadoni. The yellow ends on the ribbon are leather edge paint to prevent the ribbon from fraying. Now if I can only find the right box.
Thank you again, Tim for helping me with my site/blog.
A review of my theme bags revealed I needed to up my game in handle making. One designer has a video on the Internet of a worker making beautiful shaped handles. Seriously! Look…
Theirs – a thing of beauty!Mine – they look alright, but I want better!
I searched my favorite leather forum and see Al Stohlman’s books are referenced – a TON! So I picked up his volume two “The Art Of Making Leather Cases” because there are a bunch of handle patterns and tips. It is totally worth the 16 or 20 bucks! Plus half a hide of veg tan…
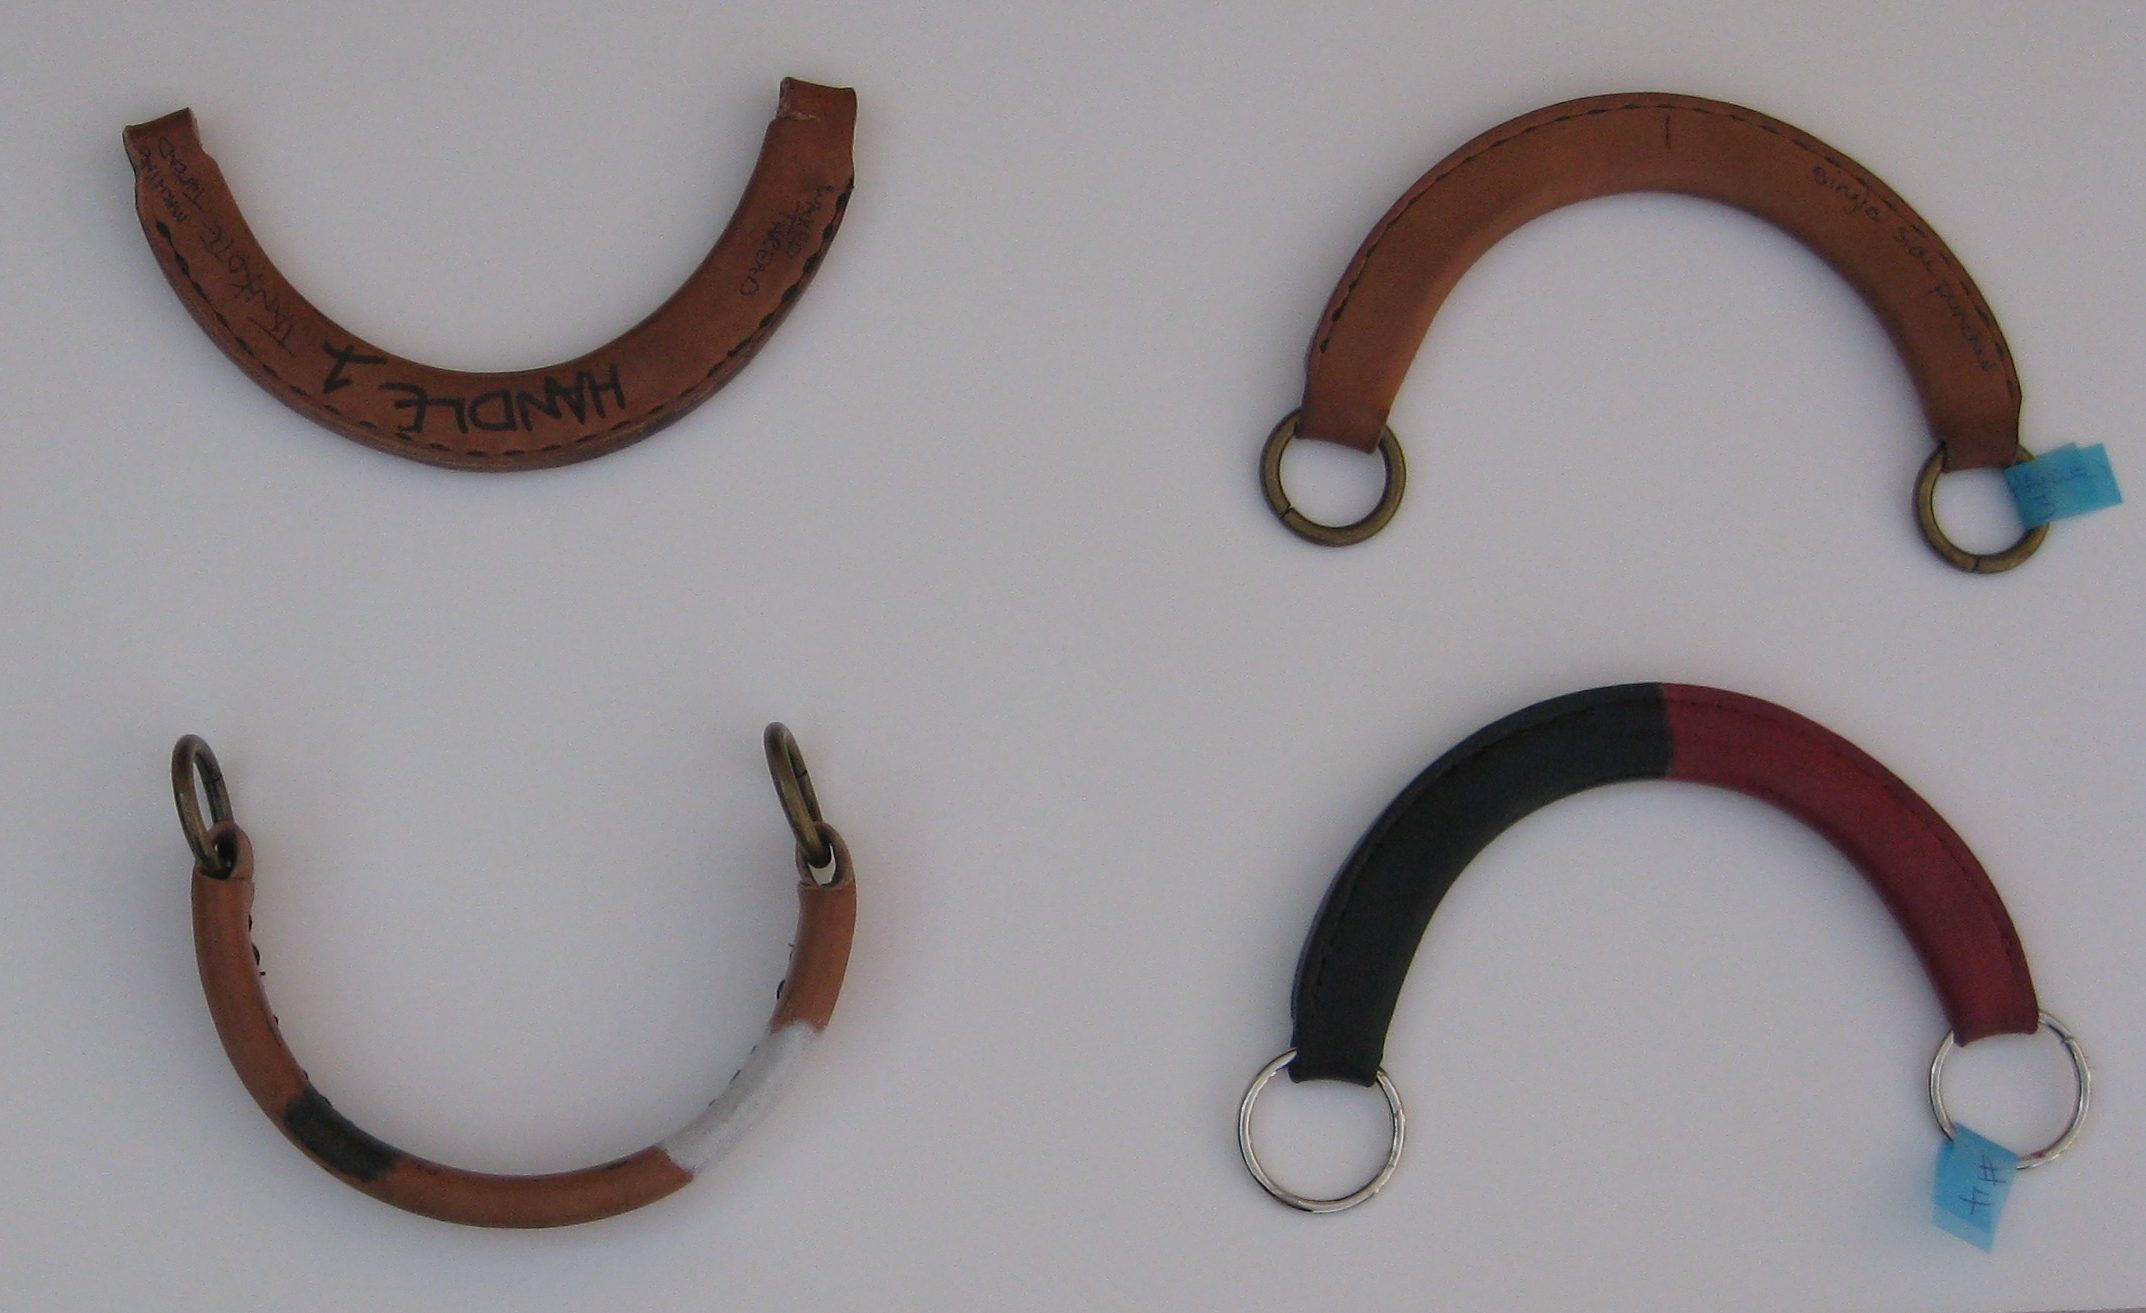
The first four…
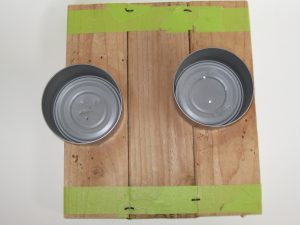
Actually I began the process in October of 2015! Yes, over a year ago and these were the first four. Because I do not have wood-working equipment (or skills) to make a forming block, I made a basic little unit by horseshoe nailing three 12″ sections of a 2″x4″ together and attaching cans to it.
This is my original forming block. A crude little beast on which I began my wet formed handles.
Frustrated and dissatisfied with my results – I got the most encouraging words of all from Alan & Jayne at Shoe School when I said I can’t make those beautiful handles like they do over at “designer house X” Alan challenged me “Why not?” He went on to say that handles are probably the only thing the guy in the video does. Everyday. It is likely he cannot create a bag from concept to final product.
I was inspired; my talent and accomplishments in my little handbag hobby were evident. Like all things – “practice, practice, practice” (thanks for that Mr. Nick! – an art instructor-friend).
The pattern needed changing – I wanted to rid the end rings (for this particular style) and I ordered a rainbow of colored edge paints and channel pliers from Springfield Leather. Once I figure this out…the possibilities may be endless.
I set out to work and as with each of my projects, I took copious notes on sizes, shapes, bonding techniques, stitching holes, thread and needle choices, and more. I created another five handles on my original forming block (the 2″ x 4″ pieces horseshoe nailed together).
With the fifth, I was that much closer to the final version – the problem? The channels created by putting the 2″ x 4″ pieces together left ridges in the handle.
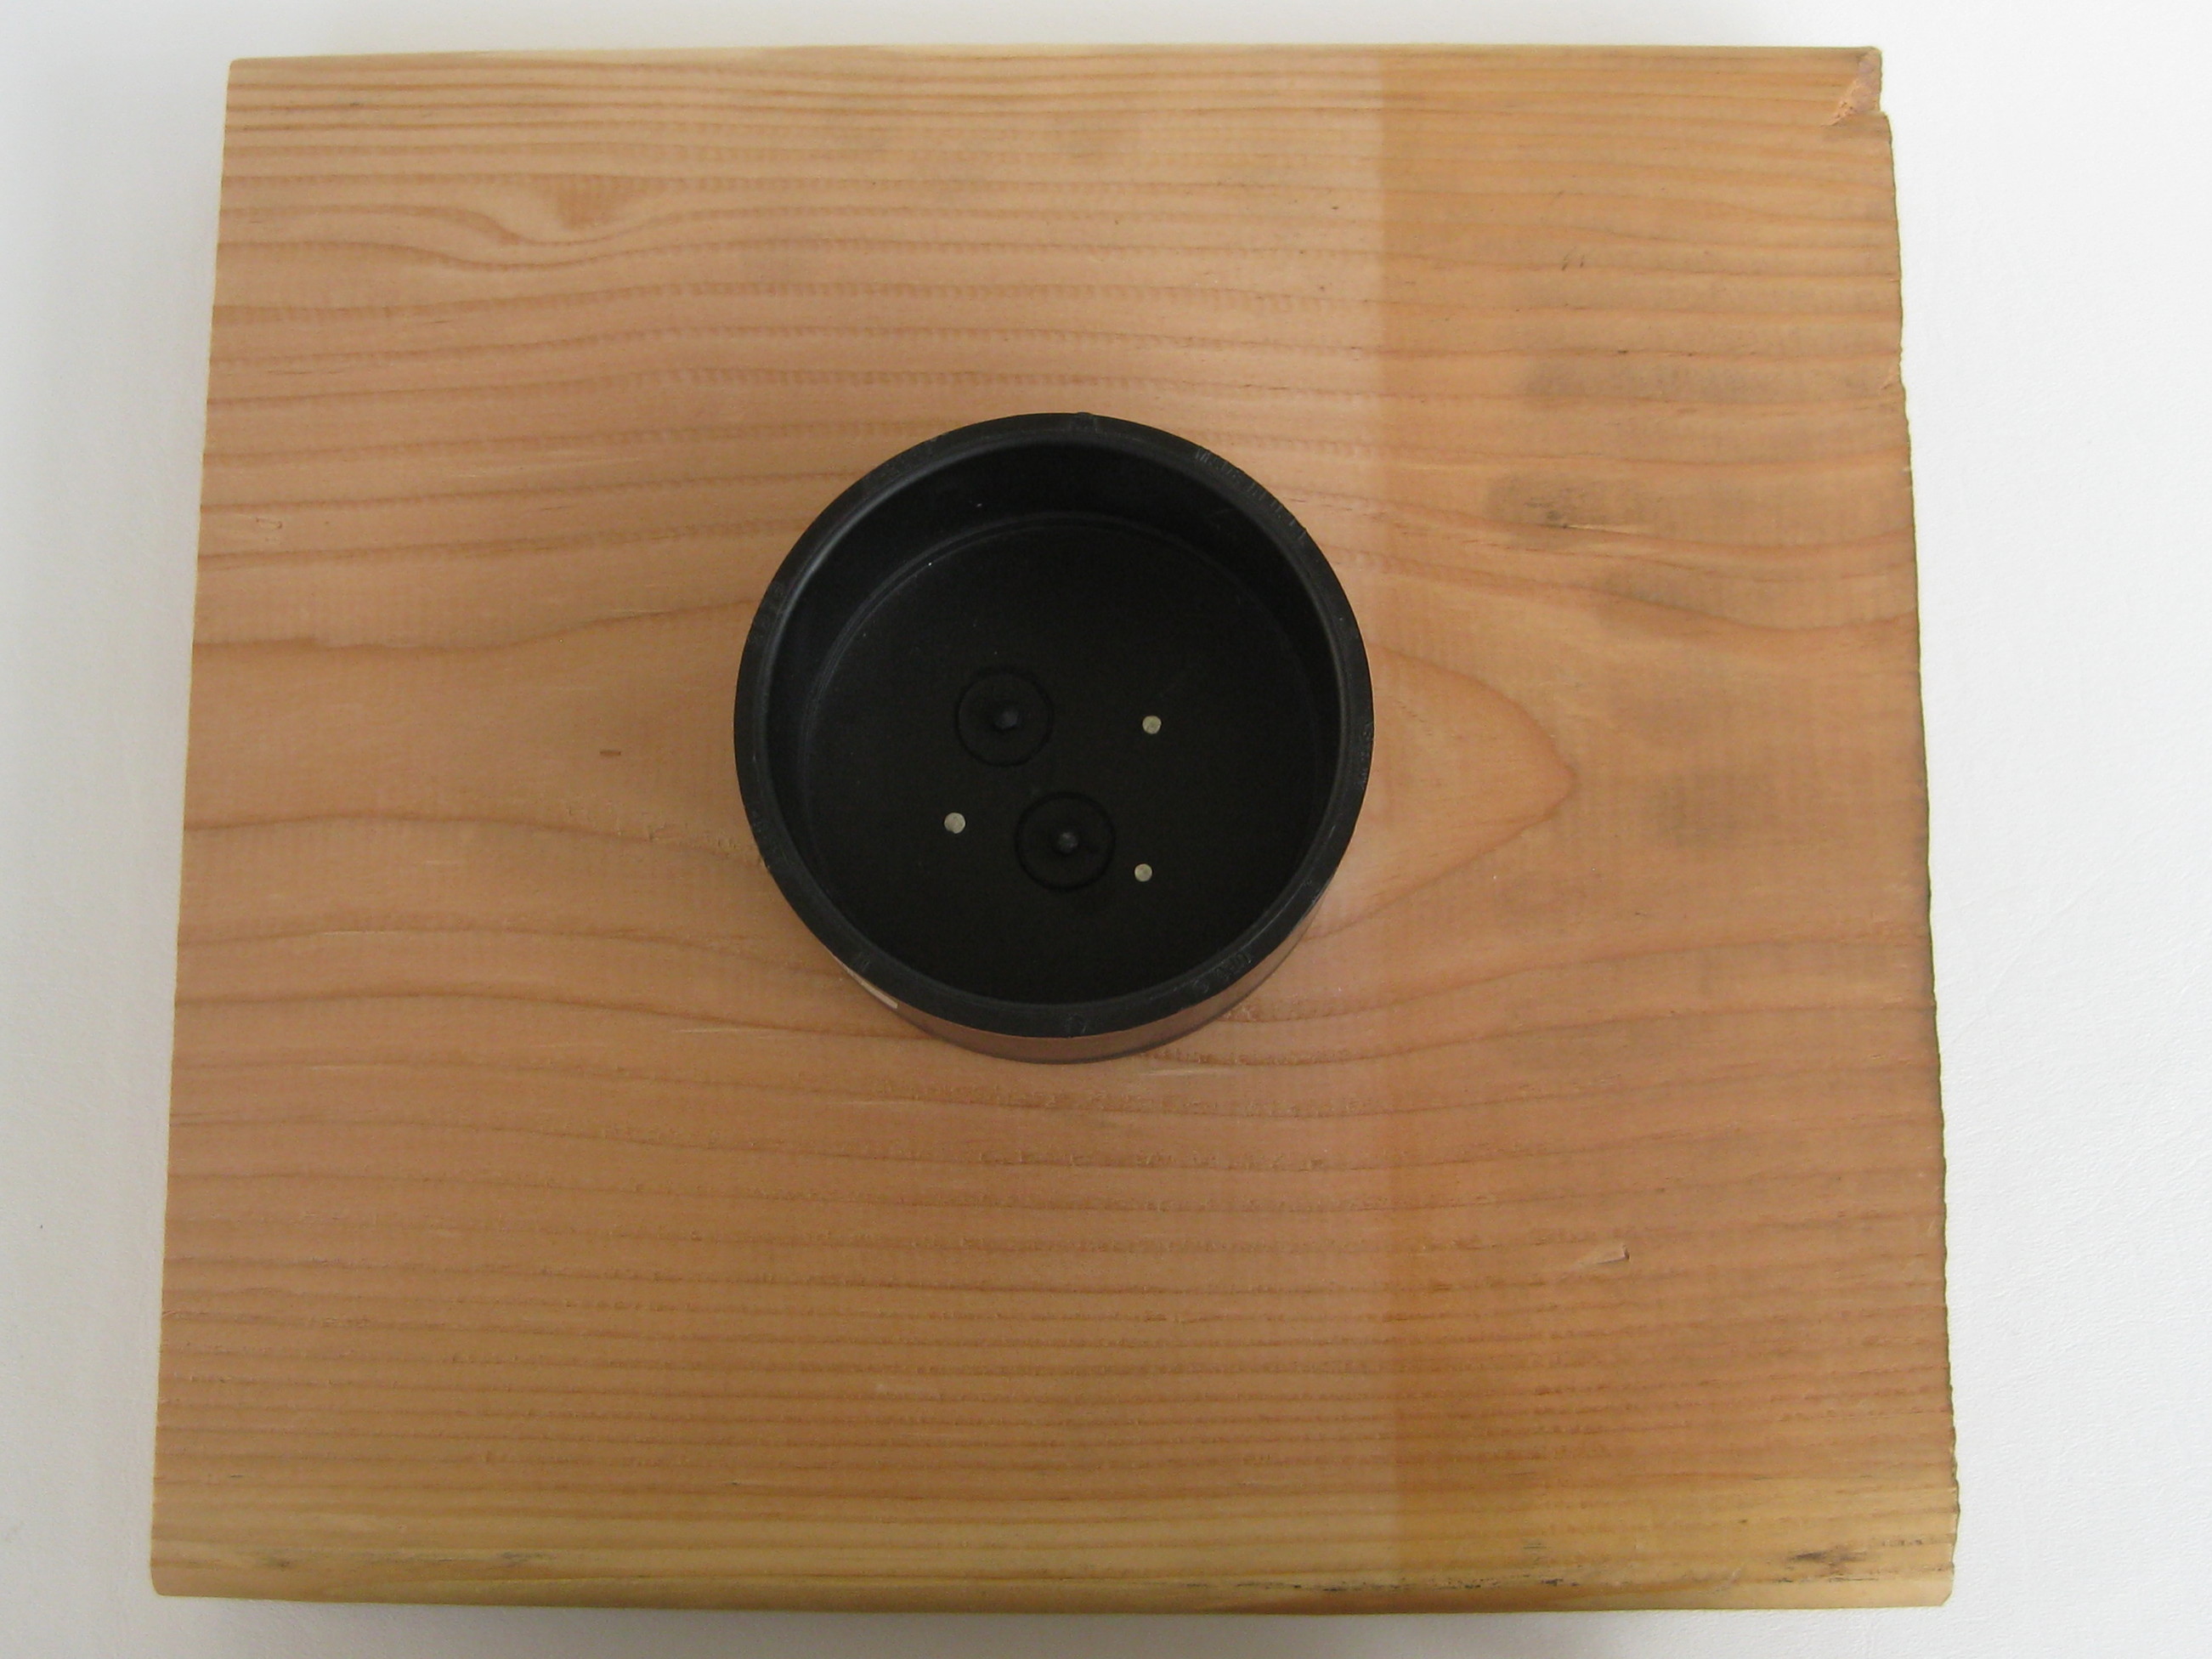
Along the top edge you can see the ridges set into the leather as it dried on the 2″ x 4″ pieces. A shout out to Alan & Eddie at Channel City Lumbar (Ha!! I sooo did not plan that – channels and Channel!) Let’s just say I certainly got Alan’s attention when I put my forming block on the counter to show hime what I was doing and what changes I wanted to make 🙂
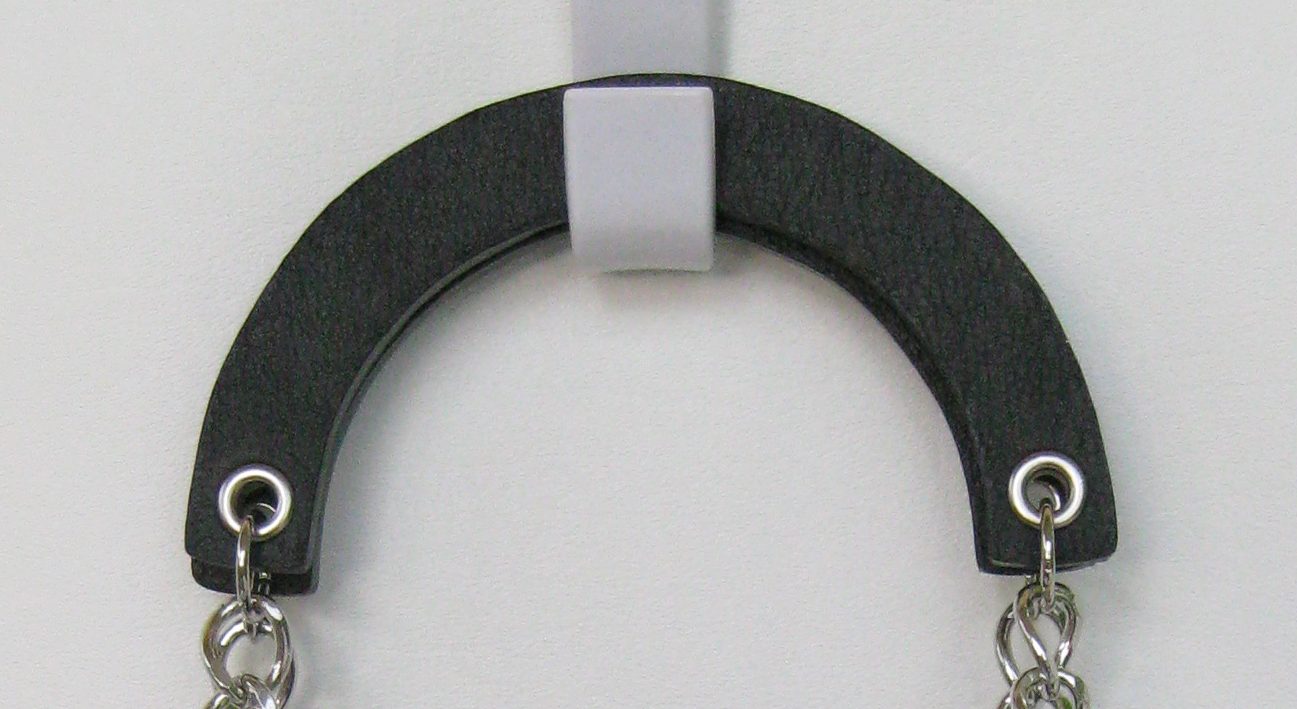
This is what we came up with for my new forming block.
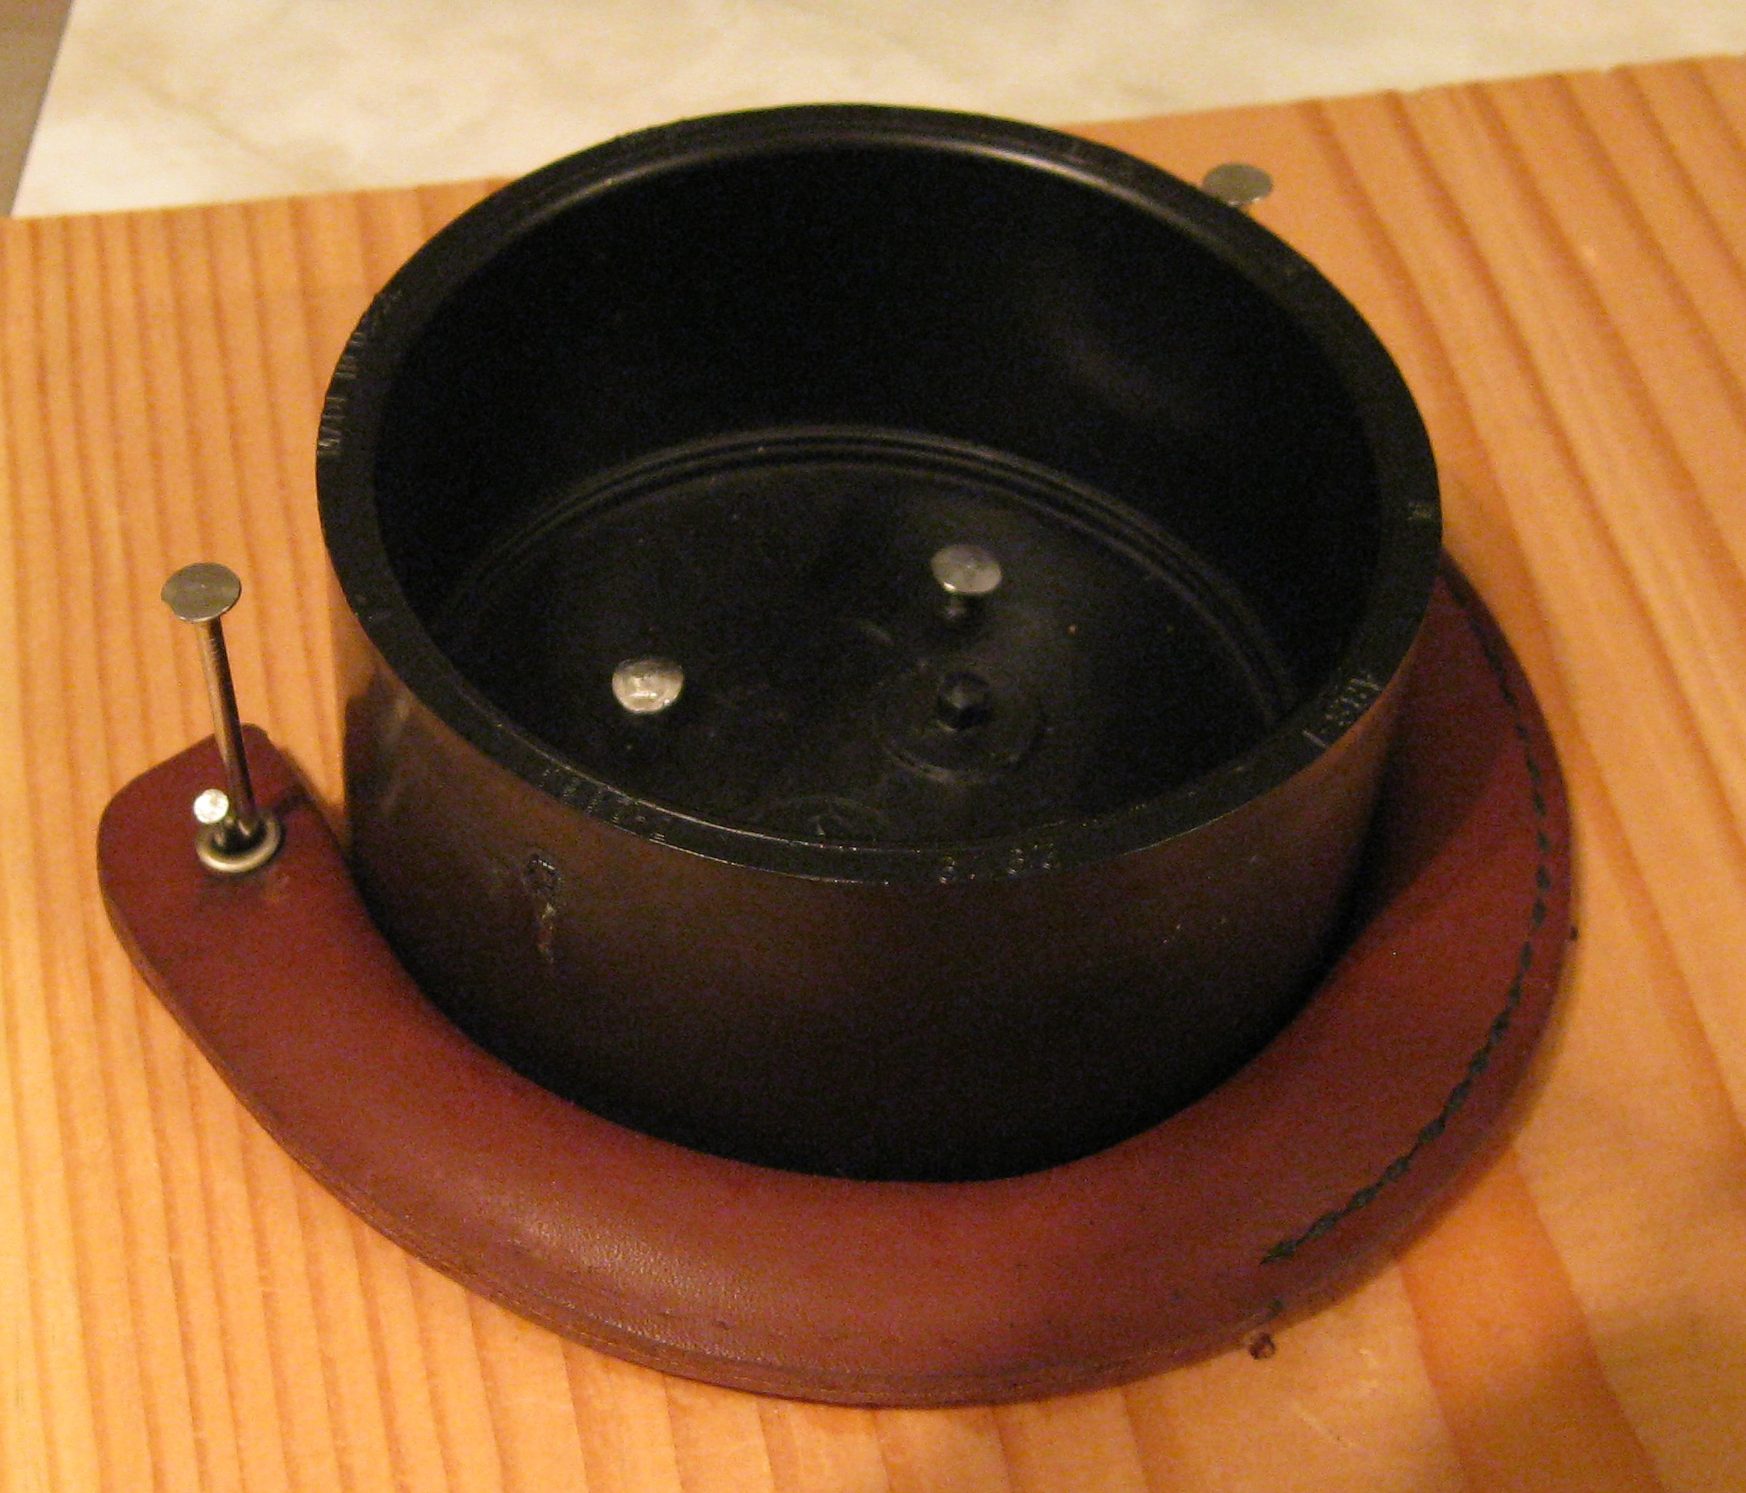
So here is version number six being set on the new forming block.
There are many details about what you see here; I won’t bore you with them though.
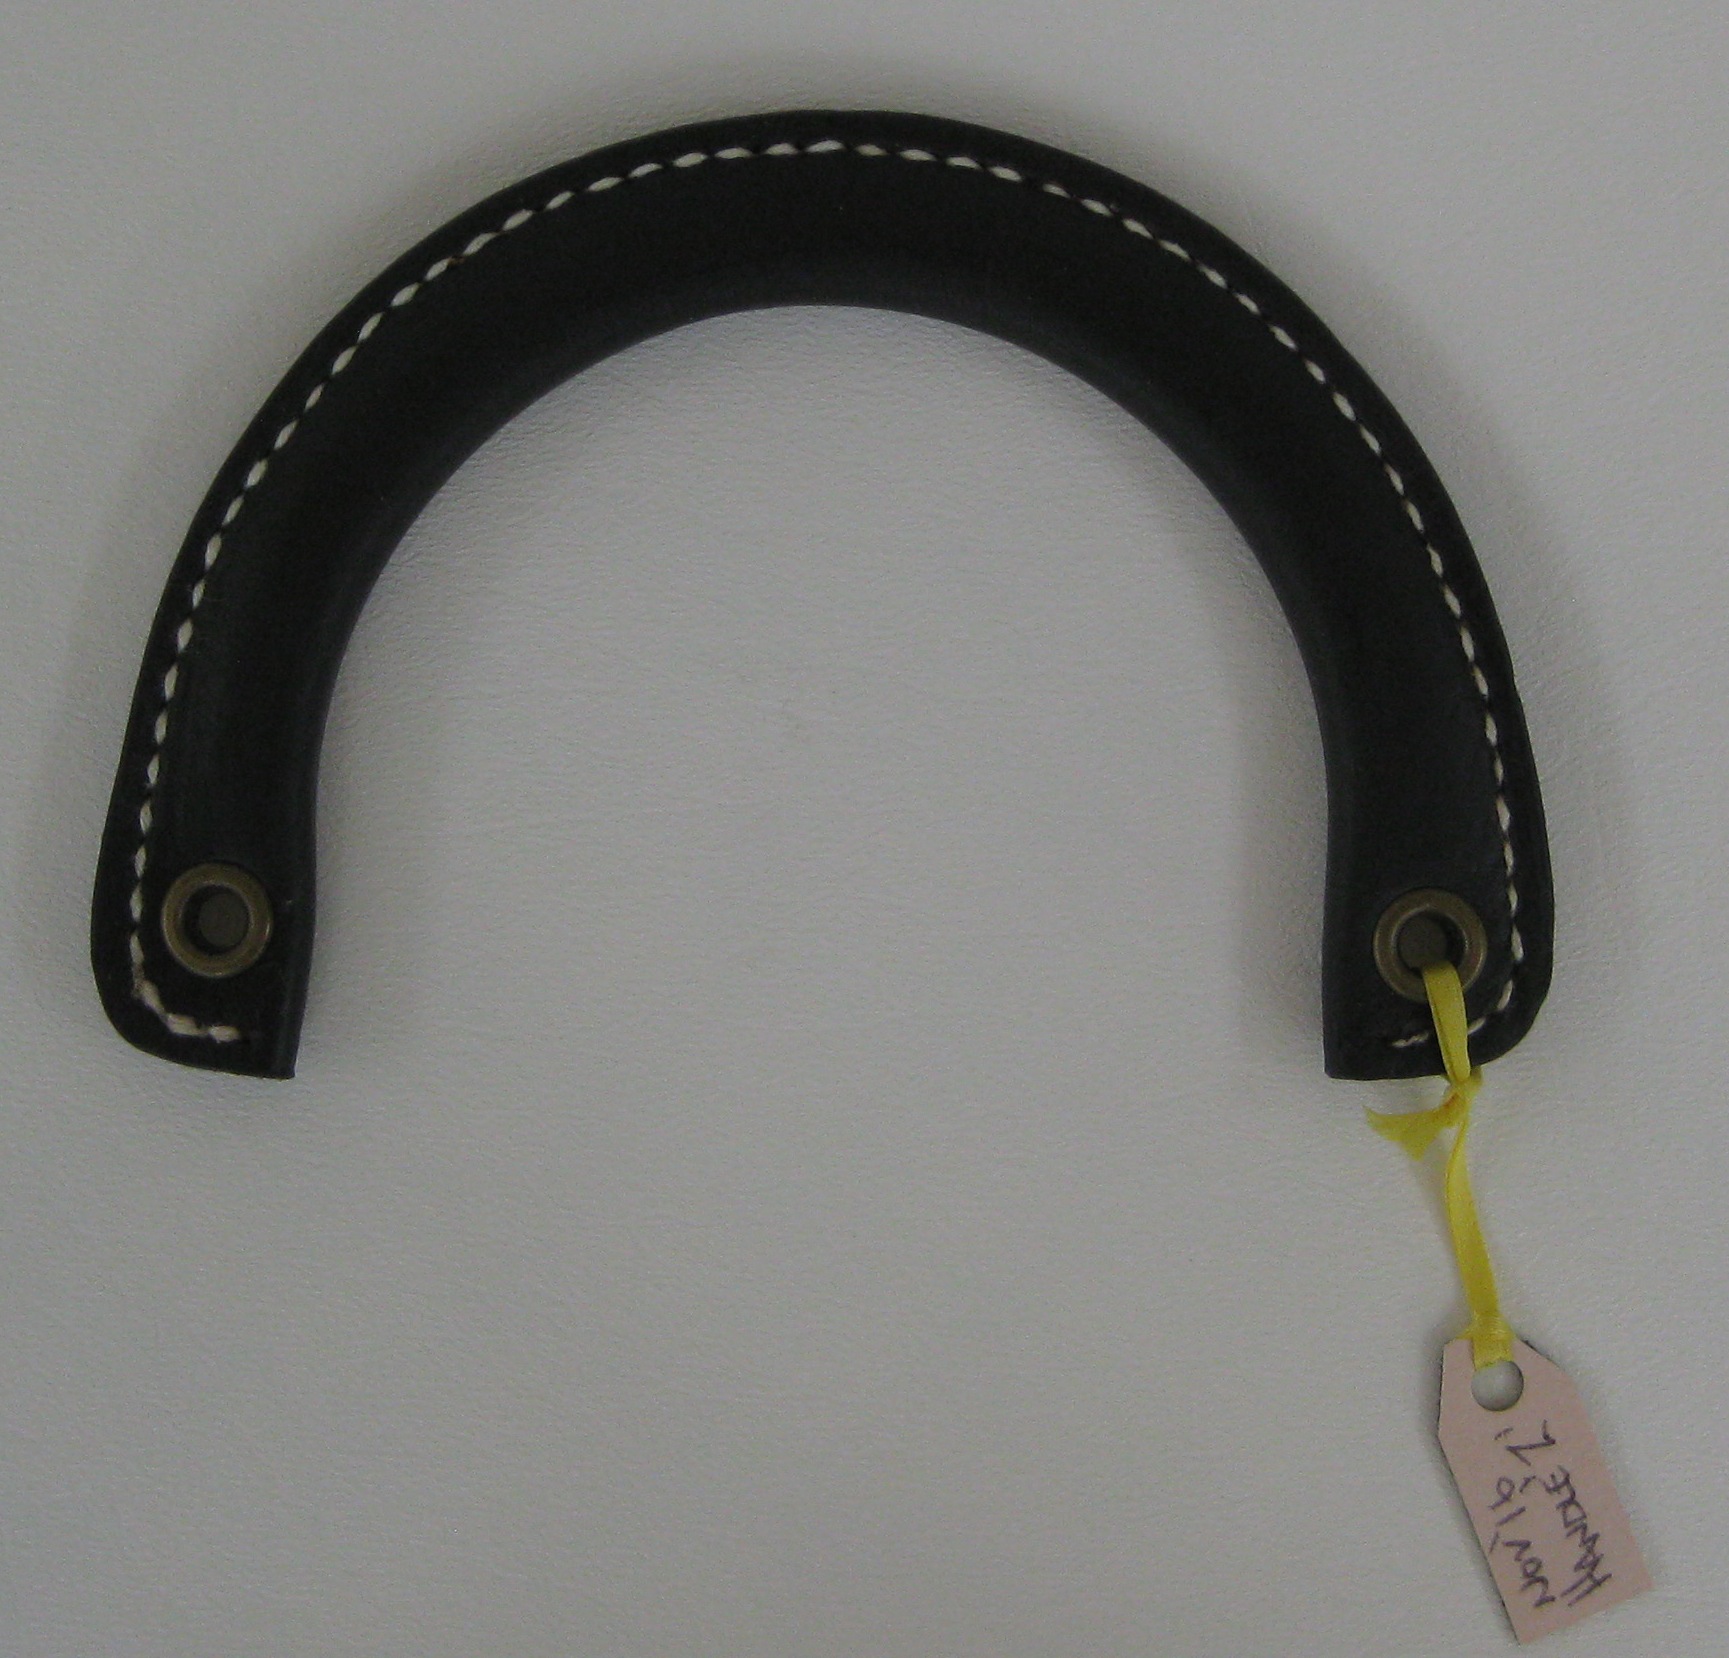
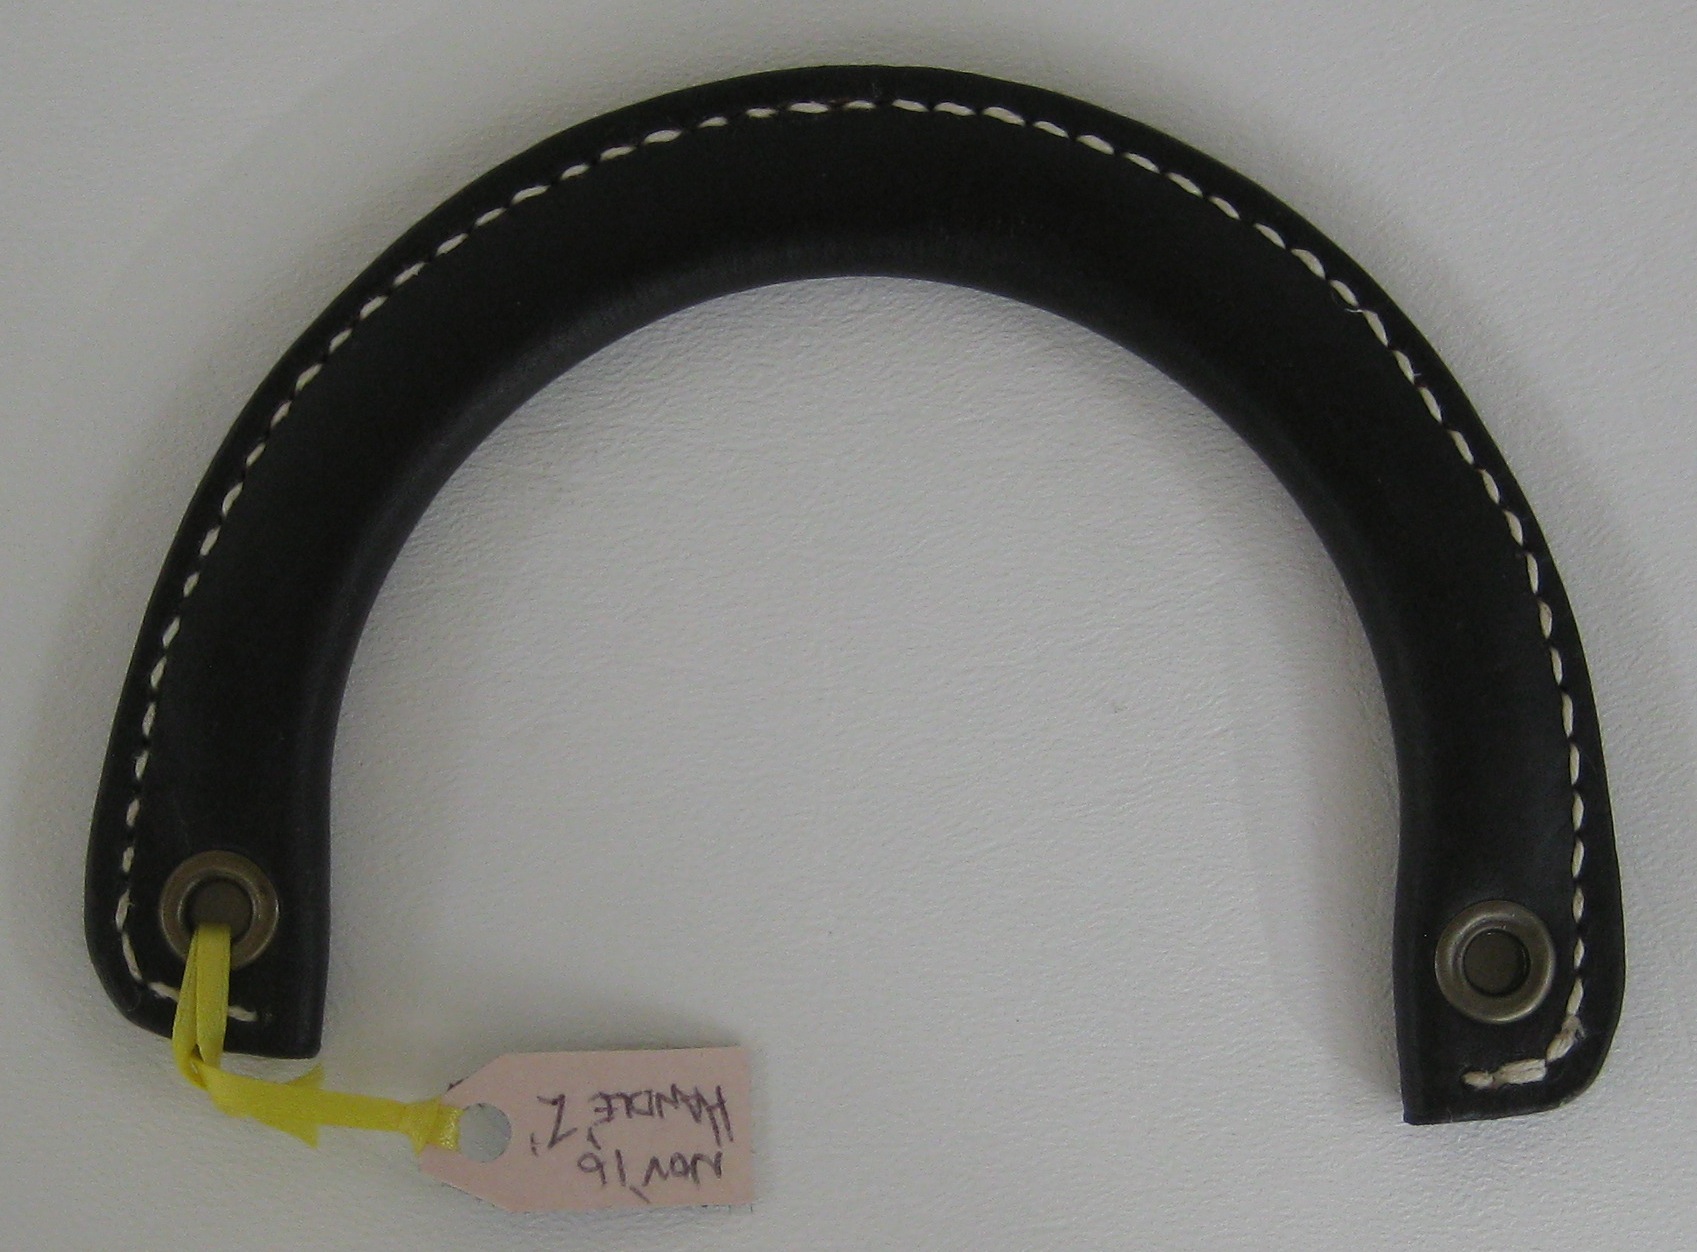
This is it! The finished handle.
If it looks like the stitches do not match, they don’t. I tried two different types of thread (linen which I hand waxed and a heavier machine thread). Before stitching, I applied multiple coats of colored leather edge paint, a clear finish and a final buffing with a bone folder.
The front and back are the same.
Next I need to find eyelets that will fit the depth of the holes – up to this point, I have been using two for each hole.
So after one or two more tests on the new forming block, I think I will be ready to go.
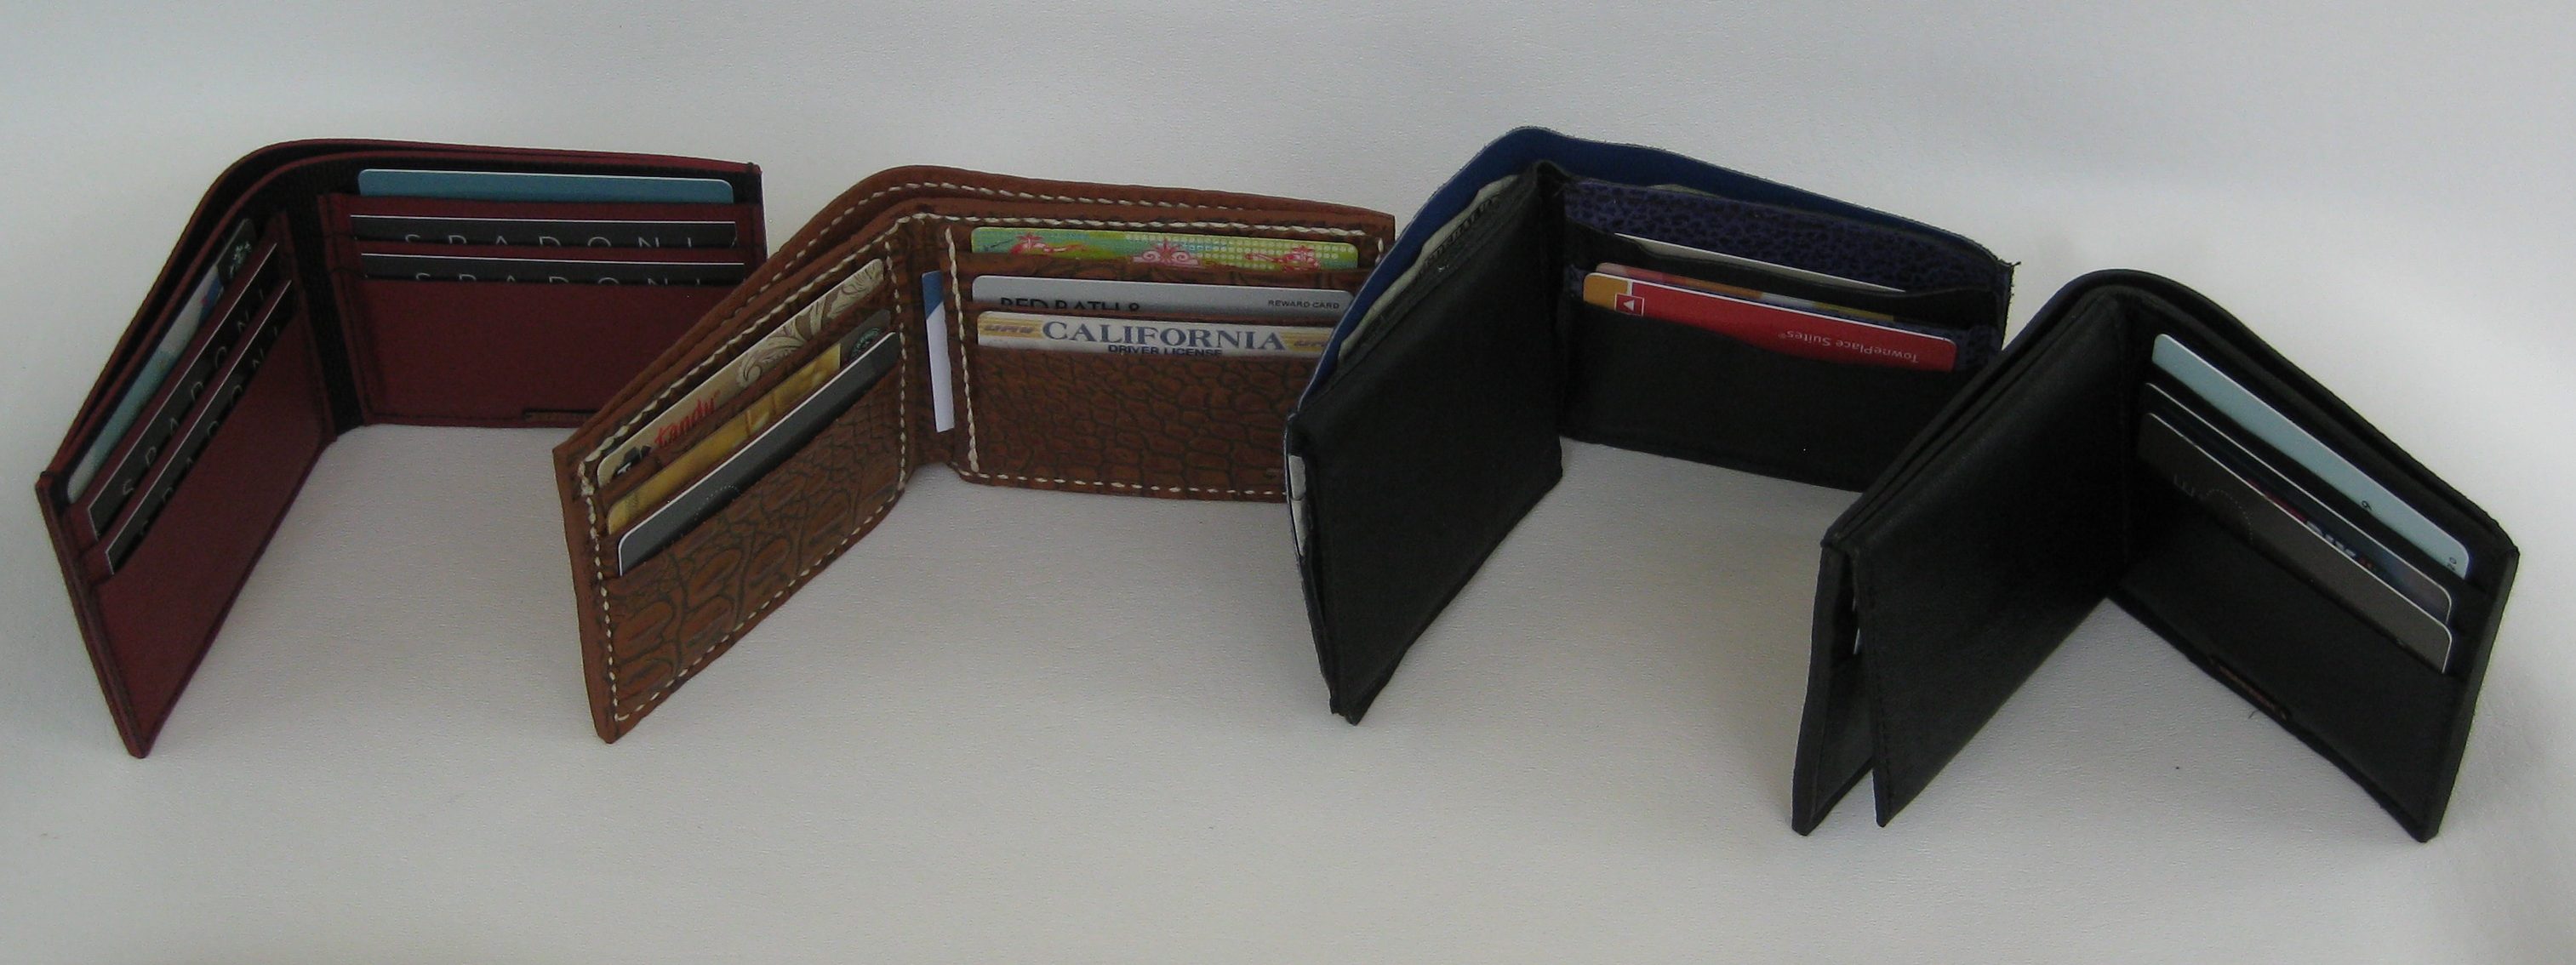
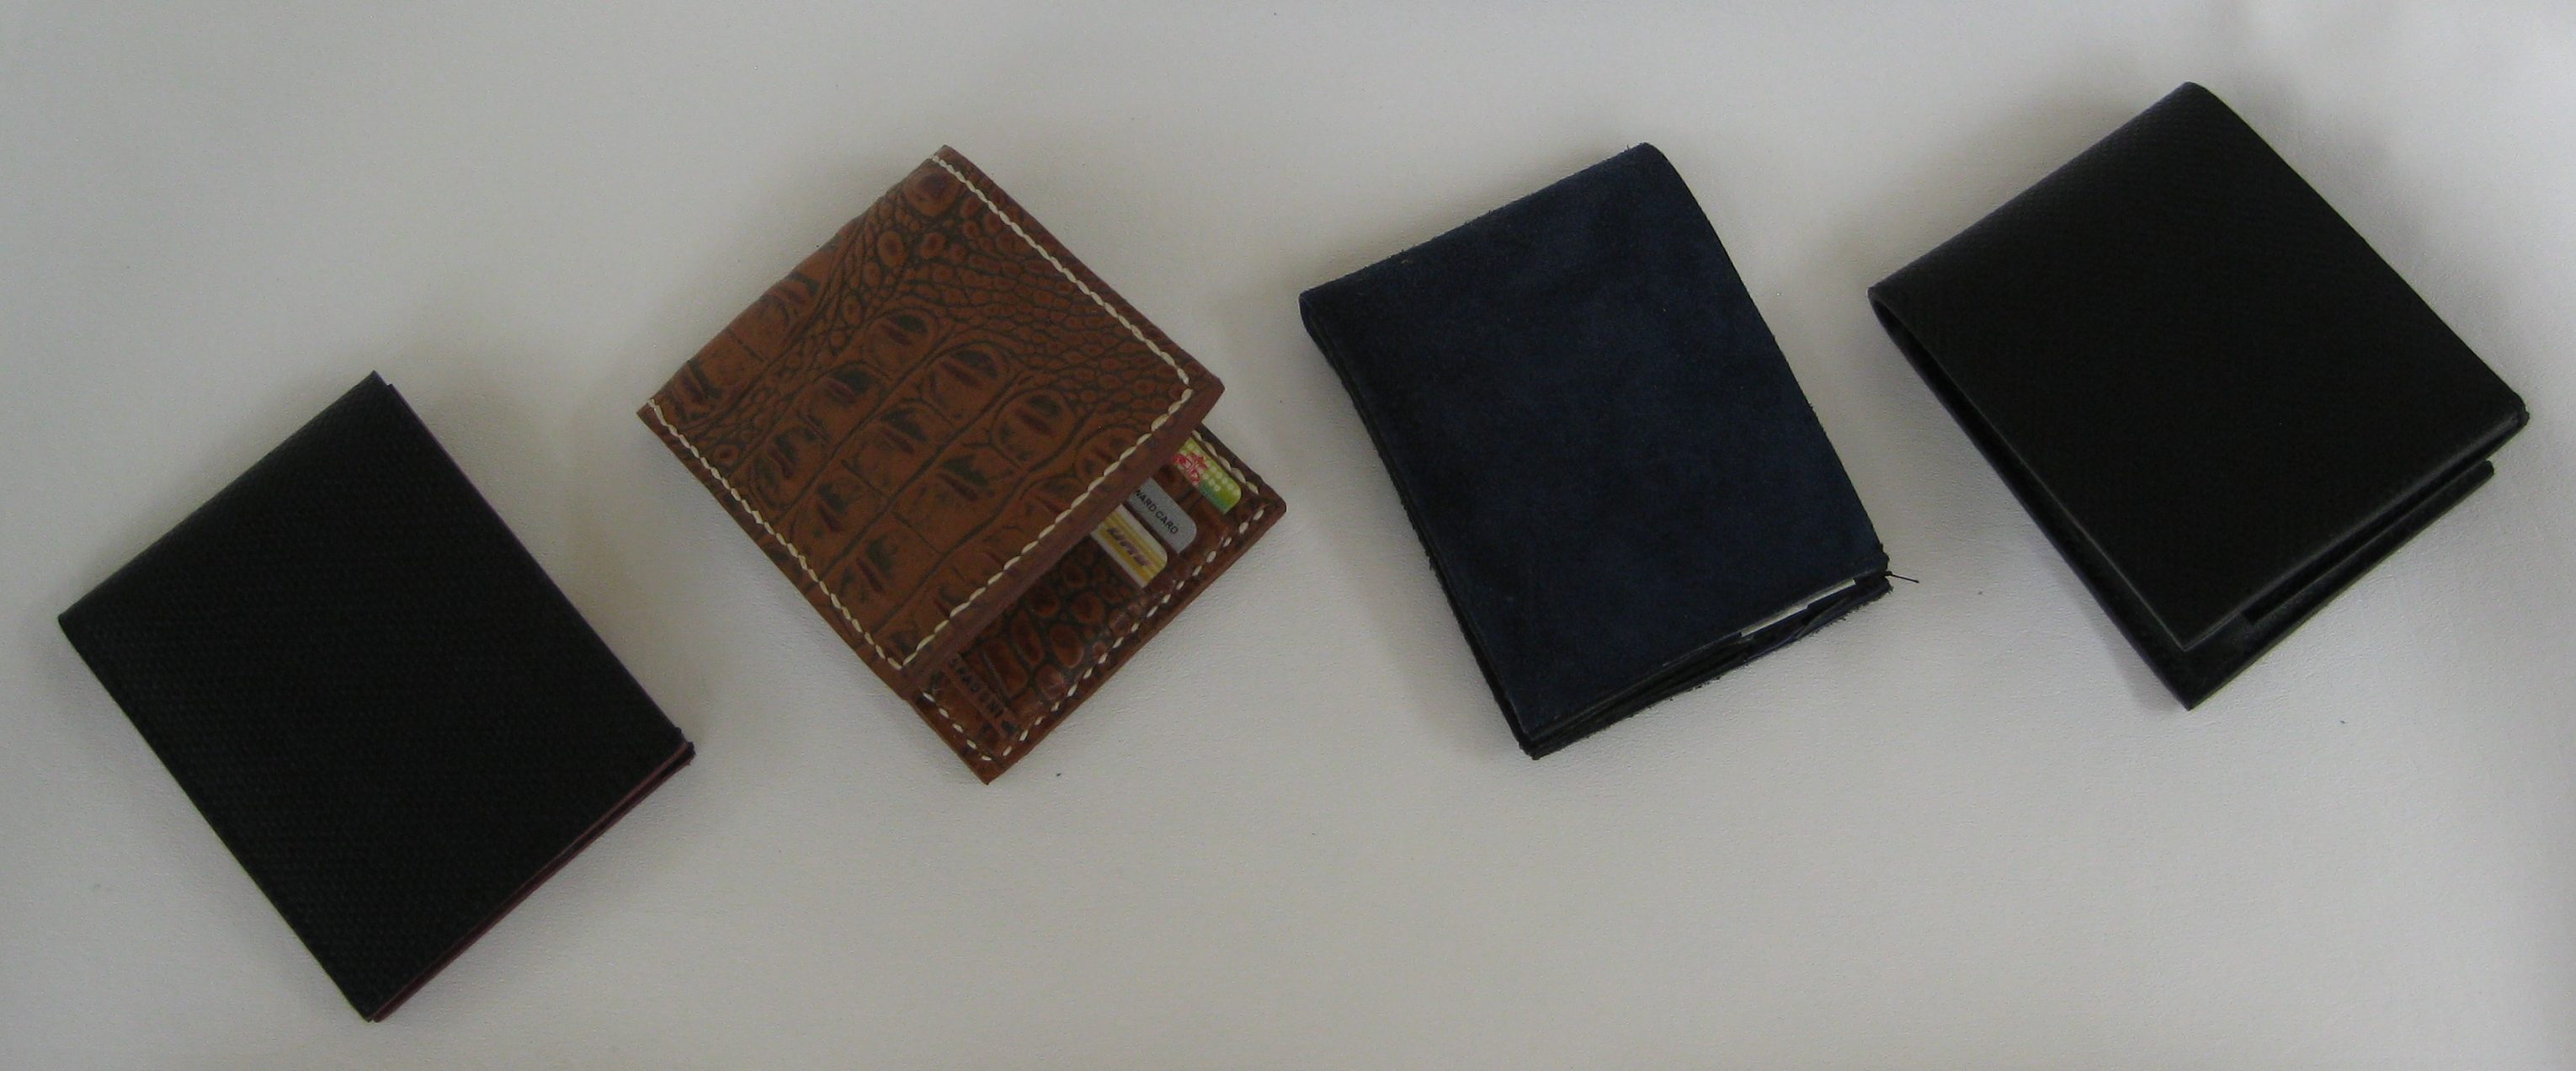
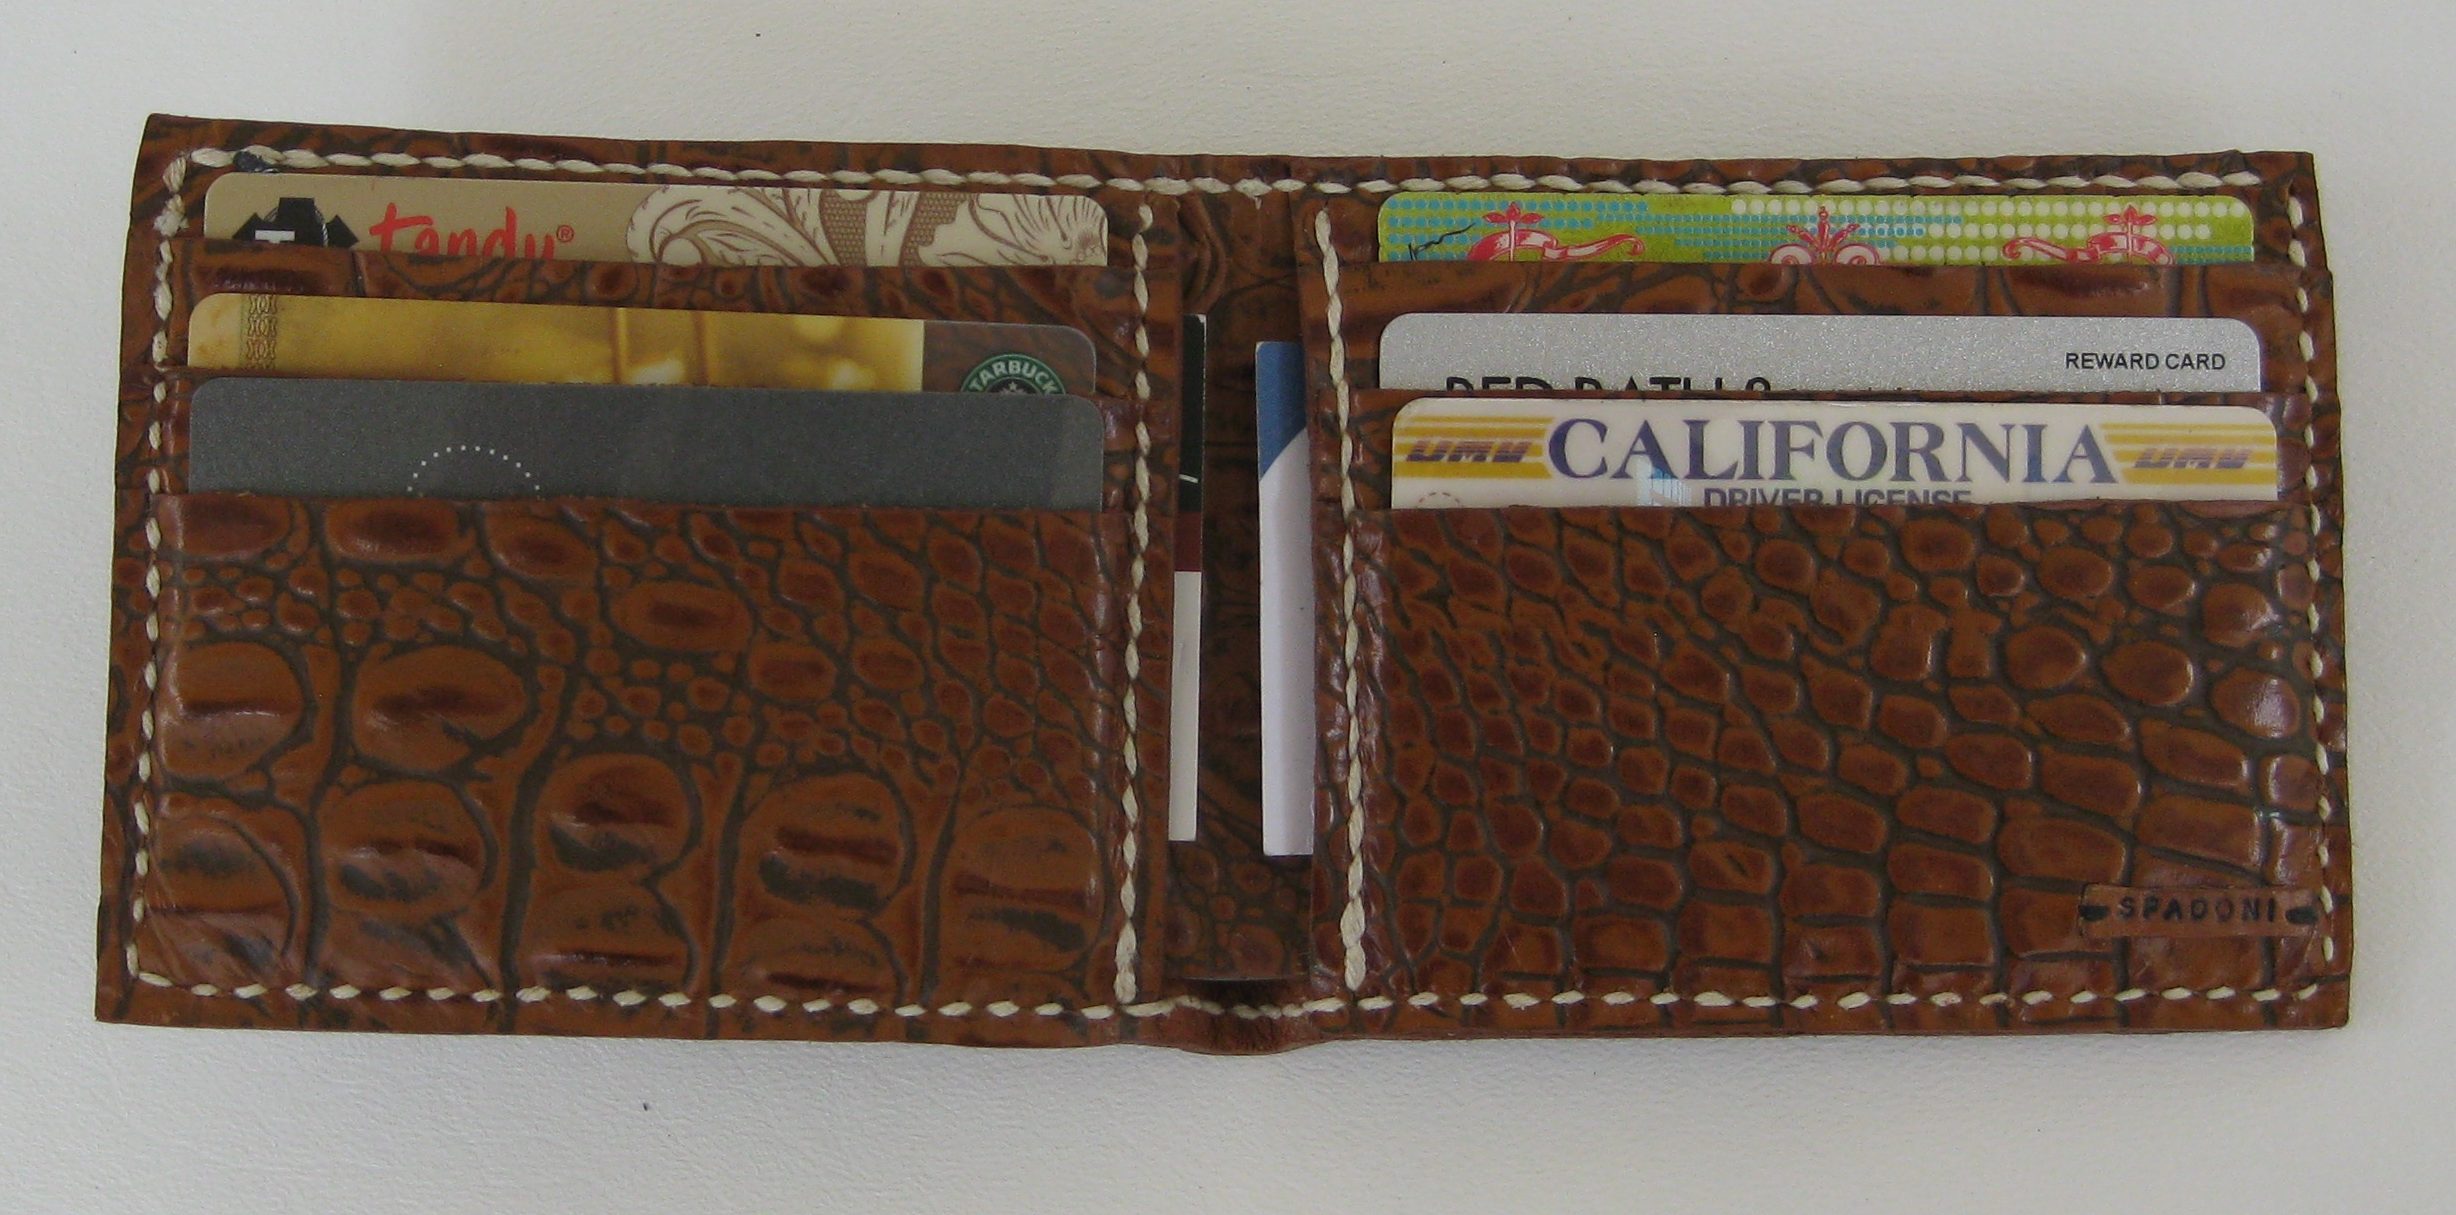
I am burned out on wallets for now but here is a series of their evolution. The most basic leather with six pockets to hand stitched with hidden pockets and the addition of an ID holder. Yup if you look carefully you can see my really crude prototype of the ID holder wallet in blue garment leather suede. 😮
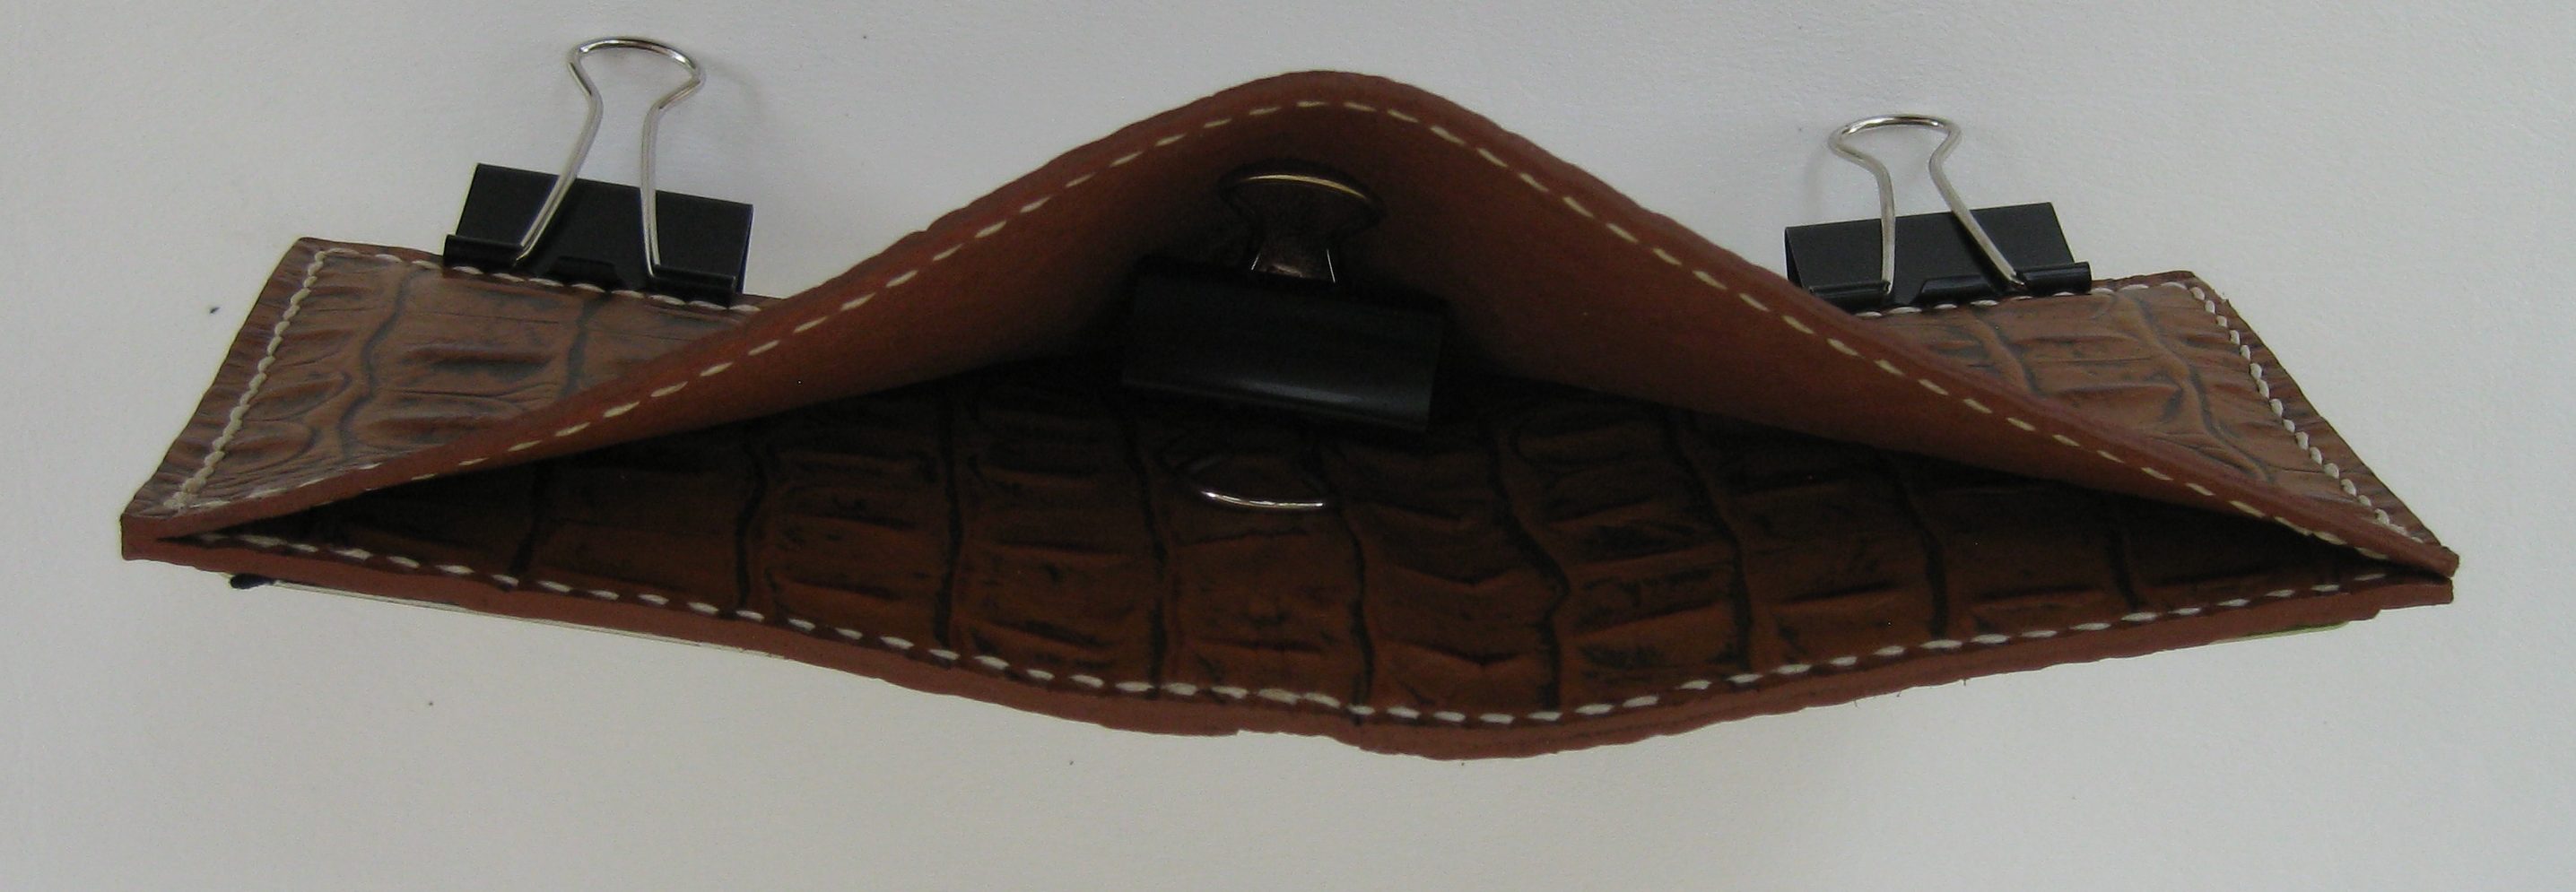
Open sesame!
Love the shade of blue on that crude prototype!
I’m taking a break on wallets for now, so I can do some handles and baby shoes right now.
Hand stitched with linen thread- this was another experiment – I wanted to see how my stitching skills were. I used Stohlman’s book for reference and recommend newbies follow the instructions step by step including don’t set your awl down as you sew with two needles in two hands. Yes! Make or buy a stitching pony.
I changed up the pattern a bit and added two hidden pockets; this was a step I would include in another wallet for a family member.
I also turned the leather for the interior piece in so it is visible when you look in the bill slot – I lined the flesh side of the exterior piece with a piece of coordinating suede.